How to Create a Disk Image in Windows 10
A disk image records the selected partitions in a backup file. It can help you restore a failed system disk, but the image must be stored on a different device and tested before you depend on it.
System image or whole-disk image?
The built-in Windows system image focuses on partitions required to restore Windows. A whole-disk image can also include other data partitions on the same drive. Neither approach is the same as copying files into a normal folder.
Use Windows Backup and Restore
- Connect an external drive with enough free space. Open Control Panel > Backup and Restore (Windows 7).
- Choose Create a system image. Select On a hard disk and the external destination, then choose Next.
- Review the included system partitions and any additional drives selected. Confirm you are not saving the image to the disk you are protecting.
- Choose Start backup and leave the PC powered on. When it finishes, check the destination for the image folder.
- Prepare Windows installation or recovery media so you can reach System Image Recovery if the system drive no longer boots.
Use a whole-disk image when needed
If the drive also contains a separate data partition or a vendor recovery partition, confirm whether the built-in system image includes it. A disk-level image can capture the whole selected disk; check the partition map before starting.
Verify and maintain the backup
Open the backup task or image location and check its date and size. Periodically create a fresh image after major changes, and keep an independent copy of frequently edited personal files.
Create a Disk Image with Qiling Disk Master
Qiling Disk/Partition Backup lets you choose the entire Windows disk or specific partitions. Include every partition needed for the recovery you plan.
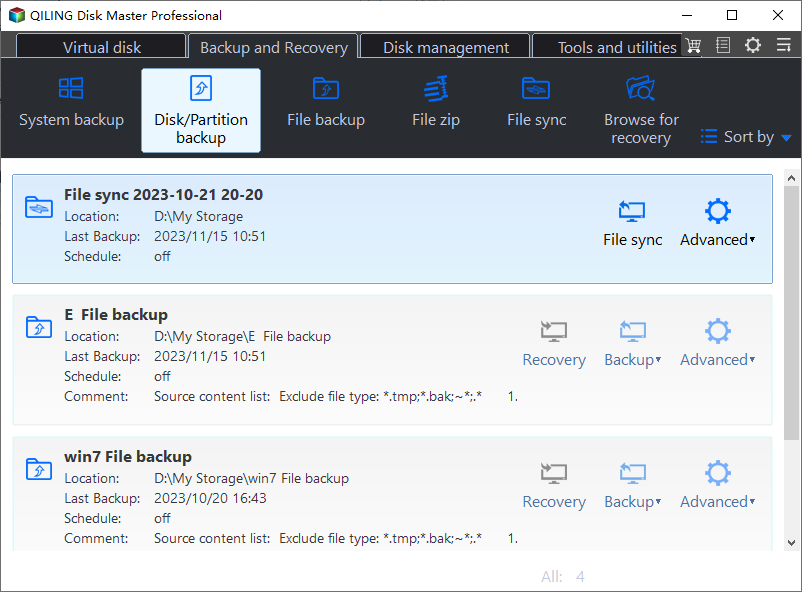
Step 1. Connect an external backup drive. Open Backup and Recovery and choose Disk/Partition backup.
Step 2. In the source selection area, select the whole Windows disk if you need all of its partitions. Confirm its model, capacity, and partition layout; do not select only C: if you need a complete disk image.
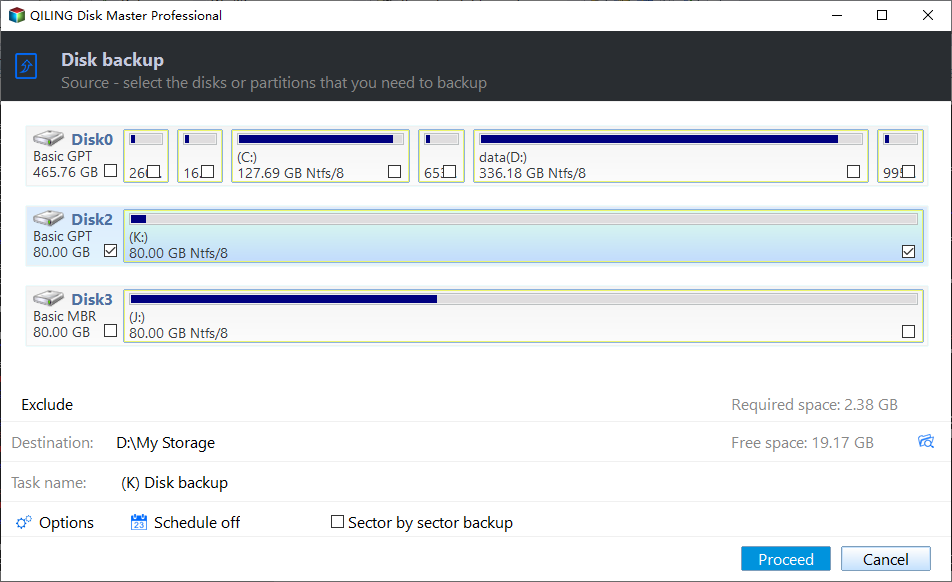
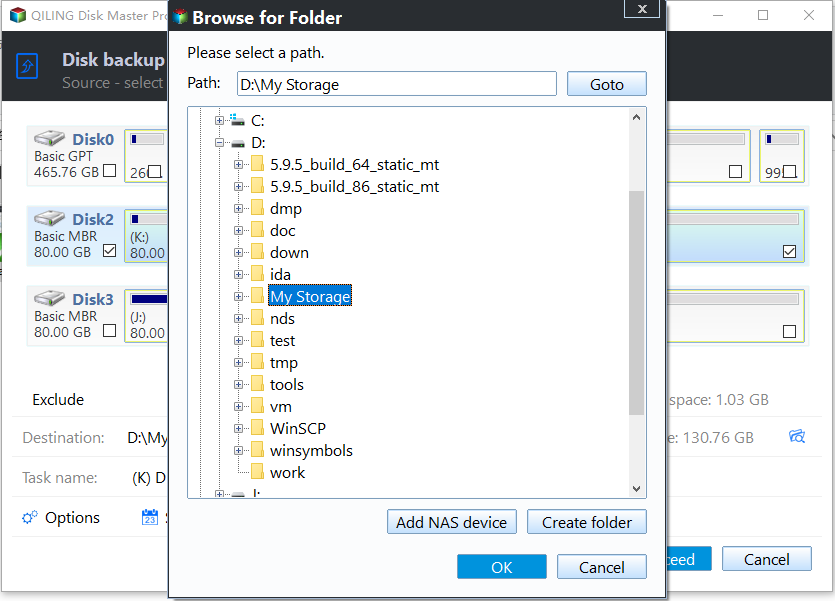
Step 3. Choose a destination on a different physical drive or network location and confirm it has enough free space for the image.
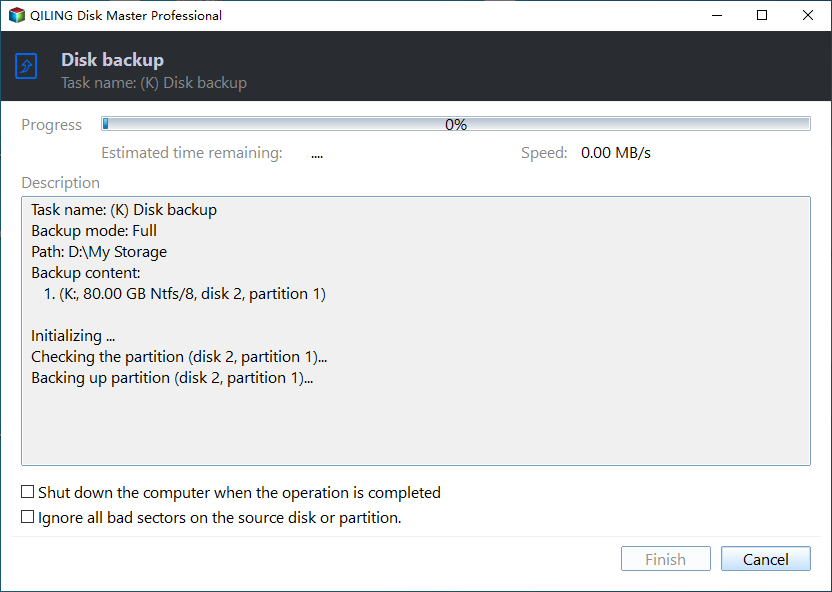
Step 4. Click Proceed and wait for the image to complete. Verify the task and destination before disconnecting the backup drive.
Frequently Asked Questions
Can I save the image on C:? Do not rely on a backup stored on the same physical disk that may fail.
Is a disk image browsable like ordinary folders? An image is a backup file; use the restore or mount capability provided by the tool to access it.
Conclusion
A useful disk image lives on a different physical drive and has a recovery path you have checked. Confirm which partitions the image includes.
Related Articles
- Windows System Backup and Restore Tutorials
Find system image, recovery drive, and restore guides for Windows. - Windows Disk Backup and Restore Tutorials
Explore disk image backup and restoration workflows for Windows drives. - Windows File Backup and Restore Tutorials
Compare ways to protect and restore personal files in Windows.
Products
Articles & Tutorials
- Data Recovery
- Data Backup
- File Recovery
- File Backup
- System Backup and Restore
- Disk and Partition Clone
- Technical articles
- Mobile articles
- Disk Master Help
- Windows Data Recovery Tutorials
- Windows Secure Delete Tutorials
- Windows Partition Management Tutorials
- Windows File Backup and Restore Tutorials
- Windows System Backup and Restore Tutorials
- Windows Disk Backup and Restore Tutorials
- Windows Clone Tutorials