How to Install Genuine Windows 10 on a New Hard Disk
Check licensing and support first
A new disk does not itself require a new Windows license when the same PC has a valid digital license for the same edition, but activation depends on the license and hardware. Check Settings > Activation on the old installation and record the edition and any transferable key. Windows 10 standard support ended in October 2025; a supported Windows release is preferable for a daily-use PC if the hardware qualifies.
Install from official media
Step 1. Back up personal files, browser data, and license records. On a working PC, use Microsoft's official Windows installation media path for the edition you are licensed to use. Avoid modified or “preactivated” images.
Step 2. Install the new disk, disconnect unrelated storage when practical, and boot the installation USB from the manufacturer's one-time boot menu. Keep the intended UEFI/Legacy mode consistent with the PC's configuration.
Step 3. Choose the matching Windows edition and Custom installation. Identify the new disk by capacity; if it is truly blank, select its unallocated space. Do not delete partitions on other drives.
Step 4. Complete setup, connect to the internet, check Settings > Activation, install official drivers, and restore backed-up files. If activation fails, use Microsoft's Activation Troubleshooter or the legitimate product key rather than a third-party activator.
When cloning is a better route
If you want the old Windows installation, apps, and settings exactly as they were, clone the existing system disk instead of performing a clean install. Cloning also does not create a license or fix an unsupported OS. If the source is corrupt, a clean installation may be safer.
Move an Existing Windows Installation Instead of Reinstalling with Qiling System Clone
System Clone moves the Windows boot and system partitions, not unrelated data partitions. Copy files on other disks separately. The destination is overwritten.
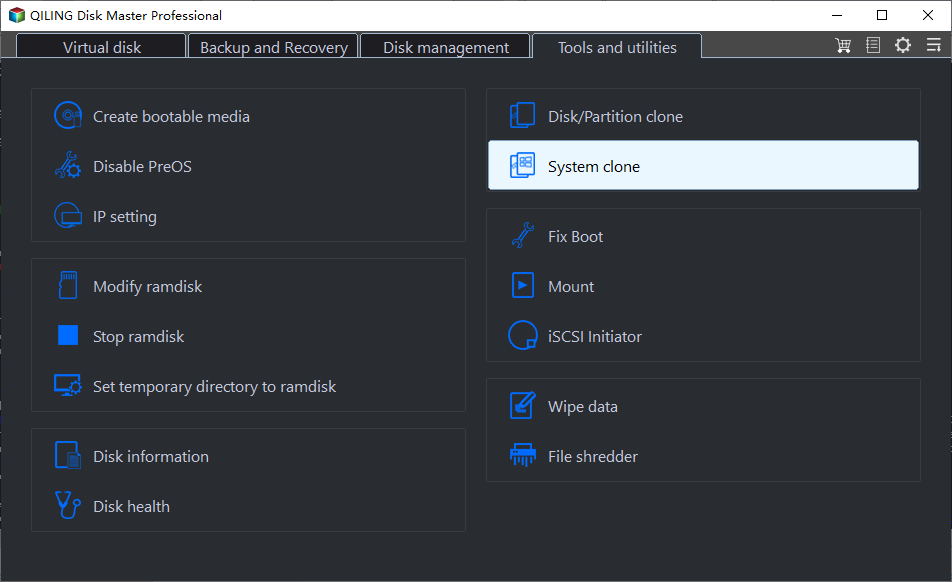
Step 1. Connect the new SSD, open Qiling Disk Master, and select Tools and utilities > System clone.
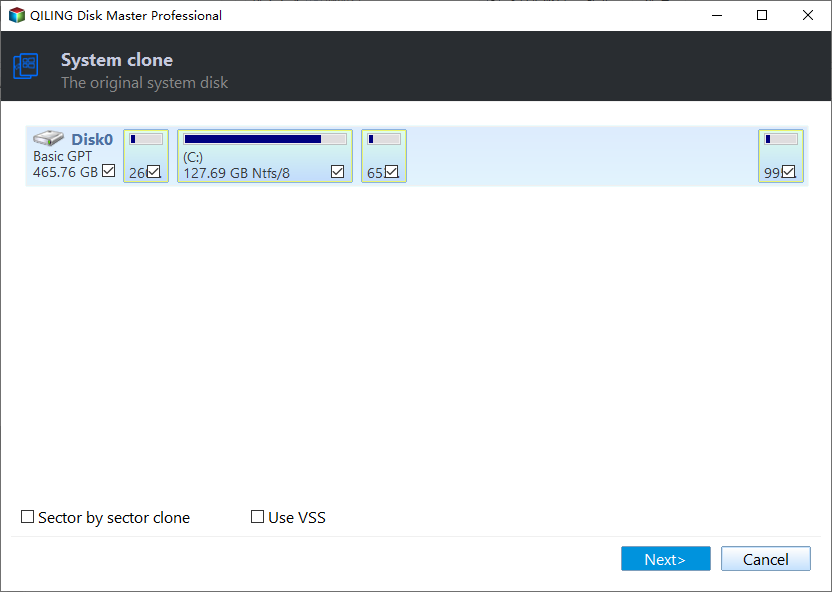
Step 2. Review the automatically selected Windows source partitions, including the small boot and recovery partitions, then click Next.
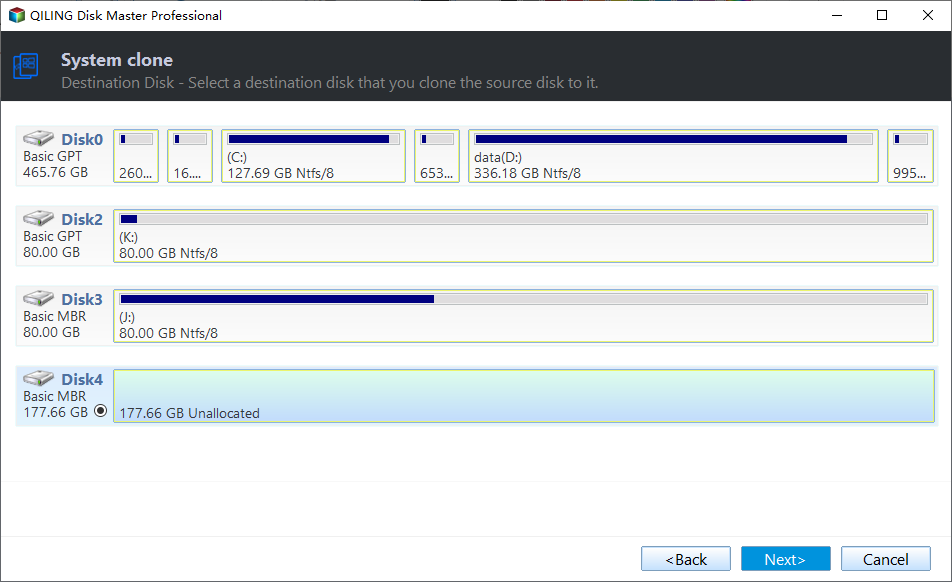
Step 3. Select the intended destination SSD by model and capacity and click Next. All existing destination data may be lost.
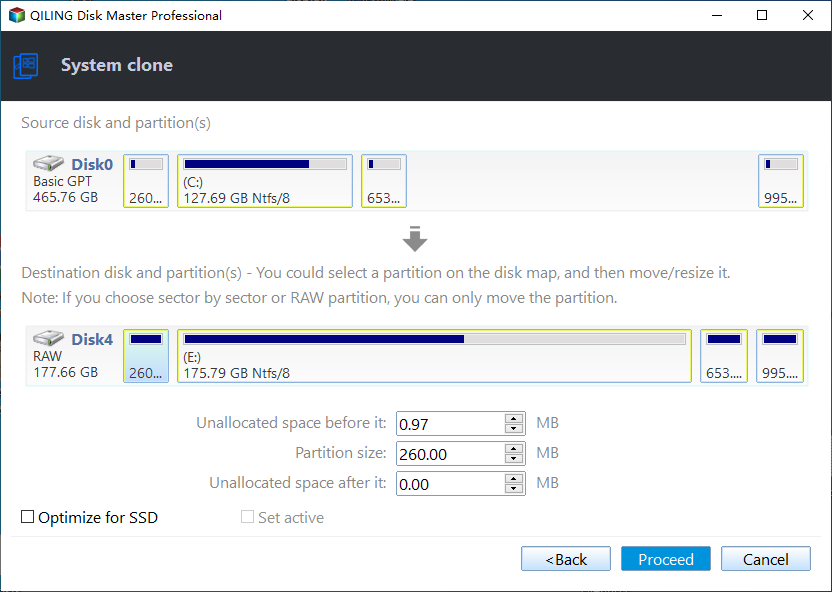
Step 4. Review the target layout, choose SSD optimization where appropriate, and click Proceed. Confirm the overwrite warning and wait for the task to finish.
Step 5. Shut down, select the new SSD's Windows Boot Manager in UEFI, and test booting with the old boot disk disconnected if practical. Check activation, BitLocker, applications, and files before changing the old drive.
Conclusion
Use official installation media and a matching license for a clean install. Clone only when you deliberately want to preserve the old installation.
Related Articles
- Windows File Backup and Restore Tutorials
Find file-copy, scheduled-backup, and restore guides. - Windows System Backup and Restore Tutorials
Compare file backups with full system images.
Products
Articles & Tutorials
- Data Recovery
- Data Backup
- File Recovery
- File Backup
- System Backup and Restore
- Disk and Partition Clone
- Technical articles
- Mobile articles
- Disk Master Help
- Windows Data Recovery Tutorials
- Windows Secure Delete Tutorials
- Windows Partition Management Tutorials
- Windows File Backup and Restore Tutorials
- Windows System Backup and Restore Tutorials
- Windows Disk Backup and Restore Tutorials
- Windows Clone Tutorials