Move Games from HDD to SSD in Windows 10
For individual games, the game launcher is usually the safest way to change installation location. Copying an install directory alone may leave the launcher pointing to the HDD.
Move Steam games through Steam
- Connect and prepare the SSD, then check that it has space for the game, updates, and temporary files.
- In Steam, open Settings > Storage and add a library folder on the SSD if one is not already present.
- Select the game or games in Storage and choose Move, then select the SSD library. Steam's layout may vary by version; follow the current Storage screen.
- Wait for the transfer and launch one game from the SSD. Check its installed location before deleting any HDD copy.
Other launchers and Microsoft Store
Use the launcher's own move or locate-installation feature where available. For apps installed through Windows, check Settings > Apps for a Move option; not every game supports it. If none exists, reinstall the game to the SSD and then restore saves.
Protect saves before you move
Local saves may live in Documents, AppData, Saved Games, or a game-specific folder rather than the install directory. Cloud sync can help, but confirm the latest save appears on another device or keep a separate copy.
Do you need a disk clone?
Clone the whole drive only when replacing the entire HDD, including Windows or many applications. Cloning one game folder to another drive will not automatically update launcher records.
Back Up Selected Files with Qiling Disk Master
Use Qiling File Backup to protect the local save folders before moving the game installation. This is a save backup, not a substitute for the launcher's Move command.
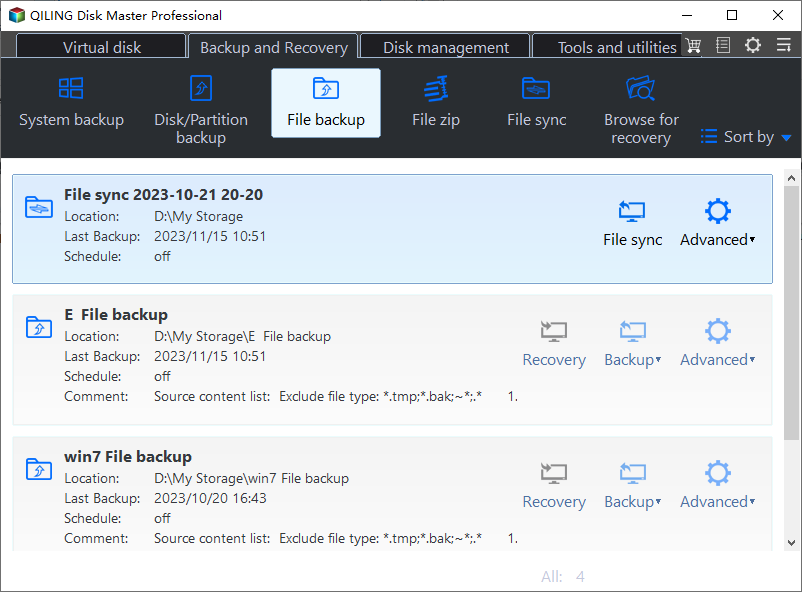
Step 1. Connect a separate backup drive. Open Backup and Recovery and choose File backup.
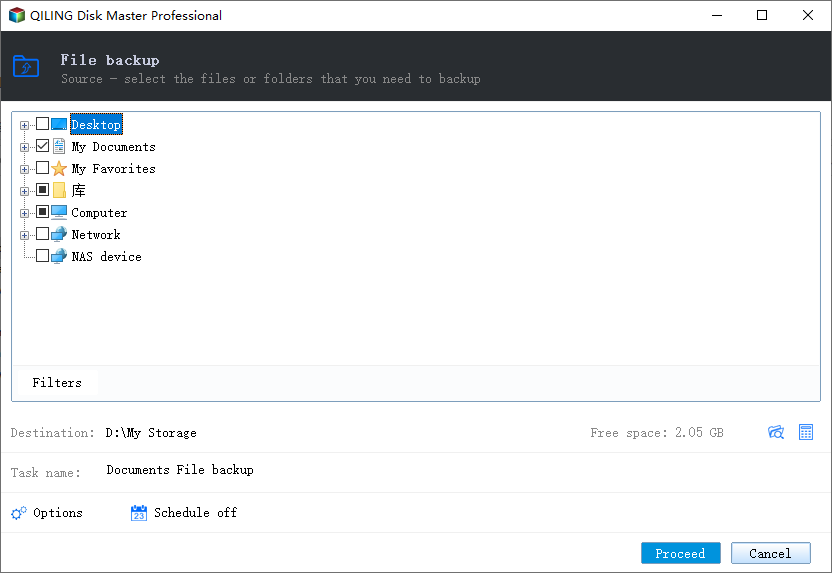
Step 2. In the folder tree, expand the appropriate drive and select the folders you need to protect. Check game saves, Documents, Pictures, or other locations that matter for this task; do not assume every needed file is in one folder.
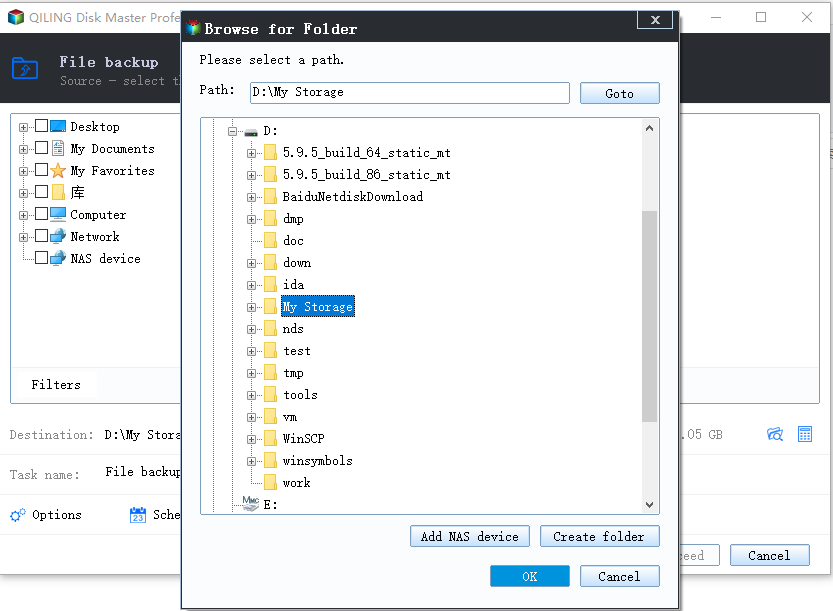
Step 3. Choose a destination on another physical drive or a trusted network location. Check its free space and give the task a recognizable name.
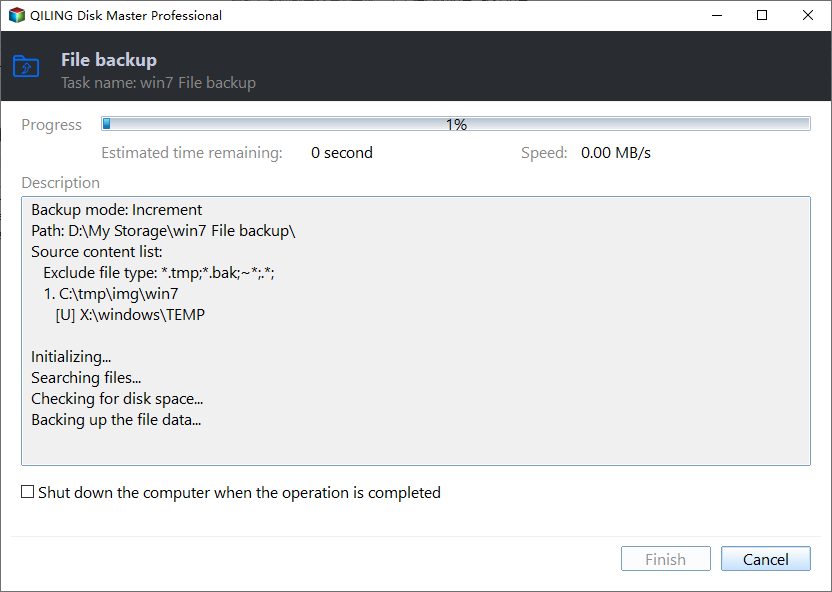
Step 4. Click Proceed and wait for the progress screen to finish. Confirm the backup exists, then keep the backup drive separate from the source PC.
Frequently Asked Questions
Will moving the install folder also move saves? Not always. Save files may live outside the game library.
Can I delete the HDD library immediately? First launch the game from the SSD and confirm its saves are intact.
Conclusion
Use the game launcher's move feature for installations and back up local saves separately. A full disk clone is for replacing an entire drive.
Related Articles
- Windows File Backup and Restore Tutorials
Compare ways to protect and restore personal files in Windows. - Windows System Backup and Restore Tutorials
Find system image, recovery drive, and restore guides for Windows. - Windows Disk Backup and Restore Tutorials
Explore disk image backup and restoration workflows for Windows drives.
Products
Articles & Tutorials
- Data Recovery
- Data Backup
- File Recovery
- File Backup
- System Backup and Restore
- Disk and Partition Clone
- Technical articles
- Mobile articles
- Disk Master Help
- Windows Data Recovery Tutorials
- Windows Secure Delete Tutorials
- Windows Partition Management Tutorials
- Windows File Backup and Restore Tutorials
- Windows System Backup and Restore Tutorials
- Windows Disk Backup and Restore Tutorials
- Windows Clone Tutorials