How to Back Up Windows 7 Files to an External Hard Drive
Decide what to preserve
Windows 7 is unsupported, so backing up before moving to a supported PC is especially important. Check C:\Users\<name> for Documents, Desktop, Pictures, Downloads, and application-specific files. Include email archives, game saves, project folders, and data stored outside the user profile. A file backup does not preserve installed programs as runnable applications.
Method 1: manually copy files
Step 1. Connect an external drive with enough free space and confirm it opens normally. Make a dedicated dated folder.
Step 2. Copy the selected folders in File Explorer. Wait for all copy dialogs to finish; do not delete originals.
Step 3. Open a few copied files from the external drive and compare folder sizes or file counts. This method is simple but must be repeated for new and changed files.
Method 2: Windows Backup and Restore
Open Control Panel > Backup and Restore > Set up backup, select the external drive, and choose folders or let Windows choose. Review the schedule, start the backup, and use Restore my files to test one file.
Method 3: Windows Easy Transfer for another Windows 7 PC
Step 1. On the old Windows 7 PC, search Start for Windows Easy Transfer. Choose an external hard disk or USB flash drive as the transfer method.
Step 2. Select the user accounts and files to move, review the estimated size, and save the transfer package to the external drive. Wait for completion and keep the original files.
Step 3. On the destination Windows 7 PC, open Windows Easy Transfer, choose This is my new computer, locate the saved package, and review the user-account mapping before importing. Reinstall applications separately and verify files afterward. This is a migration aid, not a versioned backup or a recommended Windows 10/11 transfer method.
Back Up Windows 7 Files with Qiling Disk Master
This creates a separate file-backup task; it does not change the originals. Connect a healthy external drive before starting.
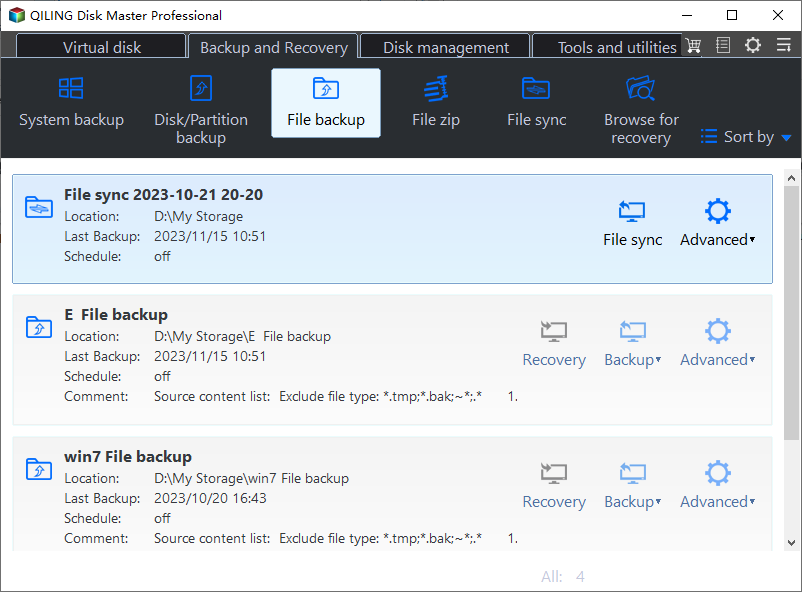
Step 1. Open Backup and Recovery > File Backup in Qiling Disk Master.
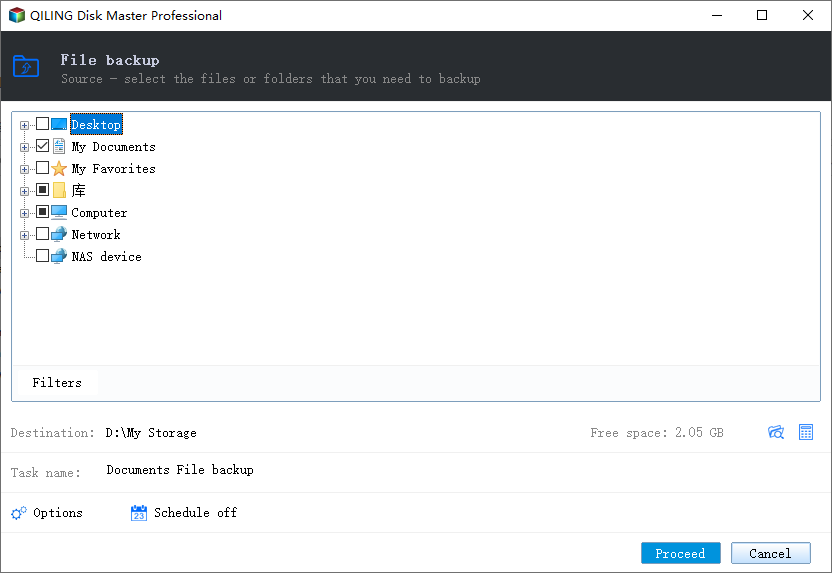
Step 2. In the source tree, select Documents, Desktop, Pictures, email archives, project folders, and any other locations found in your inventory. Check each selected folder rather than assuming everything under the user profile is included.
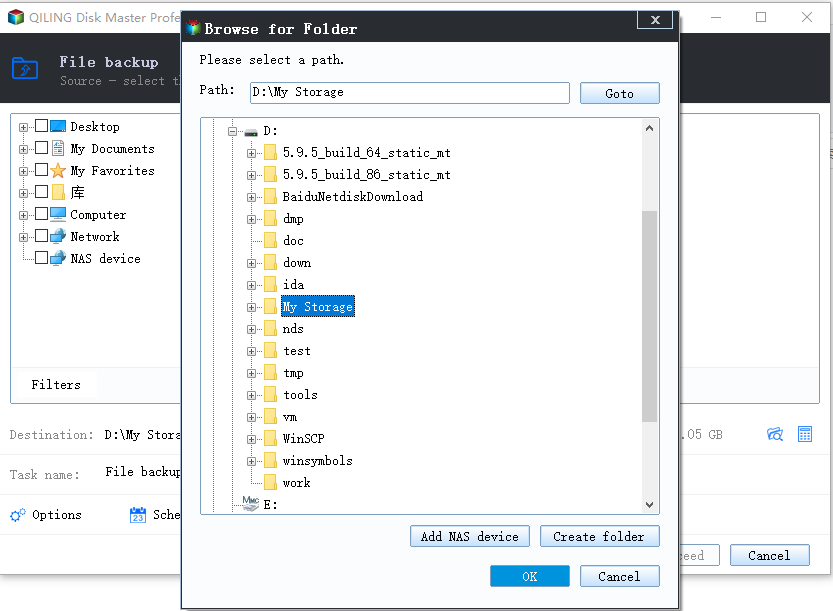
Step 3. Choose the external drive or a separate network location as the destination. Compare its letter and available space with the source; do not save the only backup on the source disk.
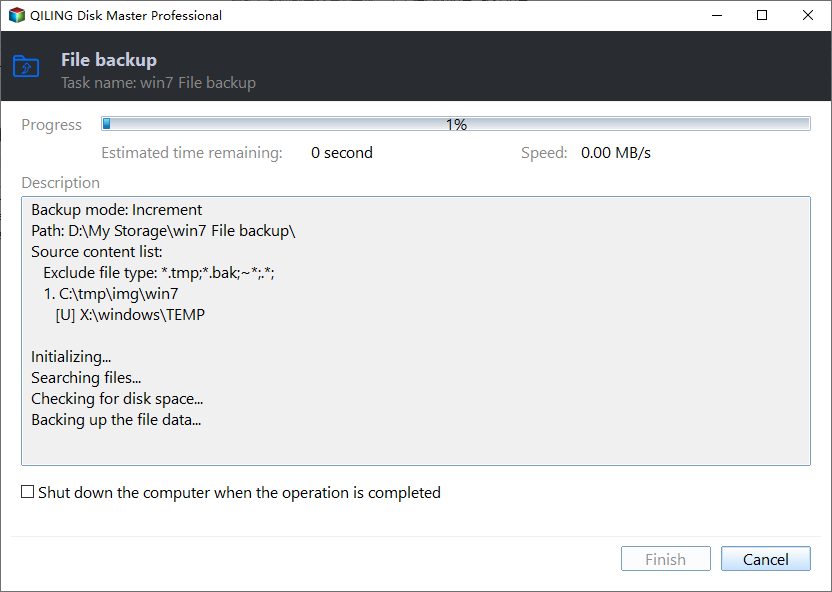
Step 4. Review the task, click Proceed, and wait for completion. Browse the resulting backup and restore a test file to a different folder before relying on it.
Conclusion
Use a separate external drive, verify sample restores, and keep it disconnected between runs. Plan migration off unsupported Windows 7.
Related Articles
- Windows File Backup and Restore Tutorials
Find file-copy, scheduled-backup, and restore guides. - Windows System Backup and Restore Tutorials
Compare file backups with full system images.
Products
Articles & Tutorials
- Data Recovery
- Data Backup
- File Recovery
- File Backup
- System Backup and Restore
- Disk and Partition Clone
- Technical articles
- Mobile articles
- Disk Master Help
- Windows Data Recovery Tutorials
- Windows Secure Delete Tutorials
- Windows Partition Management Tutorials
- Windows File Backup and Restore Tutorials
- Windows System Backup and Restore Tutorials
- Windows Disk Backup and Restore Tutorials
- Windows Clone Tutorials