Upgrade a Windows 10 VM to Windows 11 Safely
Upgrade a Windows 10 virtual machine to Windows 11 safely with compatibility checks and a backup image first.
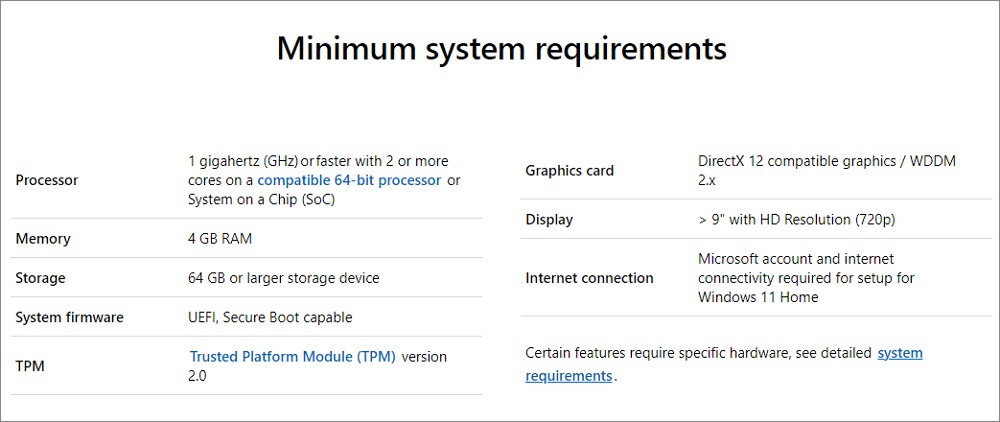
Before Upgrading a Windows 10 VM
A virtual machine upgrade depends on virtual TPM, UEFI, Secure Boot support, CPU compatibility, RAM, storage, and the hypervisor version. A failed upgrade can leave the VM unbootable, so take a snapshot or backup first.
What to Check First
- Enable UEFI, Secure Boot, and virtual TPM if your hypervisor supports them.
- Assign enough RAM, CPU cores, and disk space.
- Update VMware, Hyper-V, VirtualBox, or the platform you use.
- Back up the VM files before running Windows 11 setup.
Back Up Important Files with Qiling Disk Master
Before you change Windows settings, reset a PC, format a drive, or repair a failing disk, copy user files to a safe location. A file backup is easier to restore when you only need documents, photos, game saves, or work folders.
Choose File Backup
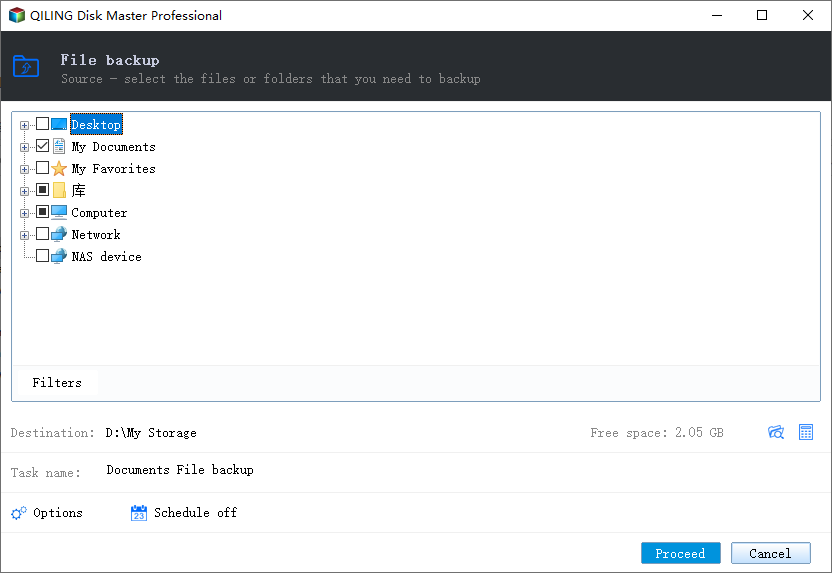
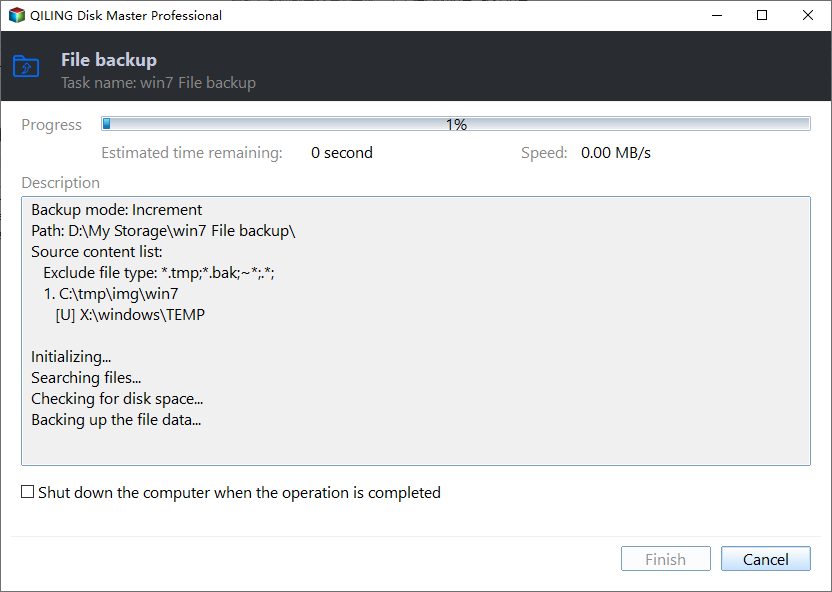
- Open Qiling Disk Master and choose File Backup. Select the folders that matter most, such as Desktop, Documents, Pictures, game save folders, browser profiles, and project folders.
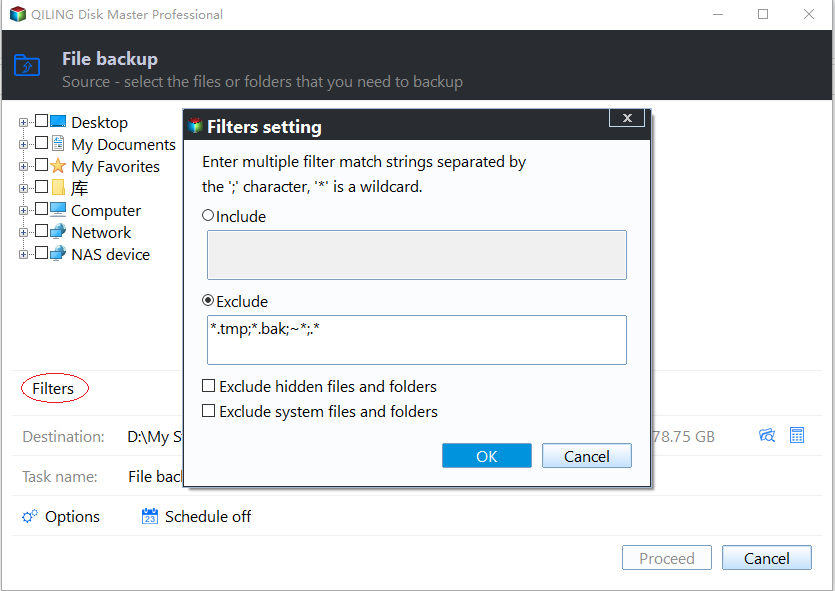
- Use the filter option if you need to include only certain file types or exclude temporary files.
Select a Safe Destination
- Choose an external drive, another internal disk, or a network location as the backup destination. Do not save the backup on the same partition that may be reset, formatted, or repaired.
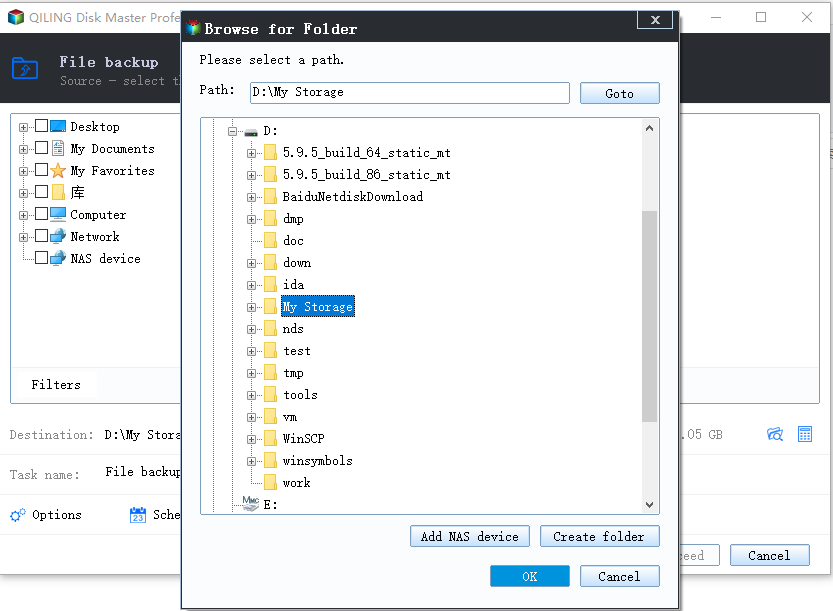
- Click Proceed to start the backup and wait until it finishes. Open the destination afterward and confirm that the backup image is visible.
Related Articles
- Windows Partition Management Tutorials
Find practical Windows partition guides for resizing, formatting, checking, converting, and repairing disks without unnecessary risk. - Windows System Backup and Restore Tutorials
Browse Windows backup and restore guides for system images, recovery drives, restore points, and safe repair preparation.
Products
Articles & Tutorials
- Data Recovery
- Data Backup
- File Recovery
- File Backup
- System Backup and Restore
- Disk and Partition Clone
- Technical articles
- Mobile articles
- Disk Master Help
- Windows Data Recovery Tutorials
- Windows Secure Delete Tutorials
- Windows Partition Management Tutorials
- Windows File Backup and Restore Tutorials
- Windows System Backup and Restore Tutorials
- Windows Disk Backup and Restore Tutorials
- Windows Clone Tutorials