Disk Cloning vs. Disk Imaging: Which Should You Use?
The key difference
A clone writes partitions directly onto another disk so that the target can often replace the source. An image stores the disk's contents in backup files that must be restored before they become a bootable replacement. Both can preserve Windows, but they serve different purposes. A clone is convenient for a one-time SSD upgrade; a scheduled image is better for keeping dated recovery points.
Compare the trade-offs
Destination: A clone usually overwrites the target disk. An image can be stored beside other files if the destination has enough space.
History: A single clone normally reflects one point in time. Backup software can retain multiple image versions, subject to space and retention settings.
Recovery: A clone may boot after you select it in UEFI and confirm hardware compatibility. An image needs the backup application and often recovery media to restore it to a disk.
Failure risk: Neither replaces a separate copy of rapidly changing files; an image on the same physical drive as Windows is vulnerable to that drive's failure.
Use a clone for disk replacement
Identify source and target by hardware, back up the target, and in Qiling Disk Master choose Tools and utilities > Disk/Partition clone. Select the whole source disk, choose the new disk, inspect the partition layout, and click Proceed. Confirm the overwrite warning, then boot the new disk independently before retiring the old one.

Create a Qiling Disk Image Instead of Cloning
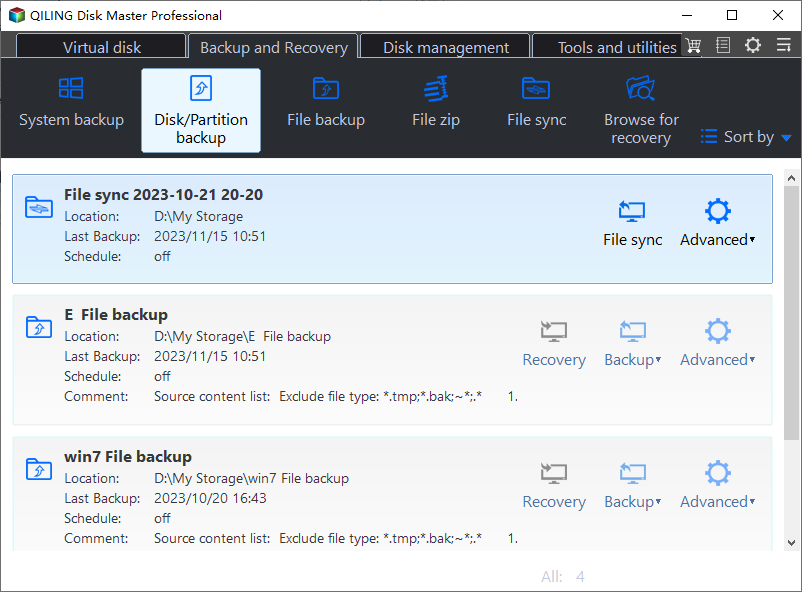
Step 1. Connect separate storage and open Backup and Recovery > Disk/Partition backup. Select the source disk or partitions.
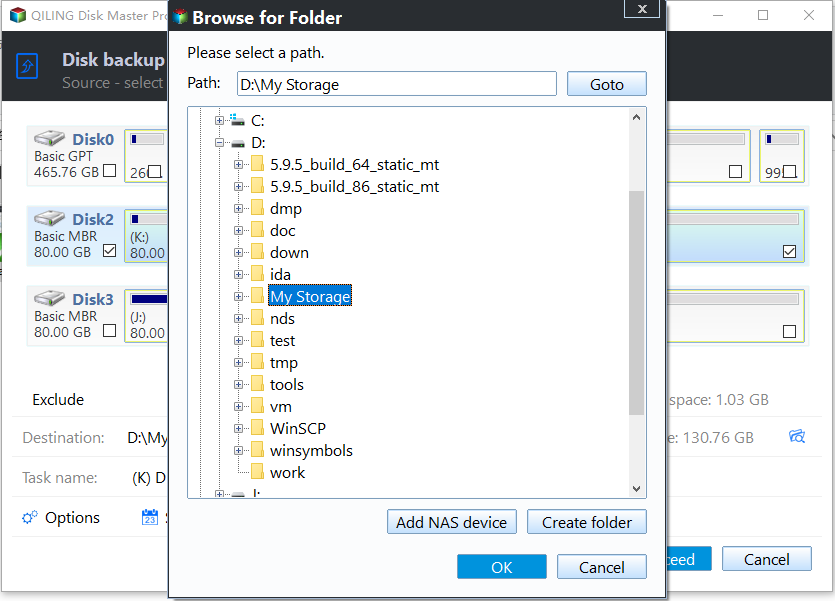
Step 2. Choose a folder on another physical drive or NAS as the image destination and check free space.
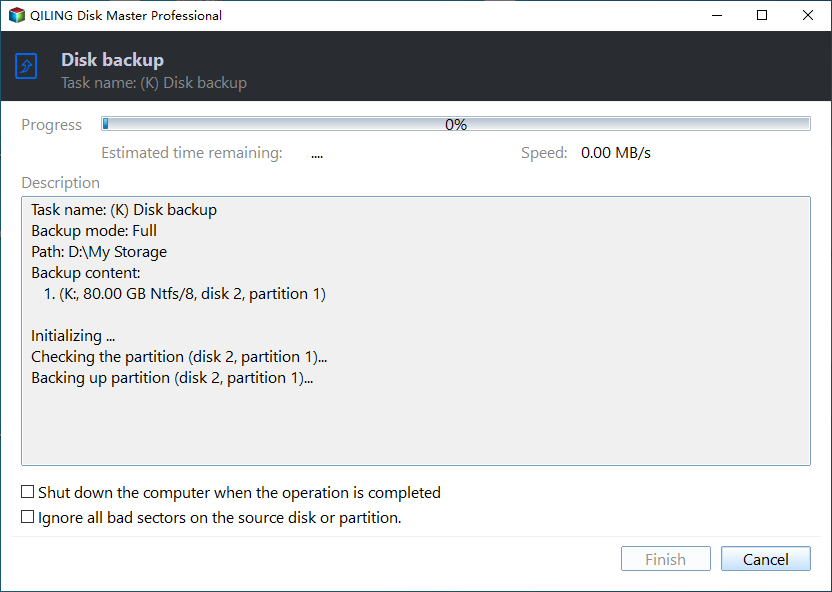
Step 3. Review the selected source and destination, click Proceed, wait for completion, and verify that the image is recognized by the restore wizard.
Conclusion
Choose a clone to replace a drive soon; choose versioned images for ongoing recovery. Many PCs benefit from both, plus a separate file backup.
Related Articles
- Windows Cloning Tutorials
Explore Windows disk, system, and SSD migration topics. - Windows Disk Backup and Restore Tutorials
Compare migration with a separate disk image.
Products
Articles & Tutorials
- Data Recovery
- Data Backup
- File Recovery
- File Backup
- System Backup and Restore
- Disk and Partition Clone
- Technical articles
- Mobile articles
- Disk Master Help
- Windows Data Recovery Tutorials
- Windows Secure Delete Tutorials
- Windows Partition Management Tutorials
- Windows File Backup and Restore Tutorials
- Windows System Backup and Restore Tutorials
- Windows Disk Backup and Restore Tutorials
- Windows Clone Tutorials