What Will You Lose When Upgrading Windows 10 to Windows 11?
An eligible in-place upgrade can keep personal files, apps, and settings, but that outcome depends on the option selected in Setup. A clean installation can erase the target disk, so check the method before clicking Install.
What the Upgrade Keeps
When you start Windows 11 Setup from within a working Windows 10 installation and choose Keep personal files and apps, Microsoft says files, apps, and Windows settings are migrated. The Keep personal files only choice removes apps and settings, while Nothing removes files as well. Booting installation media for a clean install is a different, potentially destructive path. Check the final Ready to install screen, not assumptions from an earlier prompt.
Before upgrading, use Windows Update or PC Health Check to confirm eligibility. A supported TPM, Secure Boot configuration, CPU, memory, and storage are relevant. If the device is managed by an organization, follow its upgrade policy rather than changing firmware settings independently. Microsoft's Windows 11 installation guidance explains the available keep options.
What Can Change or Disappear
Even when files and apps are retained, some older drivers, security tools, unsupported applications, default-app choices, interface behaviors, and device-specific utilities may need updates. Check manufacturer support for printers, scanners, VPNs, and specialist software. Save application installers, license details, browser exports, and local game saves that do not sync to the cloud.
Windows 10 reached end of ordinary support in October 2025. That is one reason to move to a supported system when the hardware qualifies, but it does not justify skipping a backup. Retain your BitLocker or Device Encryption recovery key in case firmware or recovery changes trigger a prompt.
Back Up the Full Windows Disk with Qiling
A disk image creates a recovery path for the existing Windows 10 installation. It does not itself perform the Windows 11 upgrade.
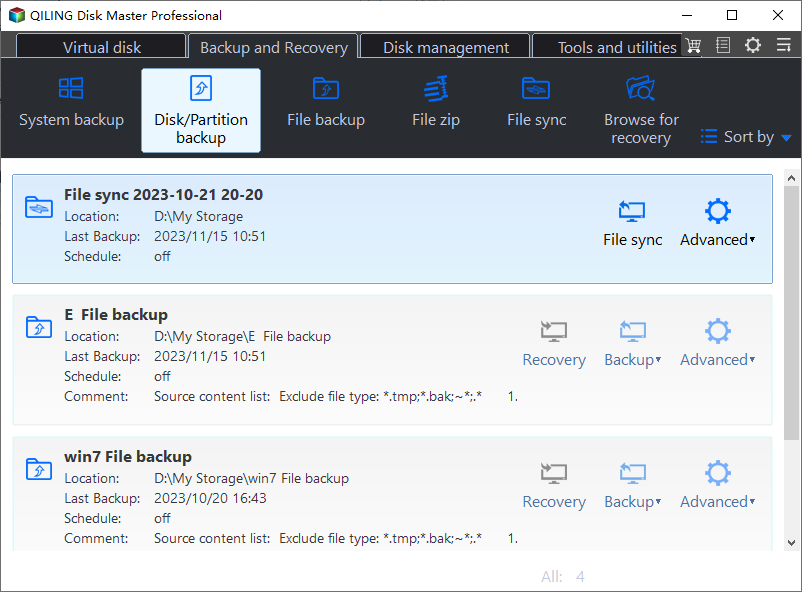
Step 1. Connect a separate drive with enough space and open Backup and Recovery > Disk/Partition backup in Qiling Disk Master.
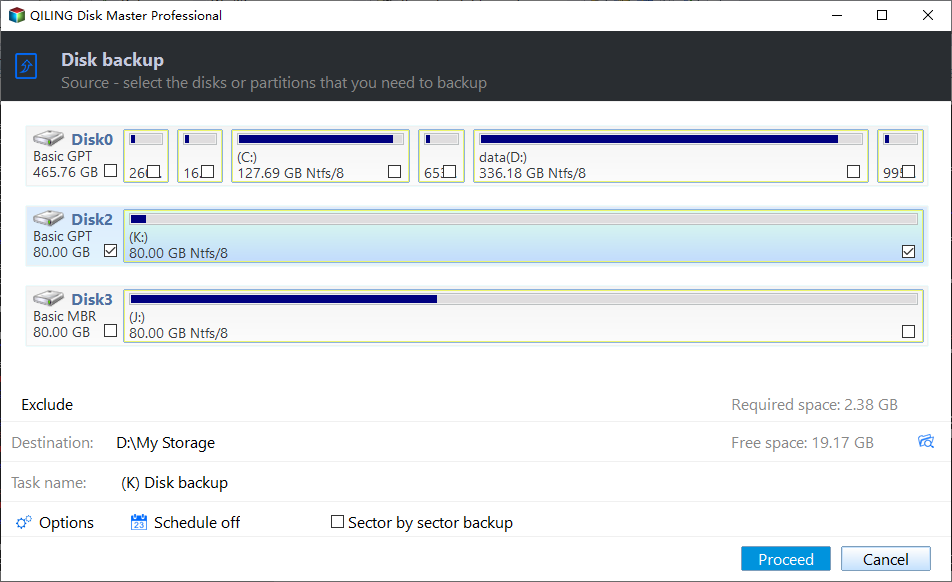
Step 2. Select the whole Windows disk, including hidden boot and recovery partitions, by model and capacity.
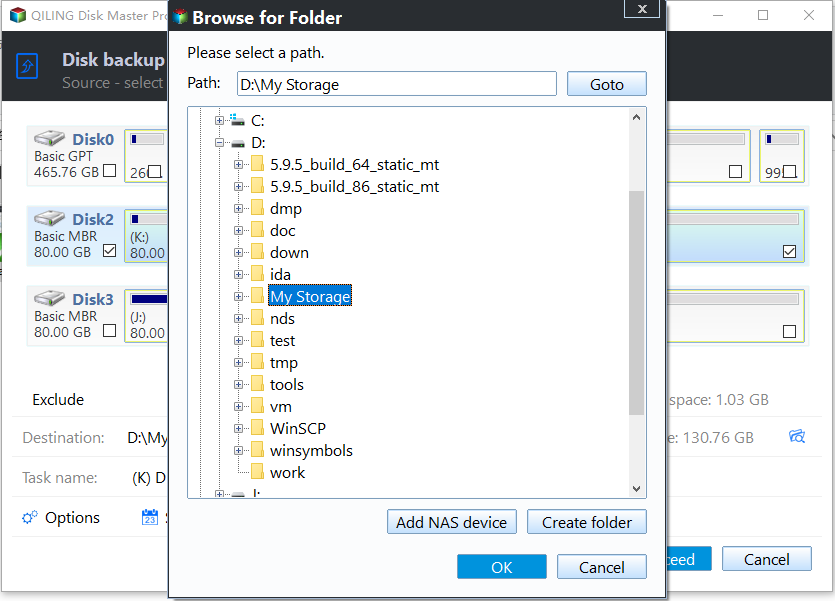
Step 3. Set the destination to a folder on the separate drive, not on the disk being upgraded.
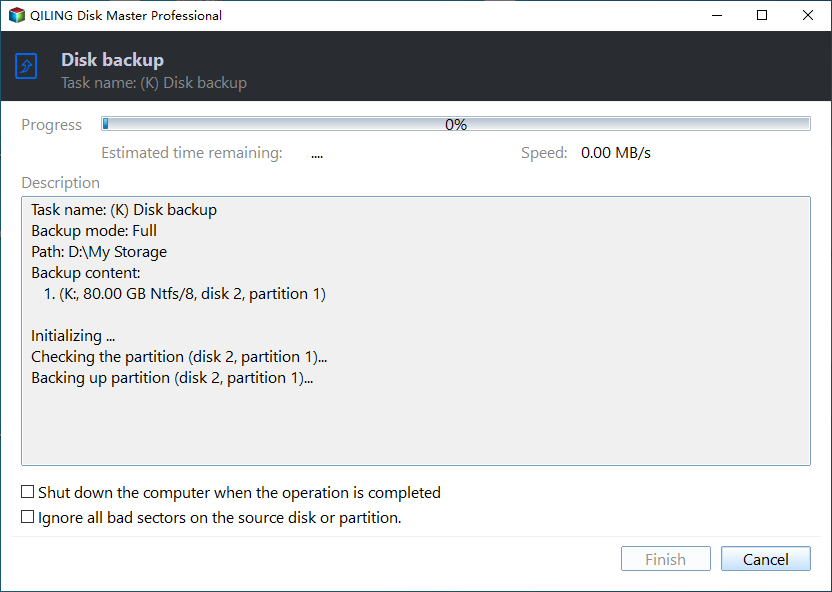
Step 4. Review the source and destination, click Proceed, and wait for a successful task status.
Step 5. Test a file recovery or a restore to spare storage and keep recovery media available.
Upgrade and Verify
Close applications, keep power connected, and follow the Windows 11 offer through Windows Update or supported installation media. On the final Setup screen, confirm Keep personal files and apps if that is your intention. After upgrading, check documents, applications, drivers, Windows activation, encryption, and backup access. Do not delete the old image until the system is stable.
Frequently Asked Questions
Does an in-place upgrade always keep every application?
No. Compatibility checks and the chosen keep option matter; verify critical applications afterward.
Does booting from the USB keep my files?
Do not assume so. A clean installation from boot media can wipe the target disk.
Conclusion
Confirm eligibility and the exact keep option, make a tested disk image, then check important files and apps after Windows 11 starts.
Related Articles
- Windows System Backup and Restore Tutorials
Plan a Windows system recovery path. - How to Install Windows 11 on a Second Drive Safely
Compare a clean installation on another disk.
Products
Articles & Tutorials
- Data Recovery
- Data Backup
- File Recovery
- File Backup
- System Backup and Restore
- Disk and Partition Clone
- Technical articles
- Mobile articles
- Disk Master Help
- Windows Data Recovery Tutorials
- Windows Secure Delete Tutorials
- Windows Partition Management Tutorials
- Windows File Backup and Restore Tutorials
- Windows System Backup and Restore Tutorials
- Windows Disk Backup and Restore Tutorials
- Windows Clone Tutorials