Why Clone Hard Drive to SSD | How to Clone Hard Drive to SSD in Windows 10
To upgrade your laptop's hard drive to a solid-state drive (SSD) without any software, you can clone the contents of the old hard drive to the new SSD using a free, open-source tool like Clonezilla or a paid option like Qiling Disk Master. Alternatively, you can reinstall your operating system and all software from scratch, which may take some time but ensures a clean start. If you're not comfortable with either option, consider purchasing a cloning software specifically designed for SSD upgrades, such as Qiling Disk Master. These tools can help you transfer your data, operating system, and applications to the new SSD with minimal effort.
If you're looking to clone a hard drive to an SSD in Windows 10, you'll find numerous video tutorials and lengthy guides online. However, you may be wondering if it's safe to proceed, or if the process is worth the effort. To help you make a decision, let's first explore the reasons why cloning a hard drive to an SSD is a good idea. Once you're convinced, we'll walk you through the steps to clone your hard disk.
Main Content:
Why Clone Hard Drive to SSD in Windows 10
Prepare Suitable Tools Before You Start
Download Disk Cloning Software - Qiling Disk Copy
How to Clone Hard Drive to SSD in Windows 10
Frequently Asked Question about Cloning Hard Drive to SSD
Why Clone Hard Drive to SSD in Windows 10
Here are the common reasons for some user:
1. Upgrade HDD to SSD
The preference for SSDs over HDDs in hard disk choices is growing, despite their higher cost and limited lifespan. While SSDs are more expensive and have a limited service life, they offer faster performance and are less prone to damage, making them a good choice for users who rely heavily on their computers for tasks like gaming or video editing.
Read also:
2. Replacing a failing or corrupted HDD
Your hard disk drive (HDD) is slow because it uses spinning disks and mechanical parts, which can slow down its performance. In contrast, solid-state drives (SSDs) are faster and more efficient. Your HDD may also be slow due to its capacity being full, which can cause it to take longer to access files. Additionally, HDDs can be noisy due to the mechanical parts, whereas SSDs are generally quieter. The main reasons for your HDD not being detected are likely due to its shortcoming, such as being slow, loud, and having a large capacity, making it less efficient than SSDs.
One of the main reasons people want to clone a hard drive to an SSD is to improve the overall performance and speed of their computer.
Prepare Suitable Tools Before You Start
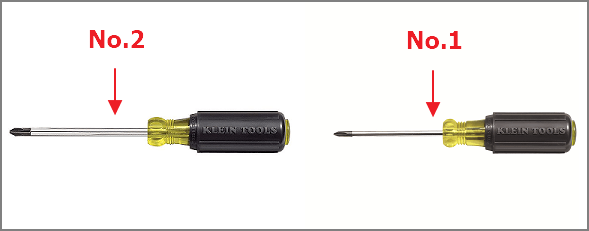
1. A Screwdriver.
To open your PC, you'll need a No. 2 Phillips screwdriver, while for laptops, you'll require a set of three Phillips screwdrivers in different sizes (#1, #0, and #00).
2. A New SSD.
To ensure a smooth transition from your old hard drive to the new SSD, make sure the new SSD's capacity is bigger than the space on your old hard drive. This is to prevent any potential issues that might arise from running out of space on the new drive.
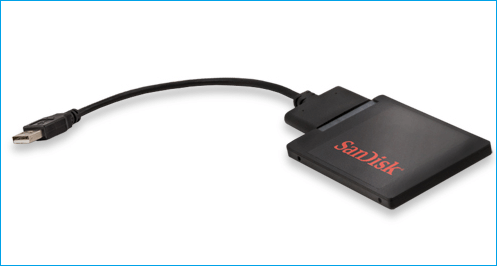
3. A USB 3.0 or 2.5-inch SATA Hard Drive Adapter.
4. Download A Third-party Disk Cloning Software on your computer.
Download Disk Cloning Software - Qiling Disk Copy
When choosing a reliable disk cloning tool, the priority is to ensure a safe and fast process without data loss. Qiling Disk Copy is a suitable option that can make a full copy of your hard drive, allowing you to upgrade to a larger one without reinstalling Windows. Compatible with various Windows versions, including 10/8.1/8/7/Vista/XP, this tool offers both disk mode and partition mode to guarantee a 100% cloning success.
How to Clone Hard Drive to SSD in Windows 10
1 - Connect SSD to computer
Connect your hard drive to the PC via a SATA hard drive adapter or a USB 3.0 port.
2 - Initialize the SSD via Disk Management
- Open disk management.
- Right-To check the partition style of a source disk, follow these steps: click on the source disk, then click on "Properties", and finally check the partition style.
- Right-click on the SSD and click "Initialize Disk".
3. Use Qiling Disk Copy
Note: To activate Qiling Disk Copy, simply launch the software and follow the on-screen instructions to initiate the disk copying or cloning process. This will ensure a smooth and efficient transfer of data from one disk to another.
Step 1. Download, install and run Qiling Disk Copy on your PC.
To copy or clone a disk, click on "Disk Mode" and select the source disk you want to copy or clone. Then, click "Next" to proceed.
Note: To ensure a successful copy or clone of the source disk, the destination disk should be at least as large as the source disk, if not larger. This is because the process involves copying the source disk sector by sector, and the destination disk needs to accommodate the same or greater amount of data.
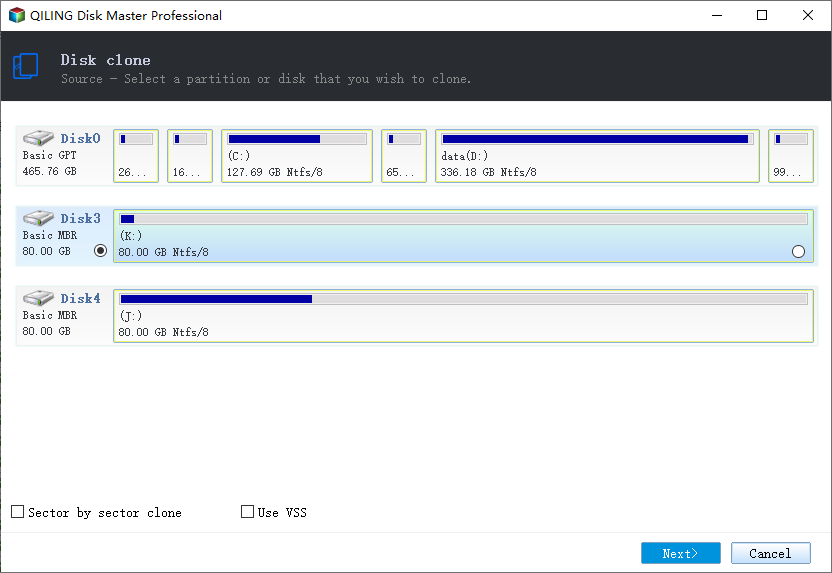
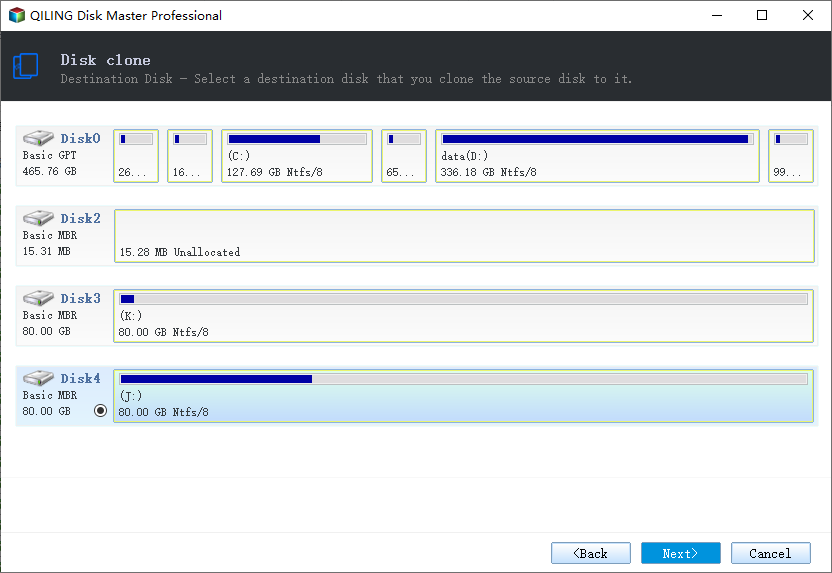
Step 2. Select the destination disk where you want to clone/copy the old disk and click Next to continue.
To confirm the program's request to erase data on the destination disk, click OK.
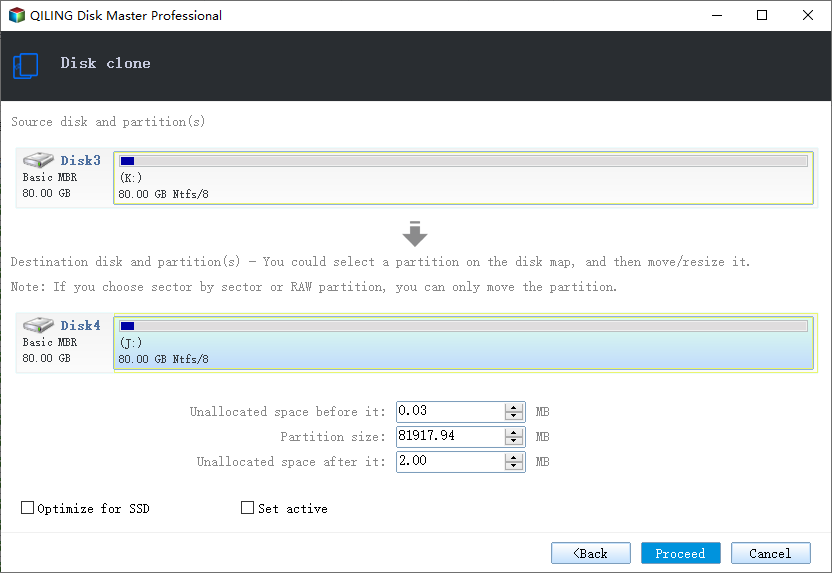
Step 3. To adjust the disk layout, select "Check and edit the disk layout" and then choose one of the following options: "Autofit the disk," "Copy as the source," or "Edit disk layout."
Autofit the disk is recommended.
The copy as the source option clones the same layout of partitions on your source disk to the destination disk.
Edit disk layout allows you to manually resize or move partition layout on the destination disk.
If your destination disk is an SSD drive, be sure to select the "Check the option if the target is SSD" option.
Click Proceed to start the disk cloning or disk copying process now.
4 - Boot Your Computer from Cloned Hard Drive
- Shut down your computer and use a screwdriver to remove the computer case.
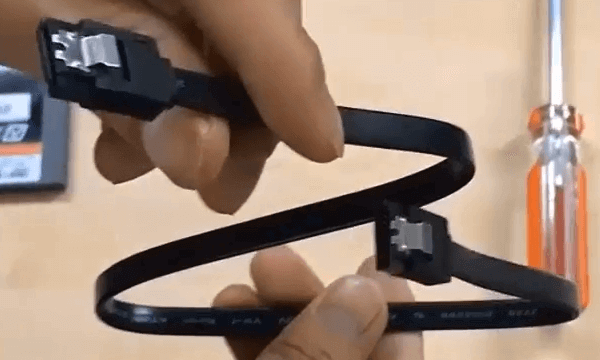
- Connect your cloned SSD to the computer via a power cable and SATA cable.
- To access the BIOS settings, restart the computer and press the F2 or Delete key to enter the BIOS setup screen.
- To set the computer to boot from the cloned SSD, go to the Boot tab, scroll down and check the "Boot Option Priorities" section, and select the cloned SSD as the boot device.
- Save all the changes and restart the computer.
Frequently Asked Question about Cloning Hard Drive to SSD
1. Is Cloning Hard Drive Safe?
As long as the disk cloning software can copy the entire source disk 100%, you can use it to move your Windows system and all its content to a new disk.
2. How long does it take to clone a hard drive?
The time it takes to clone a hard drive depends on the size of the disk and the speed of the cloning process. If the hard drive is around 500GB, the cloning process could take several hours.
Here are some tips to clone a hard drive easily and quickly:
Related Articles
- Clone Hard Drive to Larger Drive Without Reinstalling Windows and Programs
- [Full Guide] Clone Toshiba Hard Drive to SSD Quickly
- Top 6 SD Card Cloning Software Easy to Get
- How to Recover Data from Hard Drive with Bad Sectors
- How to Backup A Hard Drive Windows 7 [Ultimate Guide for Windows 7 Users]
Learn how to back up a hard drive in Windows 7 using backup tools or disk imaging to protect files before failure or upgrade. - How to Backup Don't Starve World?
If you're looking for the most efficient way to backup your Don't Starve world, this guide can help. This post will provide you with all the useful tips and guidance you need to solve this problem.