How to Clone a Windows Boot Drive to a New SSD
A boot drive is more than the visible C: partition. To start Windows from a new SSD, the replacement also needs the correct boot partition and firmware configuration.
Identify the complete boot layout
Open Disk Management and note the Windows disk, partition style, EFI System Partition or System Reserved partition, C:, and recovery partition. On UEFI computers, an EFI partition normally stores boot files. Legacy BIOS installations use a different layout. Do not copy a Windows folder and expect the SSD to boot.
Check that the replacement fits the computer and can hold the selected layout. Keep a separate copy of important files and record the BitLocker recovery key before changing the boot disk.
Choose the clone scope
A system clone automatically selects the partitions Windows needs to start; use it when moving only the operating system. A whole-disk clone is appropriate when you also want other data partitions on the source disk. Decide before starting because the target will be overwritten.
If the old drive has read errors, cloning may fail or reproduce corrupt files. Protect readable data first. If the target is smaller, make sure the system partitions fit and avoid sector-by-sector mode.
Complete the first-boot test
After cloning, shut down and install the SSD in its intended internal location. Disconnect the old boot disk if feasible, then select the new SSD's Windows Boot Manager in UEFI. A machine that boots only while the old disk is attached has not passed verification.
Check files, activation, apps, encryption, and several restarts. If startup fails, verify firmware detection and boot mode before trying repair commands. Preserve the old disk unchanged until the replacement is reliable.
Clone the Windows System with Qiling Disk Master
Use System clone for an OS-only move. The source system partitions are selected automatically; do not manually choose only C:. For other data partitions, use a full-disk clone instead.
Step 1. Connect a compatible destination SSD and open Qiling Disk Master. Choose Tools and utilities > System clone. Connect the SSD through a compatible enclosure and ensure it is detected.
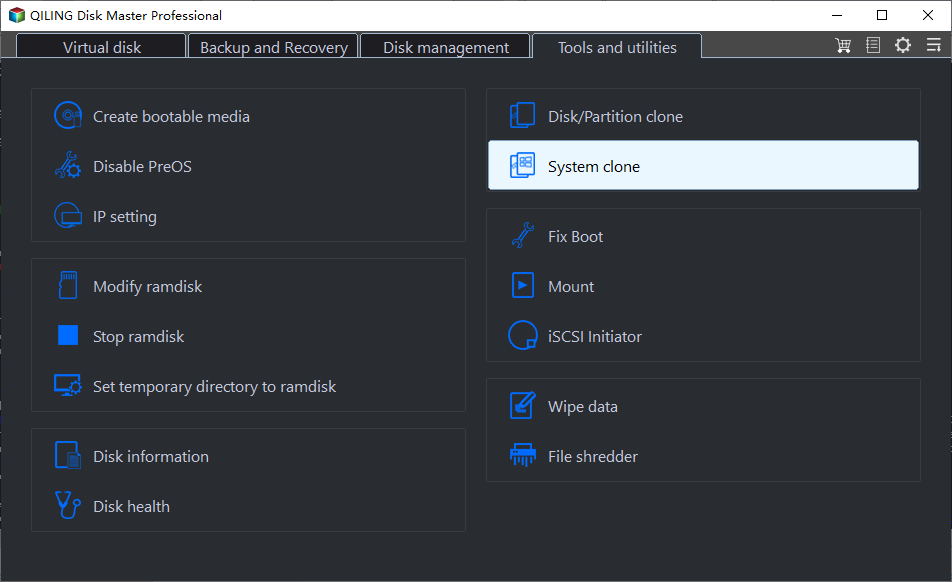
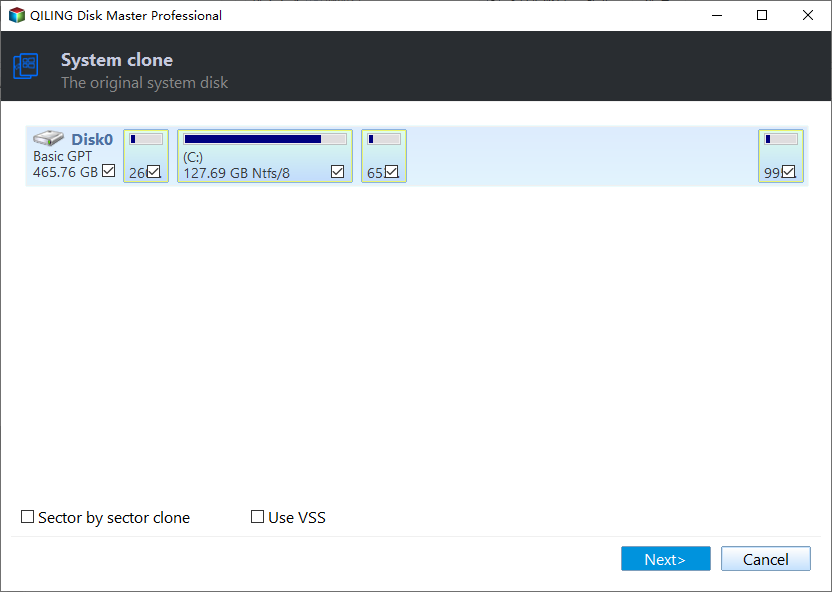
Step 2. The wizard automatically selects the Windows system partitions. Confirm that it found the intended installation, then click Next. Check the shown Windows installation and its boot partitions, especially on a PC with multiple disks.
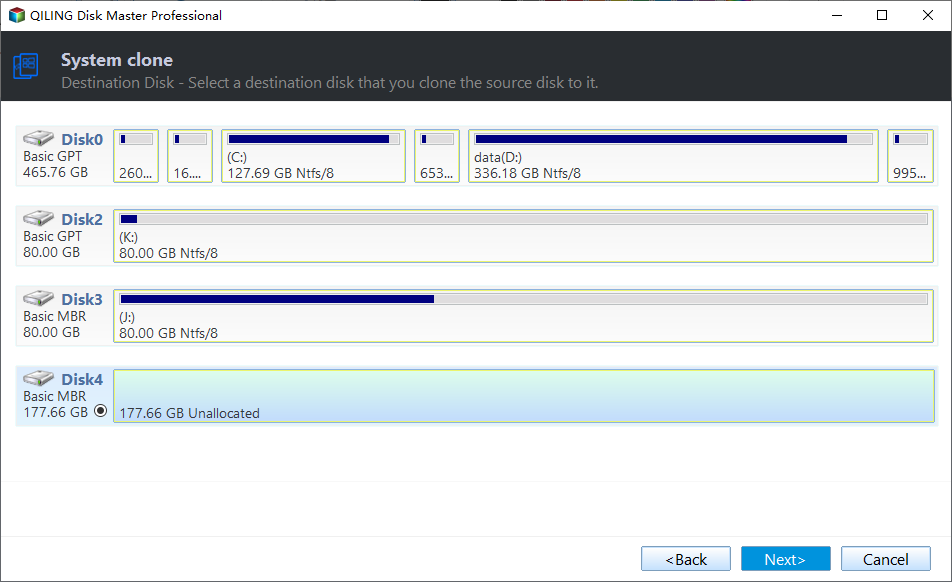
Step 3. Select the destination disk by model and capacity and click Next. Verify the new SSD by model and capacity; back up any files already there. The destination will be overwritten.
Step 4. Review the source, target, and proposed layout. Check that the system and boot partitions fit, and inspect SSD optimization if available. Click Proceed, confirm the overwrite warning, and wait for the operation to finish.

Step 5. Install the target internally, boot with the old drive disconnected, and check Windows startup and key applications. Keep the old boot disk unchanged until you have verified the new one.
Frequently Asked Questions
Why does copying C: alone fail to boot?
Boot files may be on an EFI or System Reserved partition outside C:.
Can the old drive remain installed?
Yes after verification, but disconnect it for the first test if practical to prove the new SSD can boot independently.
Conclusion
Copy the full Windows boot layout, not only the visible files, and verify independent startup before wiping the original drive.
Related Articles
- Clone SSD to SSD in Windows 10
See the whole-disk route for a complete SSD replacement. - Windows System Backup and Restore
Prepare recovery options before moving a boot disk.
Products
Articles & Tutorials
- Data Recovery
- Data Backup
- File Recovery
- File Backup
- System Backup and Restore
- Disk and Partition Clone
- Technical articles
- Mobile articles
- Disk Master Help
- Windows Data Recovery Tutorials
- Windows Secure Delete Tutorials
- Windows Partition Management Tutorials
- Windows File Backup and Restore Tutorials
- Windows System Backup and Restore Tutorials
- Windows Disk Backup and Restore Tutorials
- Windows Clone Tutorials