How to Use Deep Data Recovery
Quick Navigation:
- Step1. Select file types that you want to recover
- Step2. Select a location to scan or find data
- Step3. Preview and recover the lost files
Easy and efficient data recovery software provide two powerful scanning modes to help you restore all deleted, formatted or lost data.
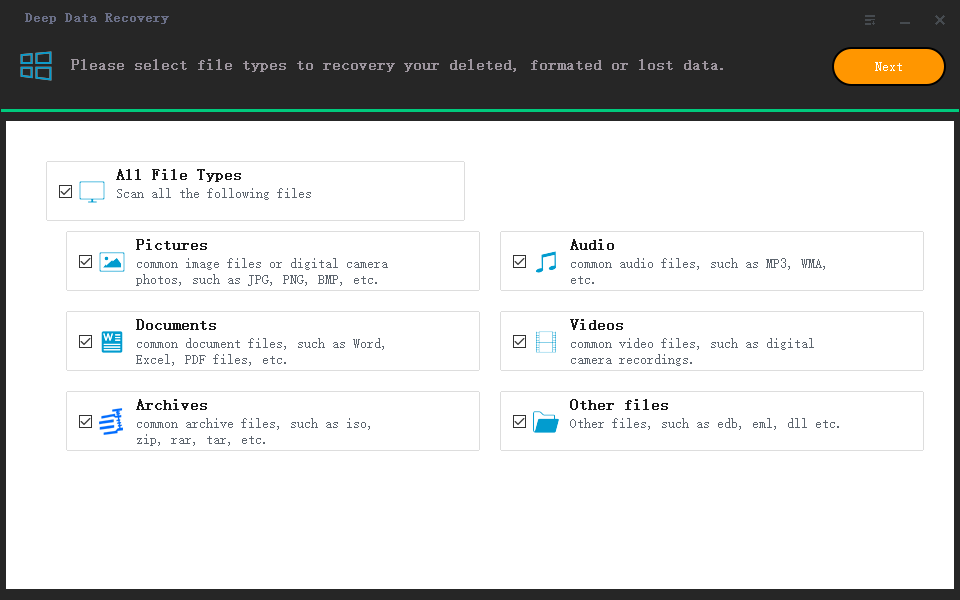
Step1. Select file types that you want to recover
When launching Deep Data Recovery, all file types are checked by default. If you only want to recover certain file types, you can uncheck and remove other file types. Click "Next" button to start restoring after selecting file types. You could check "All File Types" to select what you want if lost file type isn't among 5 common file types we list.

Step2. Select a location to scan or find data
Select a location to find data, such as certain partition, specified location etc. The program will scan the specified partitions, the entire hard drive or external storage devices to search lost data, then list what it searches. You need to select the system partition for special lost data locations like desktop, favorites or libraries.

Step3. Preview and recover the lost files
Finish Quick Scan, the upper part of the window will display the scan result and guide to "Deep Scan" for more data. A tree shaped directory put at the left of the main window can guide users to view lost files as the path or file types. The middle part will show all the files and folders under the selected folder in the left window with more info.The right side displays a thumbnail and info for the file selected in the middle window.

If some lost files are not found or cannot be correctly opened after Quick Scan and Recovery, please click "Deep Scan" at the upper part of windows to find more data. Deep Scan will scan every sector, so it will some time to complete the scanning.
After the deep scan, you still can't open the target file or not find the target file.
Related Articles
- How to Unformat SSD
- How to Unformat SD Card on Mac/Windows
- How to Unformat USB Drive
- 4 Best Ways to Recover Deleted Files in Windows 11 Without Software
Don't worry if you lose files in Windows 11. This post provides the four best ways to recover deleted files in Windows 11 without software. Read on to get more information. If you still prefer a data recovery tool, download and run Deep Data Recovery. - Top 3 Ways to Recover Deleted HTML Files on Windows 11/10/8/7
If you lost important HTML files and need to get them back, read this post. There are three ways to recover deleted HTML files on Windows 11/10/8/7. Among them, Qiling data recovery software works well in retrieving lost files from any device. - How to Recover Files from External Hard Drive Without Formatting
The best way to recover files from external hard drive without formatting is by using Deep Data Recovery. It only takes three steps to restore hard drive data. If your external hard drive gets corrupted, repair the corrupted external hard drive with the methods below.