[Solved] iPhone Keeps Freezing After Update iOS 12/11.3/11
Summary
If your iPhone is freezing and crashing after an iOS update, such as iOS 13, 12, 11.3, or 11, this article can help you find solutions. It provides tips on how to fix the issue and get your iPhone running smoothly again.
iPhone Screen Keeps Freezing After Updating to iOS 12/11
It is well-Updating your iPhone to the latest iOS version is crucial to keep it running smoothly and access new features, but it can sometimes cause issues like freezing, causing frustration for many users.
If your iPhone keeps freezing, don't worry, there are several solutions to resolve this issue. First, try restarting your iPhone, as this is often the simplest and most effective solution. If the problem persists, try disabling any recently installed apps or features, as they may be causing the issue.
To solve your iPhone freezing issue and recover lost data like messages, contacts, and photos, this article will be divided into two parts.
Two parts to fix your freezing iPhone:
Part 1. Four Solutions to Fix iPhone Freezing Issue
Here are a few solutions that have helped other users resolve their iPhone freezing problem. You may not need to try them all, just work your way down the list until you find the one that works for you.
Solution 1. Restart Your iPhone to Fix iPhone Keeps Crashing/Freezing
It's often best to try simple solutions before resorting to more complicated methods, as they can often resolve major issues quickly and easily. In this case, a simple restart of the device for 1-3 times may resolve the error, although some users have noted that this may only temporarily solve the problem, which could return in the future.
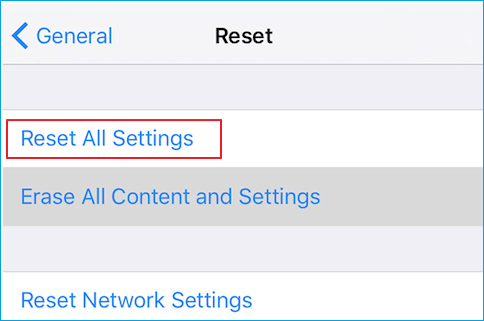
Solution 2. Reset All Settings on iPhone
Try resetting all settings on your iPhone by going to Settings > General > Reset > Reset All Settings, which will reset your general preferences without deleting existing data.
Solution 3. Downgrade to Earlier iOS Version
If your iPhone had no freezing issues on an earlier iOS version, you can try downgrading to that version.
Solution 4. Perform a DFU Mode Update/Restore
A DFU (Device Firmware Update) mode is a special state where your iPhone can communicate with iTunes without being fully turned on. This allows iTunes to update or restore your device while preserving your settings and contents.
To perform a DFU mode update or restore on your iPhone 6 Plus, connect your device to your computer and open iTunes. Press and hold the Sleep/Wake button for 3 seconds, then release it.
- Connect your iPhone to a computer using the OEM or Apple-provided USB cable, and ensure the computer has the latest version of iTunes installed.
- Press and hold the Power button and the Home button at the same time on your iPhone. This will initiate a shutdown process and your iPhone will restart.
- Release both keys when you see the iTunes logo, arrow, and lightning cable on the screen.
- After the iPhone is detected, you'll be prompted to either Restore or Update your iPhone through iTunes. Select Update to proceed with a firmware update, or Restore to restore from a backup. This process should restore your iPhone to normal if everything goes smoothly.
Selecting the Restore option will erase all settings and contents from your device, so make sure to back up your device before proceeding.
Part 2. Recover Lost Files from iPhone After Fix the Freezing Screen
If you've lost files like photos, videos, messages, or contacts, we recommend using Qiling MobiSaver, the world's first iPhone data recovery software that can recover a wide range of lost information, including photos, songs, videos, calendar schedules, notes, and more, from iPhone 11/X/8/7/6, iPad 2/1, the New iPad, and iPod touch.
Method 1. Recover Data Directly from iPhone
The easiest way to solve this is to recover or restore data directly from your iDevices. Let's see how to make it.
Step 1. Connect iPhone to Your PC
Launch Qiling MobiSaver. Click "Recover from iOS device" on the left and click "Start".
Step 2. Scan for Lost iPhone Data
Qiling MobiSaver will automatically scan your iPhone/iPad/iPod, finding both existing and previously lost data, and the process will complete once the scan is finished.
Step 3. Click the "Recover" Button
You can recover and save lost data like photos, videos, contacts, and other files to a new location.
Method 2. Recover Data from iTunes Backup File
If you have iTunes backup files for your iPhone, you can try another data recovery mode of Qiling MobiSaver called "Recover from iTunes Backup". It's a relatively straightforward process.
Step 1. Run Qiling MobiSaver
To recover data from an iTunes backup using Qiling MobiSaver, download the software, connect your iPhone or iPad to your computer, start Qiling MobiSaver, select "Recover from iTunes Backup", and then choose an iTunes backup file.
Step 2. Unlock iTunes
If the iTunes backup is encrypted, enter the password to unlock it, then click "Continue" and Qiling MobiSaver will scan the backup to find lost data.
Step 3. Preview and Recover Data from iTunes
After scanning, preview the detailed contents of your lost photos/videos, contacts/messages, notes, and SNS data. Choose the desired file and click the "Recover" button to save it on your computer.
Method 3. Recover iPhone Files from iCloud
Step 1. Choose "Recover from iCloud"
Connect your iPhone to your PC, launch Qiling MobiSaver, and choose the "Recover from iCloud" option, then click "Start".
Step 2. Turn Off "Find My iPhone"
Turn off "Find My iPhone" on your iPhone/iPad/iPod to continue.
Step 3. Type Code in the Confirmation Box
To confirm the action, type "123456" in the confirmation box and then click the "Continue" button.
Note: This step will completely erase all data and reset all settings, so it's essential to ensure that any important information has been backed up beforehand.
Step 4. Reset iPhone
To reset your iPhone, move through the setup process until you reach the reset screen, then select "Restore from iCloud Backup". Enter the Apple ID and password associated with the account you want to restore the backup from, and click "Next" to proceed.
Step 5. Select the Files
To recover data, select the type of data you want to recover, such as all files, or specific file types like documents, images, or videos. If you want to restore all files, you can click the "Select All" button below to proceed.
Step 6. Analyze the iPhone
The software will analyze your phone, which may take a few minutes, and please refrain from disconnecting or using your device during this time.
Step 7. Scan Lost Data and Recover
Qiling MobiSaver will automatically scan your iCloud backup file to find the lost data, which may take a few minutes, and then you can select the data you want to recover and click the "Recover" button.
Related Articles
- Fixed: iPhone Stuck in Recovery Mode after Failed Update
- 4 Ways to Recover Deleted WhatsApp Attachments on iPhone/Android (with Pictures)
- How to Fix iTunes Sync Error 54 on Windows and Mac
- How to View and Retrieve Call History from iCloud [iOS 15 Available]
- Best File Shredder Software for Windows 10 Free Download
File shredder is a must if you want to securely delete files on your Windows PC. Here are the top 10 best file shredder for Windows 10 you can make use of. - Why C Drive Is Full and How to Make Space
Are you facing the issue of a full C drive on your Windows device? Don't worry, this guide will walk you through the process of solving the problem and freeing up space on your C drive.