Create More Than 4 Partitions on a Windows Disk
Create more than 4 partitions on a Windows disk by understanding MBR limits, extended partitions, GPT conversion, and safe partition planning.
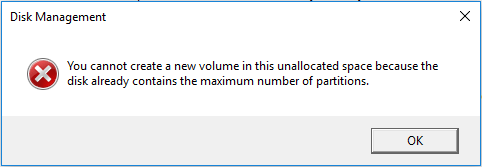
What This Problem Usually Means
MBR disks allow only four primary partitions. To create more, you need an extended partition with logical drives, or you can convert the disk to GPT if the PC and boot mode support it.
What to Check First
- Check whether the disk is MBR or GPT.
- Back up important files before changing partition style.
- Use GPT for modern systems that need many partitions.
- Do not convert a boot disk without confirming UEFI support.
Create More Than 4 Partitions with the Right Disk Layout
An MBR disk can have only four primary partitions. To create more, either convert the disk to GPT on modern UEFI systems or use an extended partition with logical drives on older MBR systems. Back up the disk before changing the partition style.
First: Check Whether the Disk Is MBR or GPT
Step 1. Open Qiling Disk Master and review the target disk. Confirm the disk number, capacity, partition style, and existing partitions.
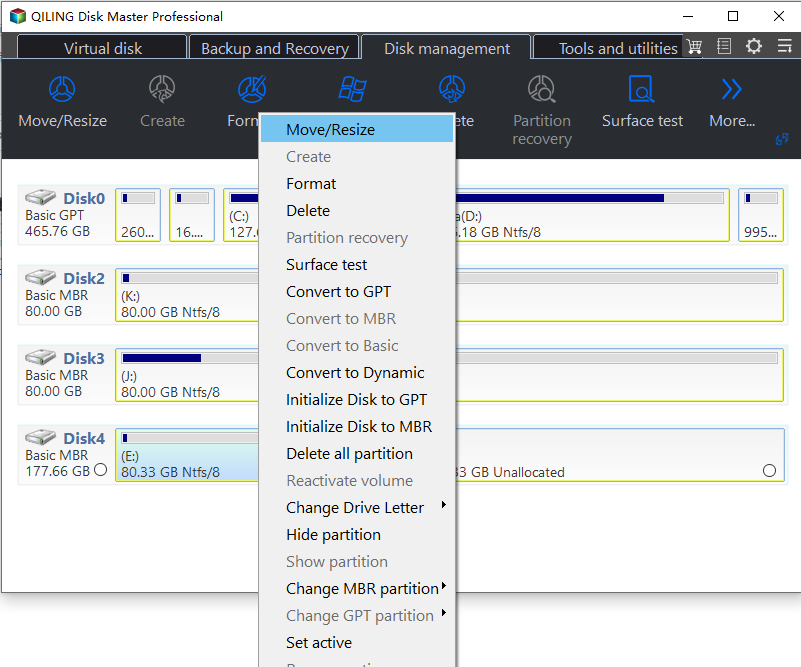
Step 2. If the disk is GPT, you can create more partitions directly as long as unallocated space is available. Go to the create partition steps below.
Step 3. If the disk is MBR and already has four primary partitions, decide whether to convert it to GPT or keep MBR for older compatibility.
Option 1: Convert MBR to GPT for Modern PCs
Step 1. Use this option for a data disk or for a computer that supports UEFI boot. Back up the disk first, especially if it is a system disk.
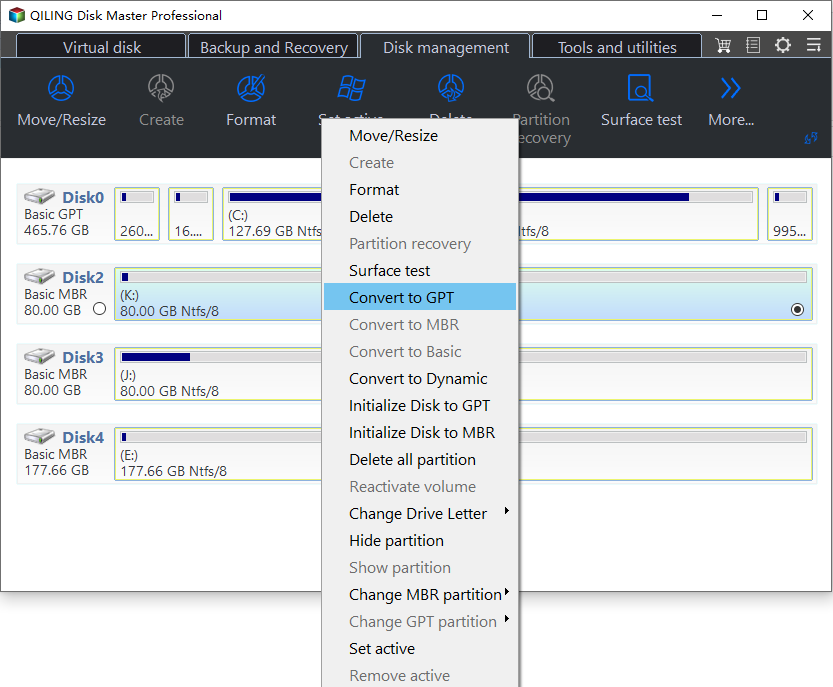
Step 2. Select the whole MBR disk and choose the conversion option to GPT. Do not select only one partition.
Step 3. After conversion, return to the disk map and use the unallocated space to create additional partitions. If it is a boot disk, enter BIOS/UEFI and switch the firmware mode to UEFI before starting Windows.
Option 2: Create Partitions in Unallocated Space
Step 1. Select the unallocated space and choose Create Partition. If there is no unallocated space, shrink a data partition first or move files to another drive.
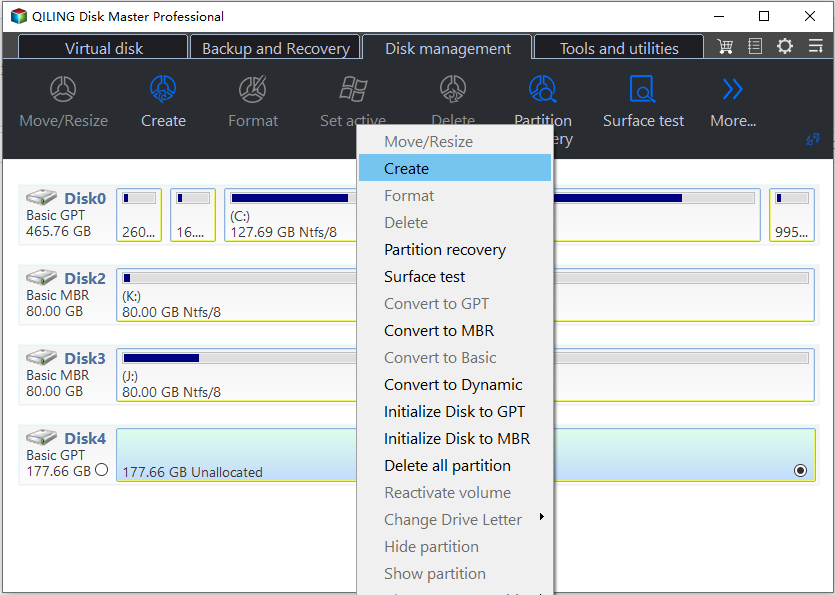
Step 2. Set the partition size, drive letter, file system, and label. Use NTFS for normal Windows storage and exFAT only when you need cross-device compatibility.
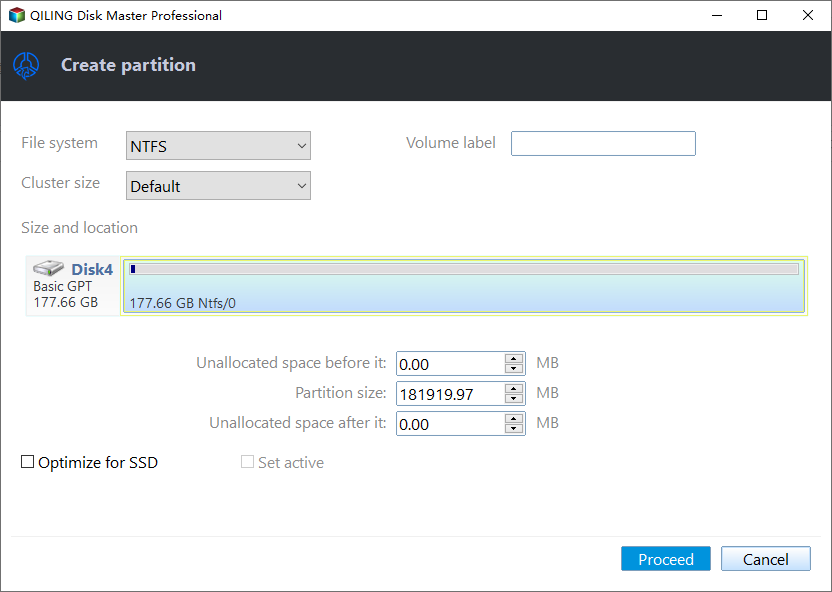
Step 3. Preview the new partition operation. Make sure the new partition is created on the intended disk and no existing partition is being deleted or formatted.
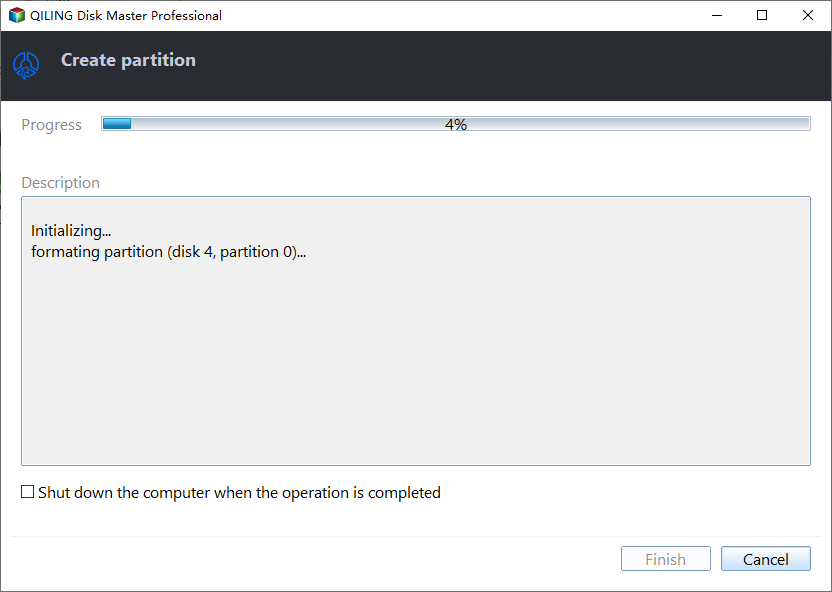
Step 4. Click Proceed. After Windows detects the new volume, open File Explorer and confirm the new drive letter works.
If You Must Keep MBR
If an old PC or device requires MBR, keep in mind that MBR cannot hold more than four primary partitions. You must use an extended partition with logical drives or remove an unnecessary primary partition after backing it up. For a modern Windows PC, converting the disk to GPT is usually cleaner and easier to maintain.
FAQ
Should I make changes before backing up? If the disk is readable and the files matter, back up first. Repairs, formatting, conversion, and cloning can change boot records or partition data.
When should I use Windows built-in tools? Use Settings, Disk Management, Startup Repair, CHKDSK, SFC, DISM, or account recovery first when the issue is simple and the risk is low.
When does Qiling help? Use Qiling tools when you need a clearer disk map, a bootable recovery environment, backup before repair, partition preview, disk cloning, or controlled password recovery on an authorized PC.
Conclusion
The four-partition limit is an MBR design limit, not a Windows bug. GPT is usually the cleaner long-term layout for modern PCs.
Related Articles
- Windows Partition Management Tutorials
Find practical Windows partition guides for resizing, formatting, checking, converting, and repairing disks without unnecessary risk. - Windows System Backup and Restore Tutorials
Browse Windows backup and restore guides for system images, recovery drives, restore points, and safe repair preparation.
Products
Articles & Tutorials
- Data Recovery
- Data Backup
- File Recovery
- File Backup
- System Backup and Restore
- Disk and Partition Clone
- Technical articles
- Mobile articles
- Disk Master Help
- Windows Data Recovery Tutorials
- Windows Secure Delete Tutorials
- Windows Partition Management Tutorials
- Windows File Backup and Restore Tutorials
- Windows System Backup and Restore Tutorials
- Windows Disk Backup and Restore Tutorials
- Windows Clone Tutorials