Can You Delete a Recovery Partition in Windows 11?
Windows 11 may show more than one partition labelled Recovery after upgrades. That label alone does not tell you which partition Windows Recovery Environment (WinRE) currently uses. Deleting the active partition can remove local recovery tools and complicate a future update, so identify its role before reclaiming space.
Map the Recovery Partitions
Step 1. In an elevated Terminal run reagentc /info. Record Windows RE status and the Windows RE location, including its disk and partition numbers.
Step 2. Open Disk Management and record the Windows disk number, the size and order of every small partition, and the C: volume. Do not confuse the EFI System Partition, Microsoft Reserved partition, OEM image, and WinRE partition.
Step 3. Compare the location from reagentc /info with the disk map. If the location is blank, status is disabled, or the disk map is ambiguous, stop and diagnose WinRE first. Do not guess which partition is obsolete.
Decide Whether Deletion Is Necessary
If C: lacks space, ordinary cleanup or moving user files is safer than deleting a small recovery partition. If a larger Windows update created an extra old partition, verify the newer active WinRE location and keep recovery media available. A manufacturer recovery partition may contain a factory image, not just Windows tools.
Deleting a recovery partition does not automatically add its capacity to C:. The freed space must be adjacent and on the correct side for Windows Disk Management to extend C:. If another partition lies between them, deleting the wrong item may gain no usable C: space while still removing recovery capability.
Create a Restorable Backup First
Before any partition change, save a system image to a separate physical drive and confirm it is readable. Also save the BitLocker recovery key and prepare official Windows recovery media.
Step 1. Connect an external disk, open Qiling Disk Master, and choose System backup under Backup and Recovery.

Step 2. Verify all Windows and boot partitions selected by the task, then choose the external destination and check capacity.

The sample source screen shows too little free space at its default destination. Select a sufficiently large external drive before clicking Proceed; the example disk sizes are not recommendations for your PC.
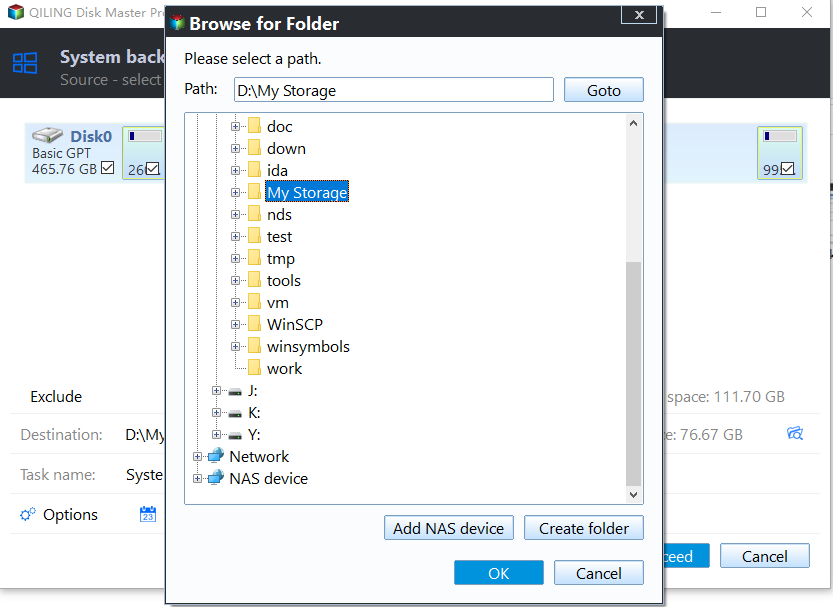
Step 3. Click Proceed, wait for success, and verify that the image can be opened. Keep the external disk disconnected from subsequent partition work.
What Must Be Confirmed Before Removal
Removal is irreversible for that partition's contents. The exact disk and partition number, active WinRE location, OEM recovery role, backup status, and a plan to restore WinRE must all be confirmed. Do not delete a partition because its size resembles another example online.
After any approved layout change, run reagentc /info again and verify that Windows RE remains enabled and points to an existing location. Test the recovery menu before discarding external recovery media. If WinRE is disabled, do not claim the operation succeeded merely because C: has more free space.
Related Articles
- System Backup and Restore
Create and verify a Windows backup before major repairs. - Check Disk Health
Recognize storage warnings before changing a drive.
Products
Articles & Tutorials
- Data Recovery
- Data Backup
- File Recovery
- File Backup
- System Backup and Restore
- Disk and Partition Clone
- Technical articles
- Mobile articles
- Disk Master Help
- Windows Data Recovery Tutorials
- Windows Secure Delete Tutorials
- Windows Partition Management Tutorials
- Windows File Backup and Restore Tutorials
- Windows System Backup and Restore Tutorials
- Windows Disk Backup and Restore Tutorials
- Windows Clone Tutorials