Enable Write Protection to USB Drive in Windows
Learn how to enable USB write protection in Windows and how to remove it later when the drive must be reused.
Why Enable Write Protection on a USB Drive?
Write protection can prevent accidental deletion, unwanted changes, or malware writing new files to a USB drive. It is useful for distributing files, storing installers, or keeping a recovery USB unchanged.
Ways to Enable Protection
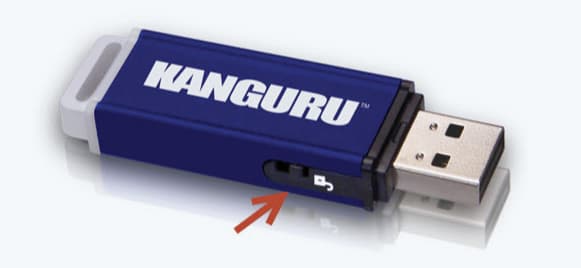
- Use the physical lock switch if the USB or SD adapter has one.
- Set Windows storage policy to block writing to removable drives.
- Use disk attributes carefully when you understand the target disk.
- Keep a separate editable copy of important files.
If You Need to Use the USB Again
When a protected USB must be reused, remove the protection first, then format only after data is safe.
Remove Write Protection with Qiling Disk Master
Write protection can come from a physical switch, Windows policy, read-only attributes, file system errors, or a failing flash controller. Check the simple causes first before formatting the drive.
Check the Drive and Remove Protection
- Inspect the USB drive or SD card adapter for a physical lock switch. Move it to the unlock position and reconnect the device.
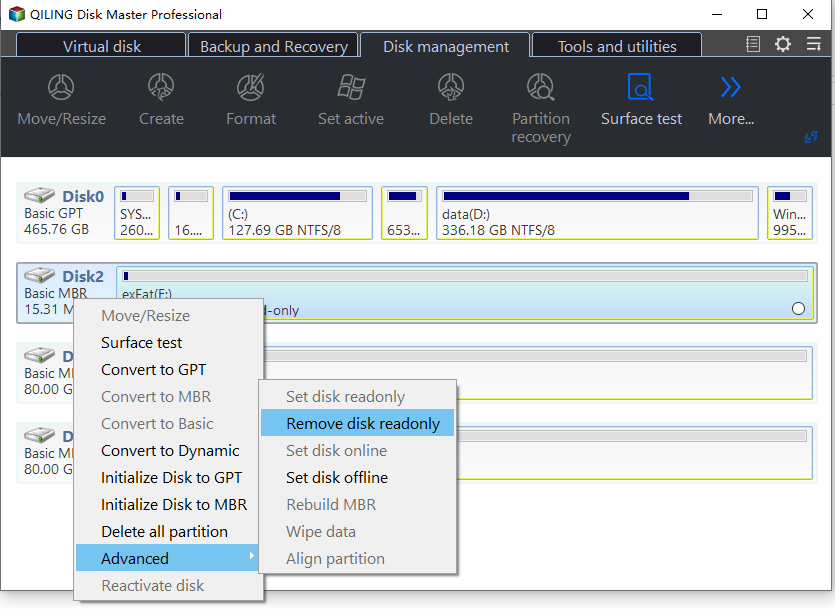
- Open Qiling Disk Master, select the protected drive, and use the write-protection removal option when available.
Format Only After Data Is Safe
Formatting removes the existing file system and makes current files unavailable. Use it only after you have copied needed files to another location or confirmed that the USB drive contains no data you need.
- If the drive becomes writable, copy important files out before doing more repairs. Do not format a USB drive that still contains the only copy of your files.
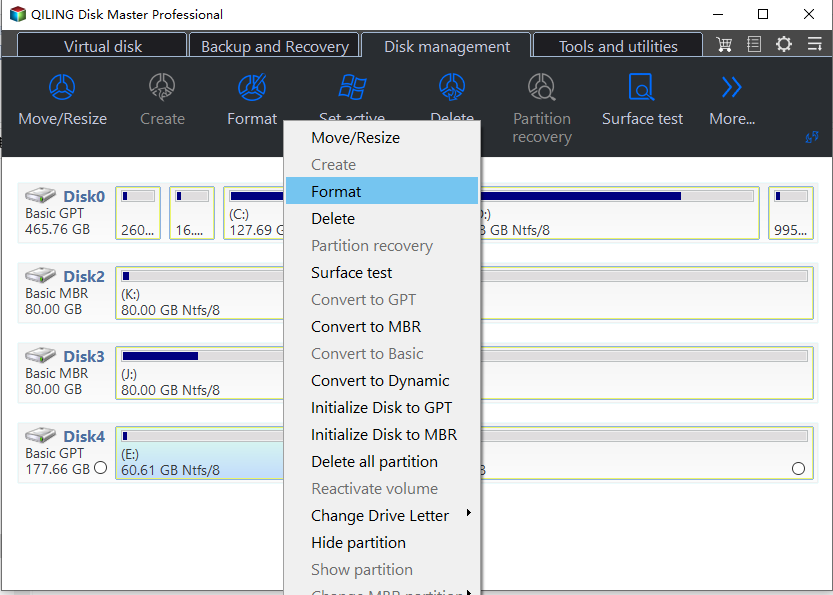
- In Qiling Disk Master, identify the USB partition by its capacity, drive letter, and label. Right-click that partition and choose Format.
- Enter a partition label and select the file system. Choose exFAT for most USB drives shared with modern Windows PCs and other devices, NTFS for Windows-only storage, or FAT32 only when an older device requires it.
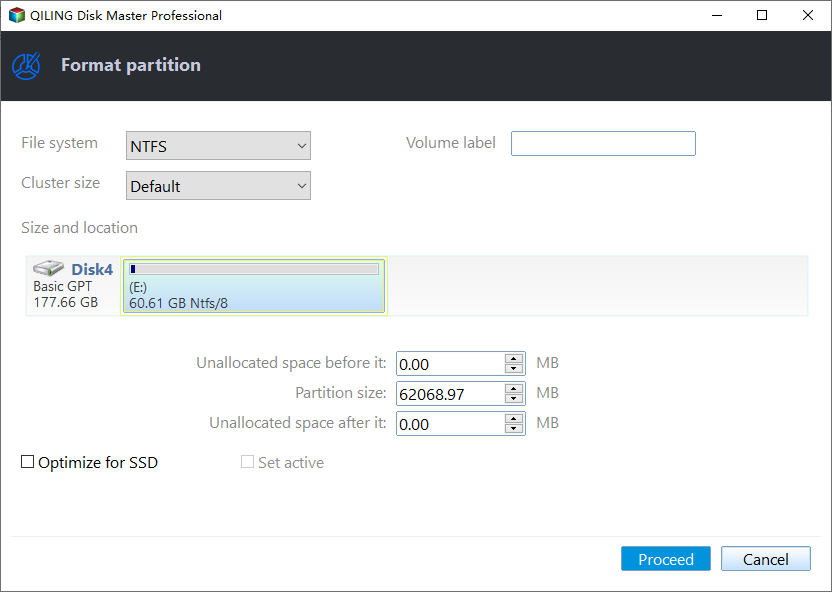
- Review the warning and confirm that the selected USB partition is correct. Click the confirmation button only after you have verified that the required files are backed up.
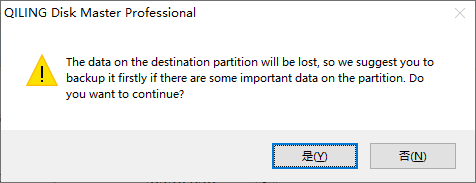
- Wait for formatting to finish, then open the USB drive in File Explorer to confirm that it is writable. Safely eject the drive before disconnecting it.
Related Articles
- Windows Partition Management Tutorials
Find practical Windows partition guides for resizing, formatting, checking, converting, and repairing disks without unnecessary risk. - Windows System Backup and Restore Tutorials
Browse Windows backup and restore guides for system images, recovery drives, restore points, and safe repair preparation.
Products
Articles & Tutorials
- Data Recovery
- Data Backup
- File Recovery
- File Backup
- System Backup and Restore
- Disk and Partition Clone
- Technical articles
- Mobile articles
- Disk Master Help
- Windows Data Recovery Tutorials
- Windows Secure Delete Tutorials
- Windows Partition Management Tutorials
- Windows File Backup and Restore Tutorials
- Windows System Backup and Restore Tutorials
- Windows Disk Backup and Restore Tutorials
- Windows Clone Tutorials