Ender 3 SD Card Format Guide for Windows
Format an Ender 3 SD card correctly in Windows. Choose FAT32, check the card, and avoid data loss.
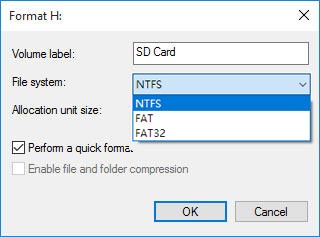
What Format Does Ender 3 Need?
Most Ender 3 printers work best with a small SD or microSD card formatted as FAT32. If the printer does not read G-code files, the card may use the wrong file system, contain hidden errors, or be too large for the printer firmware.
What to Check First
- Copy existing G-code files to the PC before formatting.
- Use a reliable card reader and avoid unstable USB hubs.
- Use simple file names and keep files in the card root if the printer has trouble reading folders.
- Test the card for errors if printing stops or files disappear.
Format or Repair the Drive with Qiling Disk Master
Formatting can rebuild the file system, but it also removes normal access to existing files. Recover or back up needed data first, especially on SD cards, USB drives, and external drives.
Select the Correct Partition
- Open Disk management and identify the target drive by capacity, drive letter, and device name.
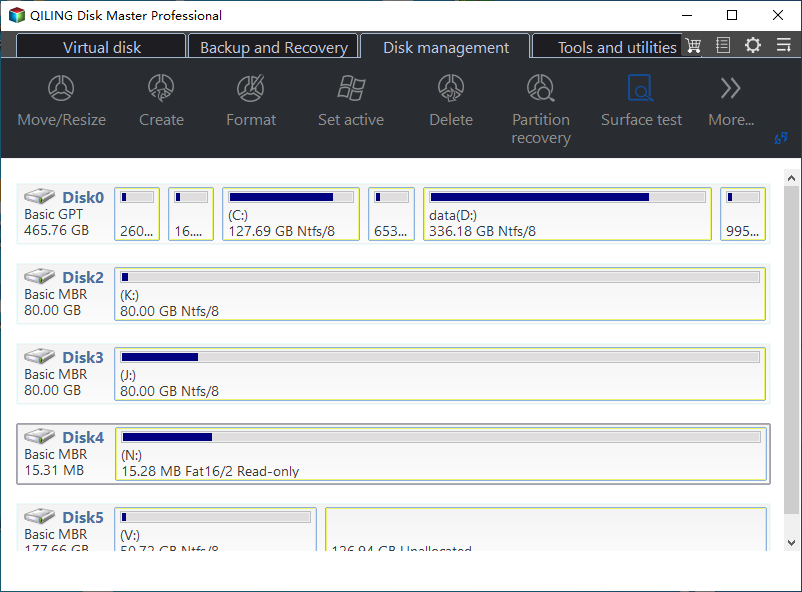
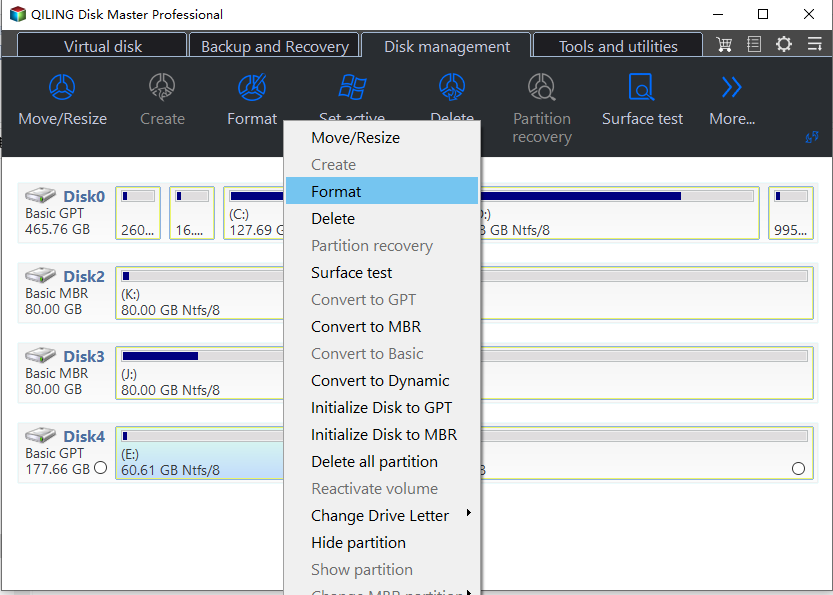
- Right-click the partition and choose Format.
Choose File System and Confirm
- Set the partition label and file system. Use NTFS for Windows internal drives, exFAT for large removable drives used across devices, and FAT32 only when the device requires it.
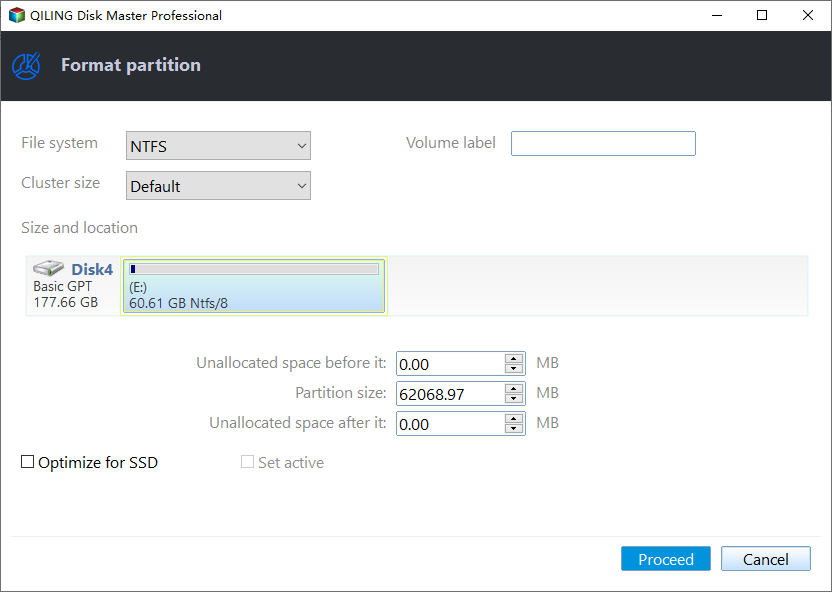
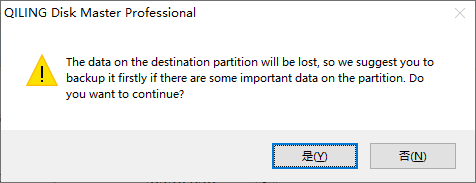
- Read the warning. If the drive contains files you need, cancel and recover or back up the files first. If the drive is ready, confirm and let the format finish.
Check Disk Health with Qiling Disk Master
Testing a drive helps separate software errors from hardware trouble. If the drive clicks, disconnects, or reports many bad sectors, back up or clone it before running heavy repair operations.
Run a Surface Test
- Open Disk management, select the disk or partition, and choose Surface test.
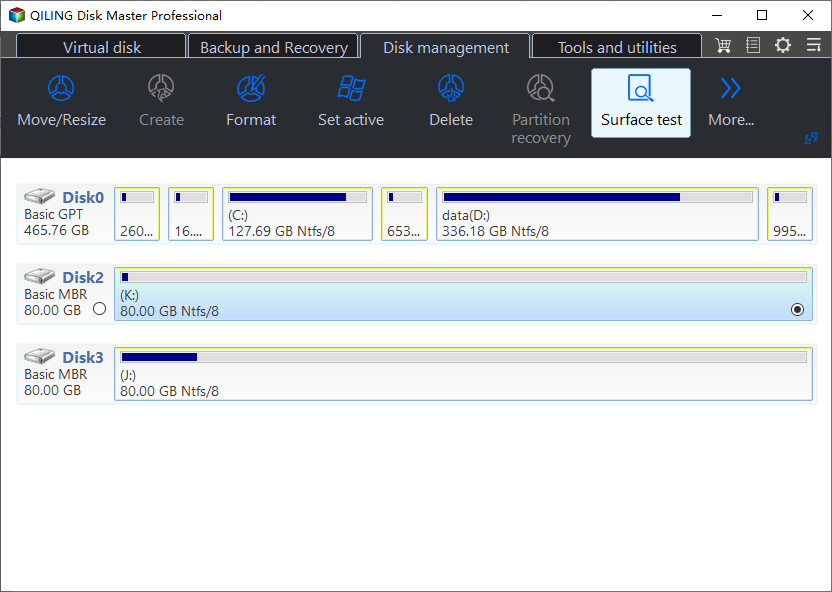
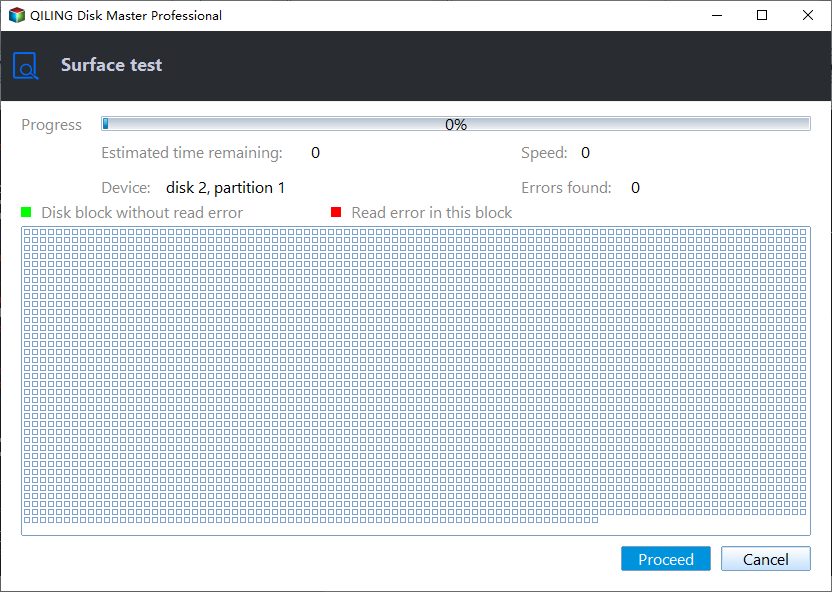
- Start the scan and wait for the result. Do not interrupt the test on a drive that is already unstable.
Decide the Next Step
- If no bad sectors are found, continue with Windows checks such as CHKDSK, driver updates, or cable replacement.
- If many bad sectors appear, stop using the disk for daily work. Create a disk image or clone it to a healthy drive before the condition gets worse.
Related Articles
- Windows Partition Management Tutorials
Find practical Windows partition guides for resizing, formatting, checking, converting, and repairing disks without unnecessary risk. - Windows System Backup and Restore Tutorials
Browse Windows backup and restore guides for system images, recovery drives, restore points, and safe repair preparation.
Products
Articles & Tutorials
- Data Recovery
- Data Backup
- File Recovery
- File Backup
- System Backup and Restore
- Disk and Partition Clone
- Technical articles
- Mobile articles
- Disk Master Help
- Windows Data Recovery Tutorials
- Windows Secure Delete Tutorials
- Windows Partition Management Tutorials
- Windows File Backup and Restore Tutorials
- Windows System Backup and Restore Tutorials
- Windows Disk Backup and Restore Tutorials
- Windows Clone Tutorials