MBR to GPT Converter for Windows
Convert MBR to GPT in Windows safely. Learn when conversion is needed, what to check before UEFI boot, and how to avoid data loss.
What This Problem Usually Means
Converting MBR to GPT is often needed for UEFI boot, Windows 11 readiness, or disks larger than 2TB. The conversion affects the partition table, so you should confirm boot mode and back up files first.
What to Check First
- Check whether the PC supports UEFI.
- Back up the disk or important partitions.
- Make sure the system has an EFI partition or room to create one.
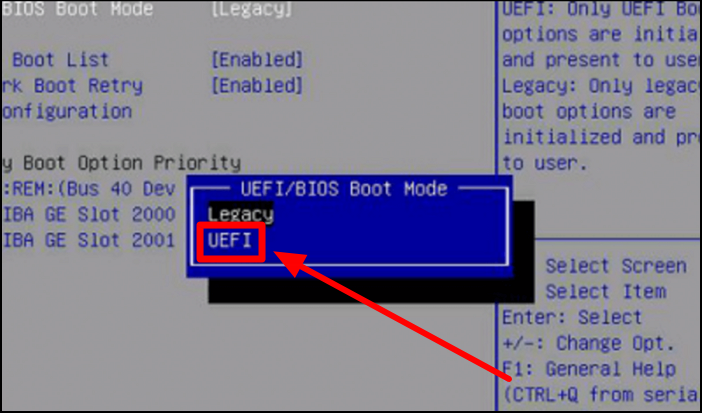
- Plan to switch BIOS mode from Legacy to UEFI after conversion.
Convert MBR to GPT with Qiling Disk Master
Use Qiling Disk Master when you need a visual MBR to GPT conversion workflow. The conversion is done on the whole disk, not on one partition. If the disk contains Windows, the PC must also boot in UEFI mode after the conversion.
Confirm the Disk and Create a Full Backup
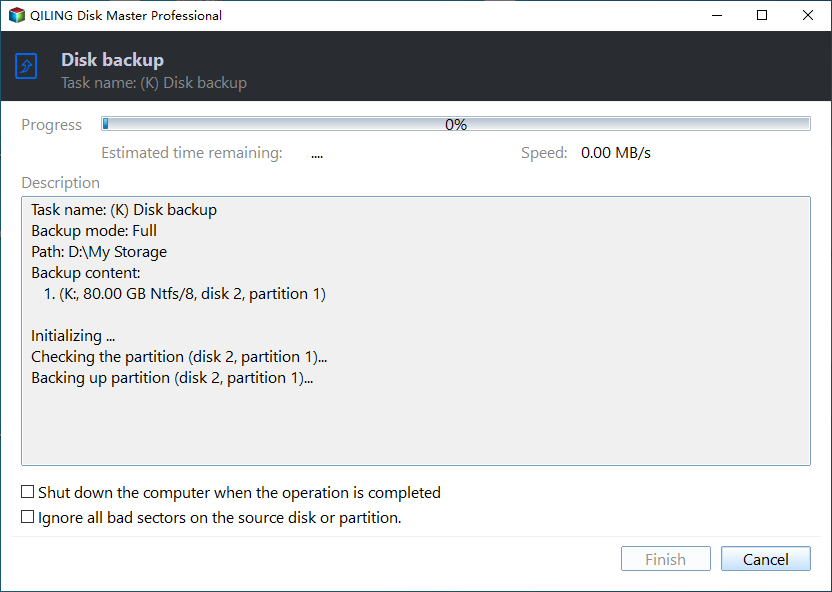
Before converting an MBR disk, create a full disk image on another physical drive or a NAS location. A disk backup protects the boot partitions, Windows partition, and data partitions together, so you can restore the original layout if the conversion or later boot-mode change does not work as expected.
Step 1. Open Qiling Disk Master and go to Disk management. Identify the MBR disk by its disk number, capacity, model, partition layout, and drive letters. If it is the Windows system disk, make sure you select the whole physical disk rather than only C drive.
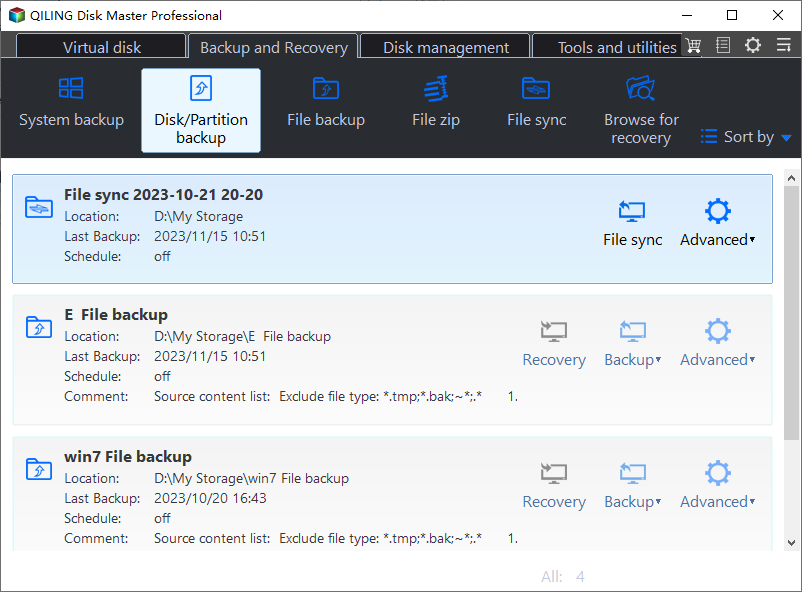
Step 2. Open Backup and Recovery and choose Disk/Partition backup. This backup type is appropriate before MBR-to-GPT conversion because it can include every partition on the selected disk.
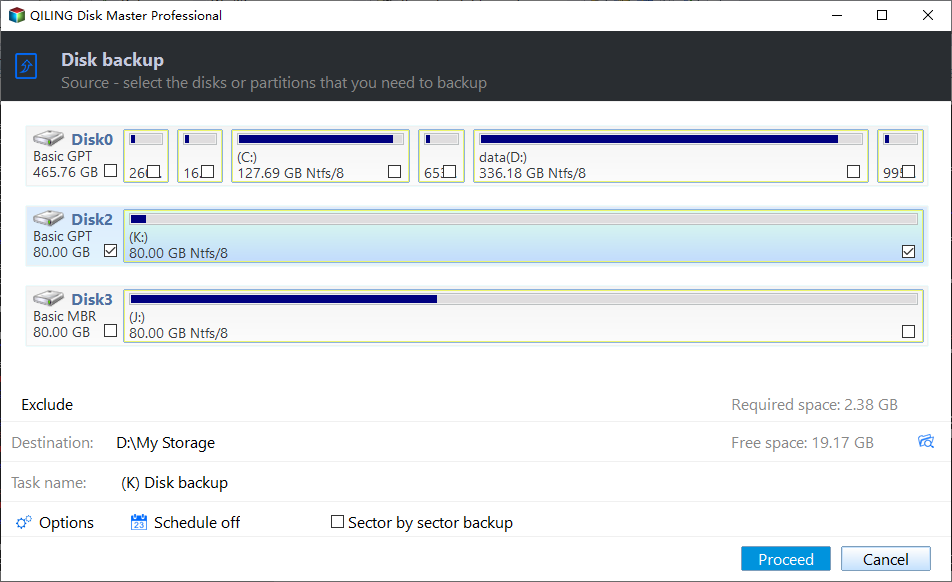
Step 3. Select the entire MBR disk as the backup source. Check the disk number, capacity, and partitions once more. Do not select only one partition when you need a rollback backup for a Windows system disk.
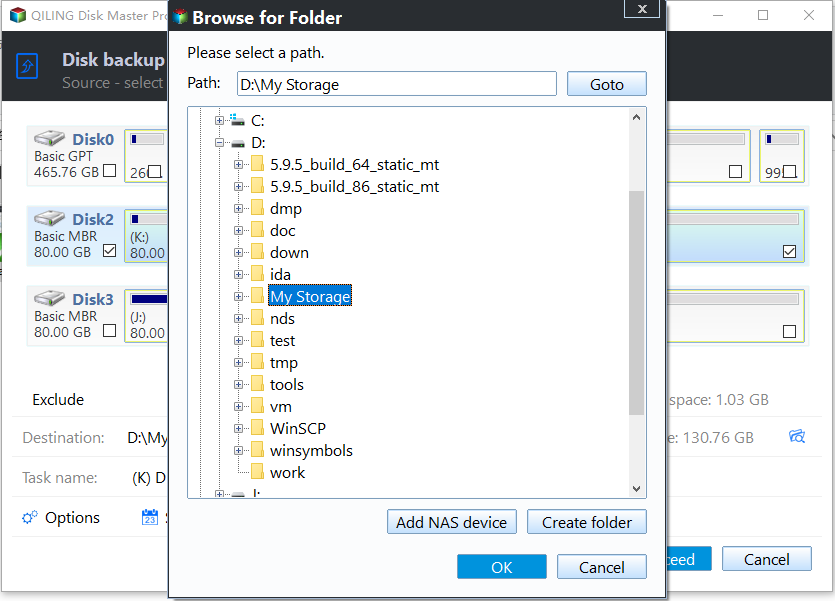
Step 4. Choose a destination on another physical disk, an external drive, or a NAS folder with enough free space. Do not save the backup image on the MBR disk that you are about to convert.
Step 5. Review the source disk and destination path, then click Proceed. Keep the source and destination drives connected until the backup finishes, and confirm that the backup image appears in the destination folder before starting the conversion.
Choose Convert to GPT on the Whole Disk
Step 1. Select the whole MBR disk, not just C drive or another single partition.
Step 2. Right-click the disk area and choose Convert to GPT. If the option is unavailable, check whether the disk is already GPT or whether another pending operation is blocking the task.
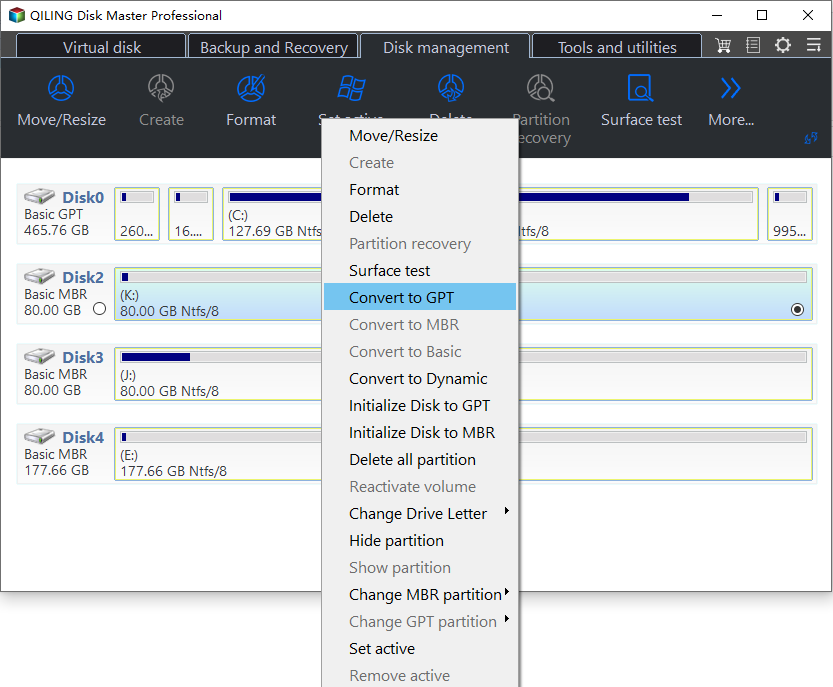
Step 3. Wait until the conversion finishes. Do not restart the PC, close the tool, or unplug the drive during the process.
Check the Result
Step 1. Reopen Qiling Disk Master or Windows Disk Management and confirm the disk now shows as GPT.
Step 2. Open important partitions and check whether files are accessible. For a data disk, the conversion is complete after the partitions are readable.
If It Is a Windows System Disk, Switch to UEFI
Step 1. Restart the computer and enter BIOS/UEFI settings.
Step 2. Change the boot mode from Legacy or CSM to UEFI. If Windows Boot Manager appears in the boot list, set it as the first boot option.
If Windows Does Not Boot After Conversion
Step 1. Return to BIOS/UEFI and confirm UEFI mode is enabled. If the firmware is still in Legacy mode, the converted GPT disk may not boot.
Step 2. If Windows Boot Manager is missing, start from Windows recovery media or Qiling bootable media and repair the boot files.
Step 3. If the disk conversion was not suitable for the computer, restore the system backup instead of repeatedly changing partition style.
FAQ
Should I make changes before backing up? If the disk is readable and the files matter, back up first. Repairs, formatting, conversion, and cloning can change boot records or partition data.
When should I use Windows built-in tools? Use Settings, Disk Management, Startup Repair, CHKDSK, SFC, DISM, or account recovery first when the issue is simple and the risk is low.
When does Qiling help? Use Qiling tools when you need a clearer disk map, a bootable recovery environment, backup before repair, partition preview, disk cloning, or controlled password recovery on an authorized PC.
Conclusion
MBR to GPT conversion is useful, but it is not just a disk setting. The firmware boot mode and Windows boot files must match the converted disk.
Related Articles
- Windows Partition Management Tutorials
Find practical Windows partition guides for resizing, formatting, checking, converting, and repairing disks without unnecessary risk. - Windows System Backup and Restore Tutorials
Browse Windows backup and restore guides for system images, recovery drives, restore points, and safe repair preparation.
Products
Articles & Tutorials
- Data Recovery
- Data Backup
- File Recovery
- File Backup
- System Backup and Restore
- Disk and Partition Clone
- Technical articles
- Mobile articles
- Disk Master Help
- Windows Data Recovery Tutorials
- Windows Secure Delete Tutorials
- Windows Partition Management Tutorials
- Windows File Backup and Restore Tutorials
- Windows System Backup and Restore Tutorials
- Windows Disk Backup and Restore Tutorials
- Windows Clone Tutorials