How to Reformat a Hard Drive in Windows 11/10 and Mac [2022 Guide]
Before reformatting a hard drive or external hard drive to its factory settings, it's essential to create a backup of your disk to keep everything secure and intact. This precautionary step ensures that you don't lose any important data during the formatting process. By backing up your disk, you can safely start from scratch and wipe the drive clean, knowing that your files and data are safely stored elsewhere.
Hard Disk Backup in Windows [Beginners Guide]
If you're looking for a straightforward guide to backing up your computer's hard disk data, this guide can help. This beginner-friendly guide will walk you through the process of creating a hard disk backup on your own, making it easy to protect your important files and data.
In this article, you'll learn:
- 1. You should format or reformat your hard drive when it becomes corrupted, infected with malware, or when you want to sell or give away your computer. Additionally, you may need to reformat your hard drive if it's running low on space or if you're upgrading to a new operating system.
- 2. What format should you format the hard drive?
- 3. How to reformat a hard drive in Windows or Mac?
To successfully reformat your hard drive, if you're not clear about the answers. Just follow the guide below, and you'll learn how to do it effectively.
When to Format or Reformat a Hard Drive
People may need to reformat their hard drives for various reasons or moments, such as upgrading to a new operating system, removing viruses, or selling their computer. If you're facing one of these situations, you'll need to reformat your hard drive on either a Windows or Mac computer.
- A hard drive can become full even if it doesn't appear to have many files stored on it, due to various reasons. This could be because of large files, such as videos or high-resolution images, taking up space, or because of the way the operating system and file system are configured, leading to wasted space and fragmentation.
- If your computer or hard drive is running slower than you'd like, formatting it for a fresh start might be a good idea. However, before you do that, you may want to try some other troubleshooting steps to see if you can speed it up first.
- Format a hard drive to factory settings for sale
- Format a hard drive to quickly clear all content
- Format to change a hard drive file system
- Reformat a hard drive from BIOS for reinstalling OS
- More...
What Format or File System Should You Reformat the Hard Drive To
You'll need to reset the file system format during the formatting process. Are you clear about which format to set?
Here is a list of common file systems that you may consider for your storage devices: NTFS, HFS+, APFS, exFAT, FAT32, and ext4. Each has its own strengths and weaknesses, and the choice ultimately depends on your specific needs and preferences.
- NTFS NTFS (New Technology File System) is the default and modern Windows file system, providing a robust and efficient way to organize and manage files on a computer. It was introduced in Windows 2000 and has since become the standard file system for Windows operating systems. NTFS offers advanced features such as file compression, encryption, and access control, making it a reliable choice for storing and retrieving data.
If you're planning to reinstall your operating system, use your hard drive as a data drive in Windows, store large files, or format it as NTFS, to avoid any issues.
- FAT32 A small-sized drive format of 64GB or requested format for a gaming drive.
If you're planning to reset your USB or external drive or set it up for storing games, consider using this format.
- exFAT - Ideal format for big-sized external hard drives.
If you plan to use a large USB or SD card, consider formatting it in this format as it offers fast performance and stability when transferring files, outpacing FAT32 in reading and writing speed.
- Ext2/3/4 - Linux file system for specific usage.
If you want to create a Linux format drive, set your drive like this.
- HFS/HFS+/APFS - macOS format.
If you want to make a hard drive usable on a Mac, you can set the file format to HFS, HFS+, or APFS.
To reformat a hard drive on Windows or Mac, first check the tips below and follow them. You'll get a full guide on reformatting your hard drive on both Windows and Mac computers, starting with these initial steps.
How to Reformat a Hard Drive in Windows 11/10/8/7
If you're a Windows user, you can change your hard drive format on your own by following the methods outlined here, which will guide you through the process successfully.
#Tip 1. Reformat a Hard Drive in File Explorer or Disk Management
To quickly format a working hard drive on a Windows computer for new usage, you can directly format it using File Explorer or Disk Management, which involves selecting the drive, right-clicking, and choosing the format option, followed by selecting the file system and allocating space for the drive. This process is straightforward and doesn't require any additional software or technical expertise.
Reformat Hard Drive with File Explorer
Step 1. Press Windows + E to open File Explorer.
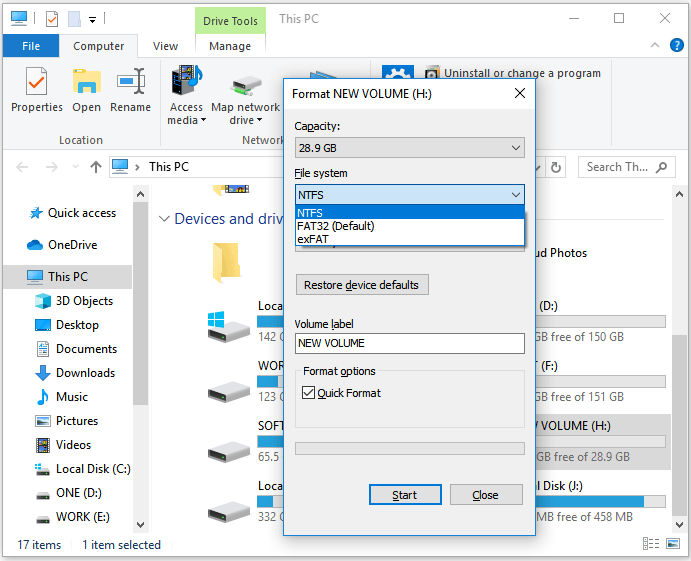
Step 2.To format a hard drive partition, navigate to the partition, right-click on it, and select the "Format" option from the context menu. This will initiate the formatting process, erasing all data on the partition.
Step 3.To set the file system and quick format a drive, select the desired file system (such as "NTFS") and check the box next to "Quick Format".
Step 4. Then, click "Start" to let the computer format your drive.
Repeat the process until you complete reformatting the target drive.
Reformat Hard Drive in Disk Management
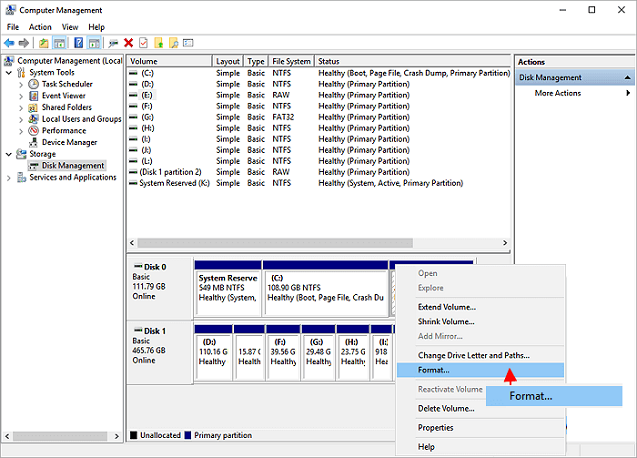
Step 1. To open Disk Management, press the Windows key + R keys, type 'diskmgmt.msc' and click 'OK'.
Step 2. To format a target drive, find and right-click on each partition one by one, and select "Format Volume" from the context menu.
Step 3. To format a drive, set the file system to "NTFS" or another desired format, select the "Quick Format" option, and click "OK".
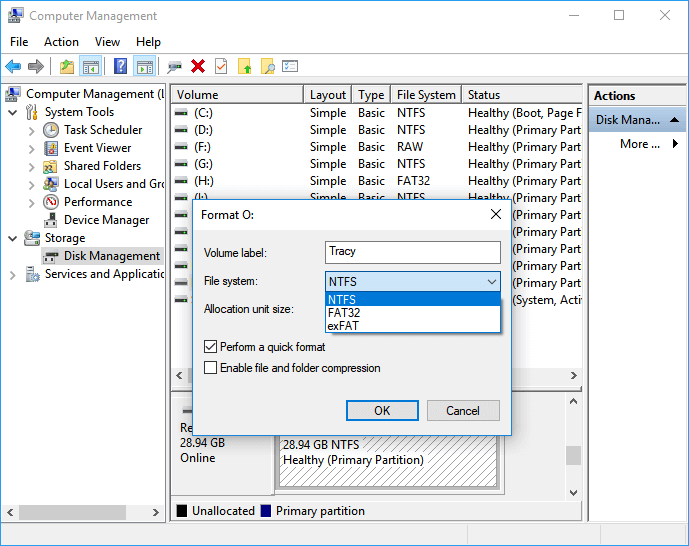
Format all partitions on the hard drive by repeating the process until all partitions are formatted, ensuring a clean slate for the operating system and applications to be installed.
# Tip 2. Reformat Hard Drive with or Without Operating System
If you're looking for a simpler solution to format a hard drive or operating system, Qiling Partition Master is a professional tool that can help you manage hard drives and switch disk partition formats.
This software can be directly applied to reformat a hard drive, with or without an operating system.
Reformat a Data Hard Drive in Simple Steps
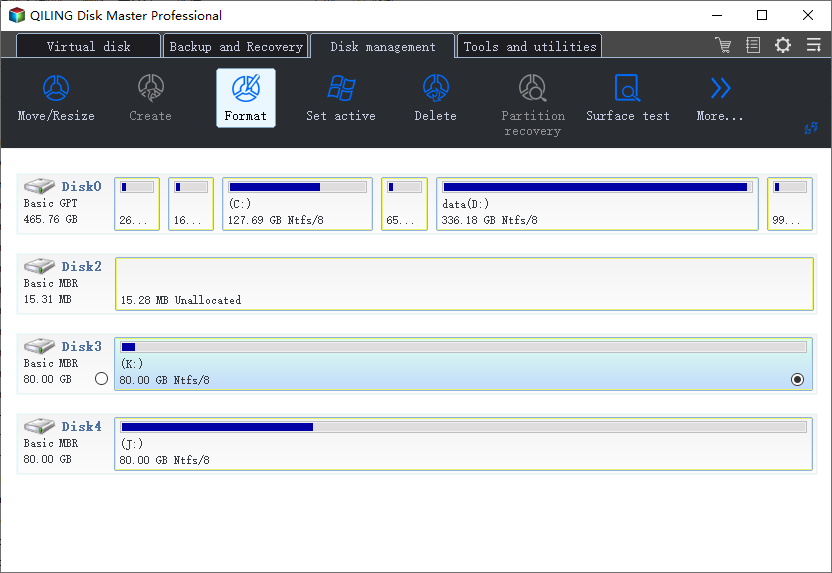
Step 1. Run Qiling Partition Master, right-click the hard drive partition you intend to format and choose "Format".
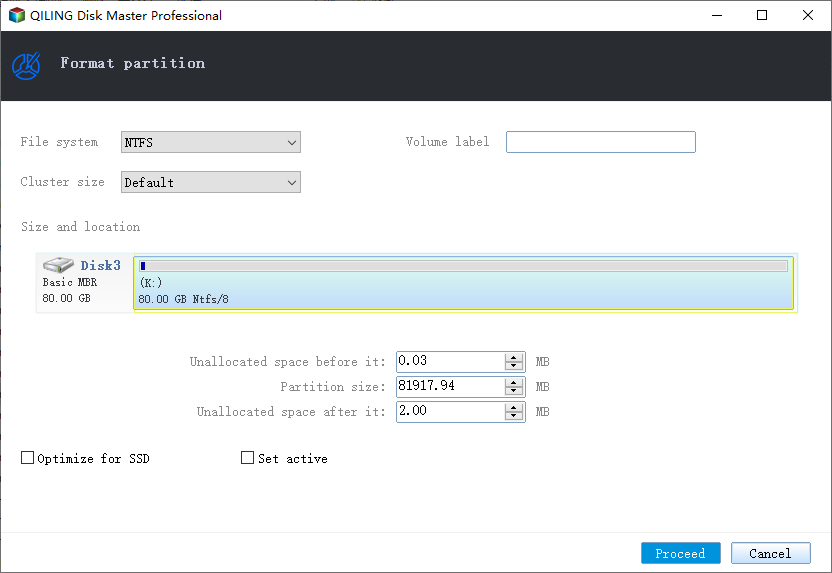
Step 2. Set the partition label, file system, and cluster size for the new partition, then click "Proceed" to format it.
Step 3. Then you will see a warning window, click "OK" in it to start formatting the partition on your hard drive. This will erase all data on that partition.
Reformat (OS) Hard Drive in BIOS Without Booting Windows
If you want to clean an OS drive for a Windows reinstall or simply want to wipe the drive without fully booting into the OS, Qiling Partition Master can help you achieve this.
To create a WinPE bootable disk to an empty USB drive, you'll need to apply it to format the drive in BIOS. This will allow you to boot from the USB drive and then format the drive.
#1. Create a Bootable Disk
Step 1. To create a bootable disk of Qiling Partition Master, prepare a storage media such as a USB drive or CD/DVD disc, and correctly connect it to your computer.
Step 2. Launch Qiling Partition Master, find the "Create bootable media" feature on the tools page, and click on it.
Step 3. You can choose to save the ISO file to a USB, CD/DVD, or local drive, and then proceed with the process. If you don't have a storage device, you can save the ISO file to a local drive and burn it to a storage media later. Click "Proceed" to begin.
When the process finishes, you have successfully created a Qiling Partition Master WinPE bootable disk, allowing you to manage your hard disks and partitions through the bootable drive whenever the computer fails to boot normally.
To add a RAID driver in WinPE, click "Add Driver" from the menu bar, allowing you to install the driver for your RAID device, which might not be recognized under WinPE without the necessary drivers installed, especially for RAID or specific hard disks.
After completing the installation, connect the bootable USB to your PC, restart the computer, and enter the BIOS settings by pressing F2/F8/Del. From there, set the bootable USB as the primary boot device.
Save the changes and boot the PC from the bootable disk created by Qiling Partition Master.
#2. Re-Format Hard Drive from BIOS
Step 1. Click the hard drive partition and choose the "Format" option.
Step 2. Set the Partition label, File system, and Cluster size for the partition, then click "Proceed" in the new window.
Step 3. You can see a warning window, click "OK" to start formatting the hard drive partition. This will erase all data on the selected partition.
How to Reformat a Hard Drive in macOS
For Mac beginners, formatting a hard drive is best done using Disk Utility, but advanced users may also use Terminal for assistance.
It's recommended to back up any important data on the drive before reformatting it.
If your drive is in NTFS format, you can first mount it to Mac and access its data using NTFS for Mac software, then follow a guide to make the drive readable on Mac.
After backing up all your data, you can proceed with the next steps to reformat your hard drive on your Mac.
#Tip 1. Reformat Hard Drive on Mac Using Disk Utility
Step 1. To launch the Disk Utility tool, go to the Application folder, click on "Utilities", and then double-click on "Disk Utility".
Step 2. Select your hard drive on the left panel, then click "Erase" at the top panel.
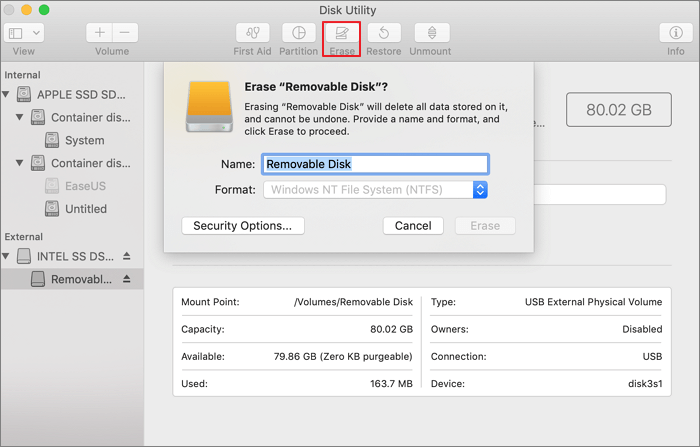
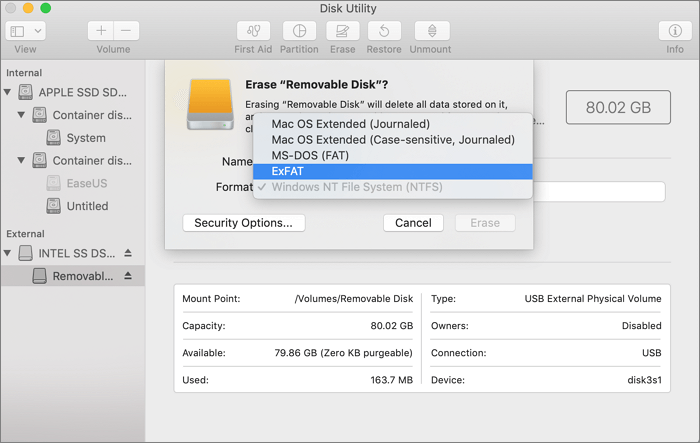
Step 3. Set the file format to your hard drive, like MS-DOS or other formats, and click "Erase" to confirm the operation.
#Tip 2. Reformat a Hard Drive on Mac Using Terminal Command
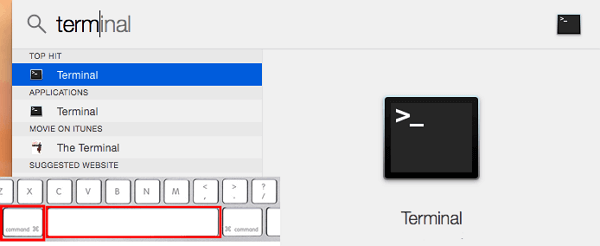
Step 1. Press command + Space to bring up Spotlight.
Step 2. Then type terminal and hit Return to launch it.
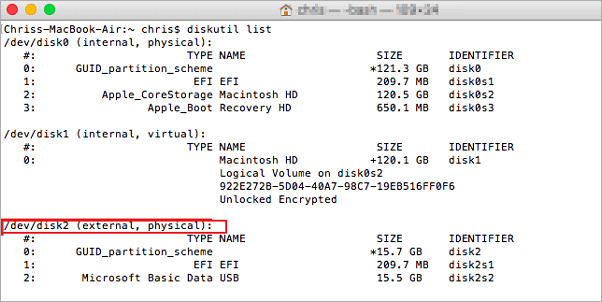
Step 3. Type the following command lines and hit Return each time to format the target hard drive:
sudo diskutil eraseDisk FAT32 MBRFormat /dev/disk2.
You can replace FAT32 with another format as you want.
Step 4. When the formatting completes, close the Terminal window.
Reformatting a Hard Drive Could Be Easy, You Can Do It On Your Own
When to reformat a hard drive varies between Windows and Mac, but it's essential to backup your data first, regardless of the method you choose.
To format a drive, you can use reliable disk formatting tools like File Explorer or Disk Management on a Windows computer. Alternatively, you can use Qiling Partition Master to format a drive in BIOS.
Both Disk Utility and Terminal can be used to format a drive on a Mac, but Disk Utility is a more user-friendly option for beginners.
Related Articles
- File Copy Stuck at 5 Seconds Remaining [Fixed]
- How to Fix New Simple Volume Greyed Out in Windows Server
- How to Partition 1TB Hard Disk in Windows 11/10/8/7
- [Solved] Diskpart Delete Partition Override Not Working
- Format/Reformat Seagate External Hard Drive on Windows or Mac
Formatting a Seagate external hard drive on Windows or Mac can be a straightforward process, even if it was preformatted with the exFAT file system. To format it on Windows, connect the drive to your computer, right-click on it in File Explorer, and select “Format” from the context menu. - How Do I Format SSD Partition as FAT32 from Command Prompt (CMD)? [2024 Tutorial]
This page provides a step-by-step guide on how to format an SSD partition as FAT32 using the Command Prompt.