Check SanDisk SD Card Health on Windows Without Risking Files
An SD card may seem unhealthy because of a bad reader, damaged file system, counterfeit capacity, or worn flash cells. Windows error checking can find logical problems, but most SD cards do not expose full SMART health data. Back up readable files before a repair that writes to the card.
Check the Reader and Card First
Step 1. Insert the card directly into a known-good reader. If it has a lock switch, confirm its position. Try a second reader or port before blaming the media.
Step 2. Open Disk Management and note the expected capacity and partition state. If Windows asks to format a card containing needed data, cancel. A 0-byte or intermittently missing card may have a hardware fault.
Step 3. Copy important files to a separate drive and open a few copies. If copying repeatedly fails at the same location, stop write operations and prioritize recovery.
Check Logical Errors in Windows
Step 1. For a stable card with a backup, right-click its drive letter in File Explorer and choose Properties > Tools > Check. Follow the result, but do not assume a clean scan proves flash memory is healthy.
Step 2. Alternatively open an elevated Terminal and run chkdsk X: for a read-only status check, replacing X with the card's verified letter. Use a repair switch only after files are backed up, because repairs may change directory entries.
Step 3. After any repair, copy a sample of files and verify them on another device. Recurring corruption or disconnects call for card replacement.
Some cameras write database or thumbnail files in their own format. A Windows error check may report a healthy file system while the camera still rejects the card. Test in the original device after protecting the data, and follow that device's official card capacity and formatting guidance.
Recover Missing Files Before Formatting
Qiling Deep Data Recovery can scan a card that Windows detects reliably. Install it on the PC and save recovered files elsewhere.
Step 1. Open Qiling Deep Data Recovery and choose USB/SD Scan for the card. If the card was formatted, choose the mode matching that loss instead.
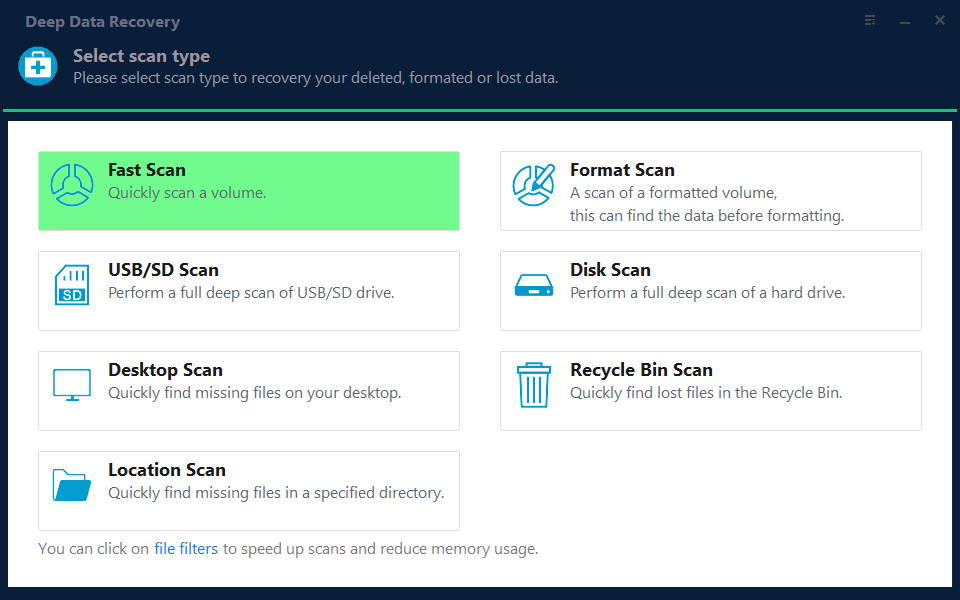
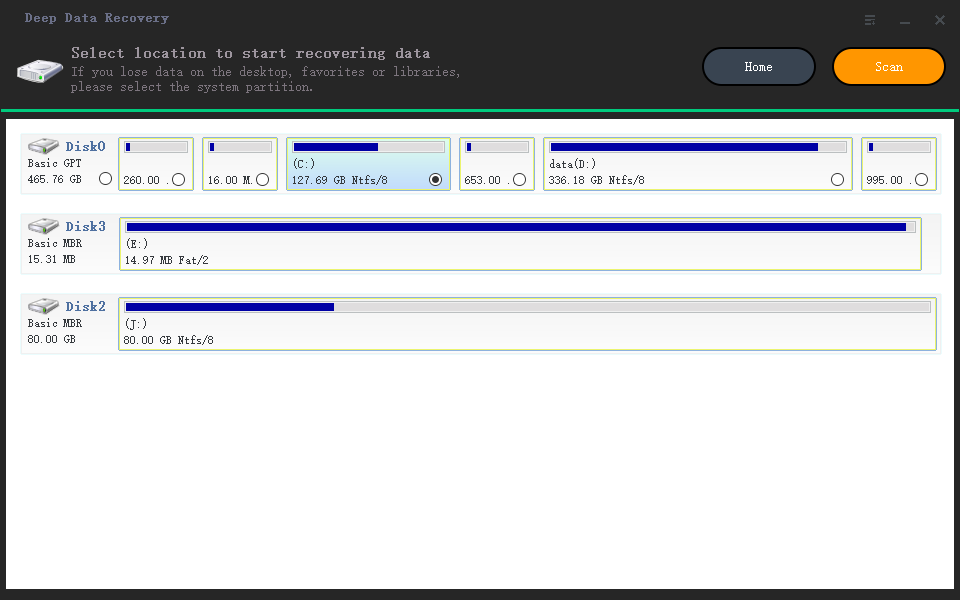
Step 2. Select the relevant file types, such as Pictures and Videos, then choose the SanDisk card by capacity and drive letter. Start the scan only after confirming it is the source card.
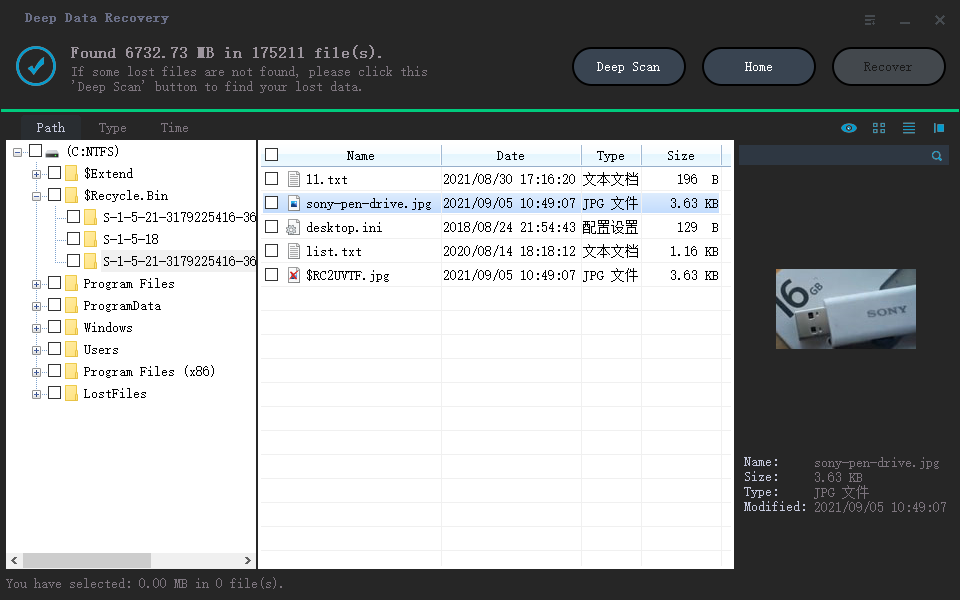
Step 3. Let the scan complete while the reader stays connected. Search the results and preview several important files to confirm they are usable.
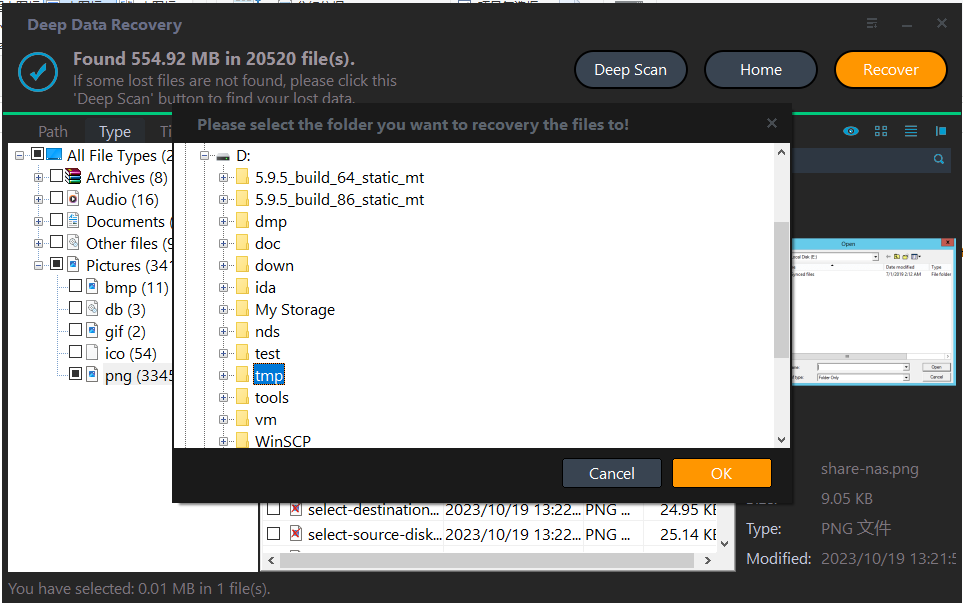
Step 4. Click Recover and save the selected files to another physical drive, not the card. Open copies before considering reformatting or replacement.
What a Health Check Cannot Prove
Neither CHKDSK nor a single successful copy predicts remaining flash life. For critical camera or work use, keep multiple backups and replace a card that repeatedly corrupts files.
Capacity tests write across the card and can expose counterfeit or failing media, but they erase or overwrite data in the tested area. Use them only on an empty card after recovery and backup. If the card becomes read-only on its own, treat that as a possible failure mode rather than trying endless formatting utilities.
Related Articles
- System Backup and Restore
Create and verify a Windows backup before major repairs. - Check Disk Health
Recognize storage warnings before changing a drive.
Products
Articles & Tutorials
- Data Recovery
- Data Backup
- File Recovery
- File Backup
- System Backup and Restore
- Disk and Partition Clone
- Technical articles
- Mobile articles
- Disk Master Help
- Windows Data Recovery Tutorials
- Windows Secure Delete Tutorials
- Windows Partition Management Tutorials
- Windows File Backup and Restore Tutorials
- Windows System Backup and Restore Tutorials
- Windows Disk Backup and Restore Tutorials
- Windows Clone Tutorials