Free Photo Recovery Software: Recover Pictures on Windows
Quick Navigation:
- Start With Free Recovery Options
- Before You Scan
- Recover Photos With Deep Data Recovery
- When Free Recovery Is Not Enough
- Frequently Asked Questions
When photos disappear, the fastest fix may be a backup or Recycle Bin restore. If neither contains them, recovery software can scan the original storage, but the device should remain unused until you finish.
Start With Free Recovery Options
Look in Recycle Bin, the original photo folder, OneDrive or another synced service, and File History if it was enabled. These methods can restore the original file without a scan and may keep its name and folder.
For photos deleted from a camera card or USB drive, the Windows Recycle Bin often does not contain them. Do not shoot new pictures, copy files, or format the card; those writes can replace recoverable content.
Before You Scan
Connect the camera card through a reliable reader or the external drive directly. Confirm Windows can detect the device and record its capacity, even if the volume itself cannot be opened.
Use a different disk for installation and recovered pictures. Preview is important: a thumbnail or filename alone does not establish that the full-resolution image is usable.
Recover Photos With Deep Data Recovery
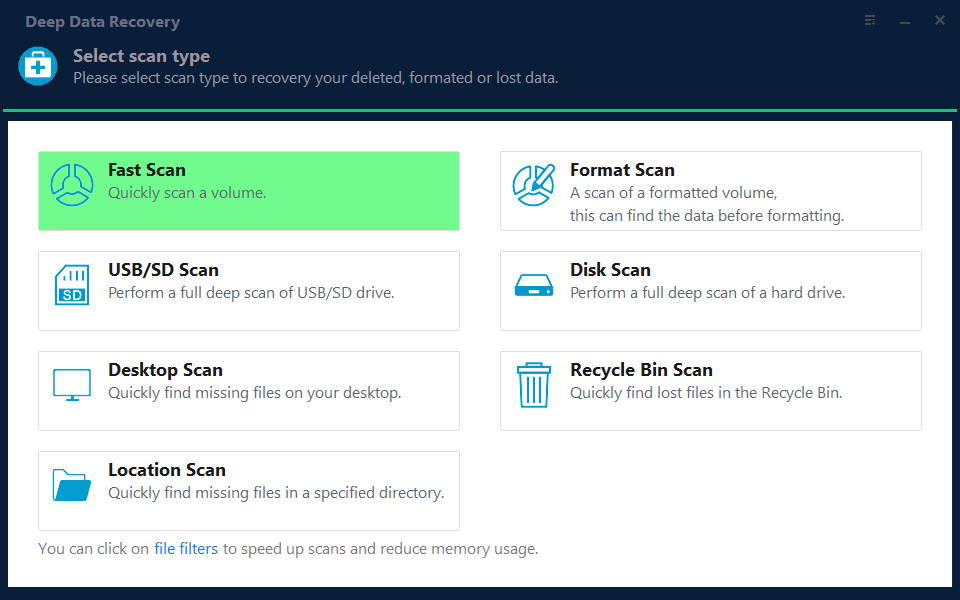
Qiling Deep Data Recovery provides the scan modes shown below. The mode in Step 2 is chosen for this specific loss scenario; it does not change the need for a separate recovery destination.
Step 1. Prepare the PC and Destination
Connect an output drive with room for the pictures. Download and install Deep Data Recovery away from the source card or drive, then open the program.
Step 2. Choose the Photo Loss Mode
For a memory card or USB drive choose USB/SD Scan. If you formatted a volume, select Format Scan; for recently deleted photos on a PC volume, begin with Fast Scan.
Step 3. Select the Photo Source
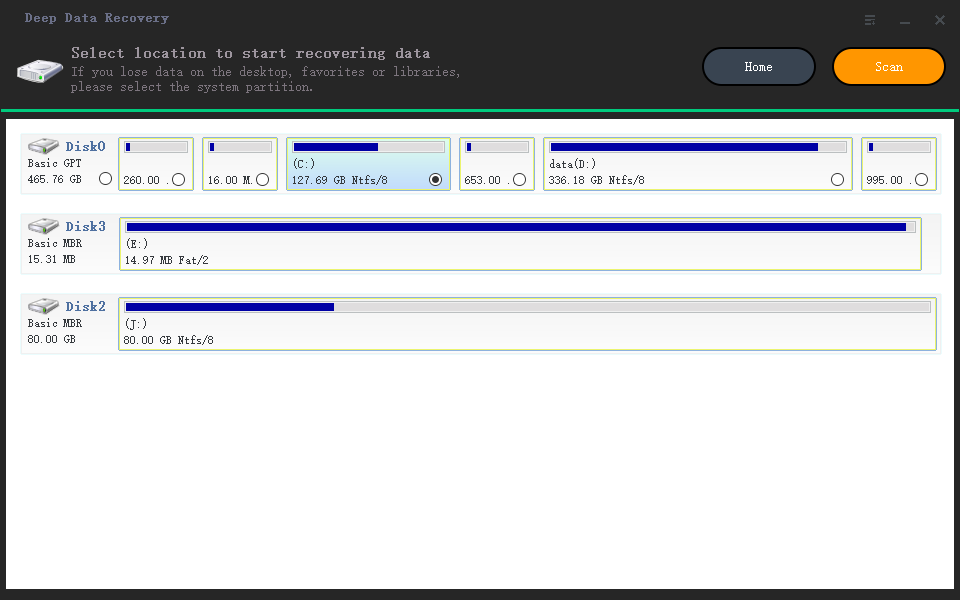
Select the camera card, external drive, or PC volume by capacity and label. Click Scan; do not choose the output drive.
Step 4. Filter and Preview Pictures
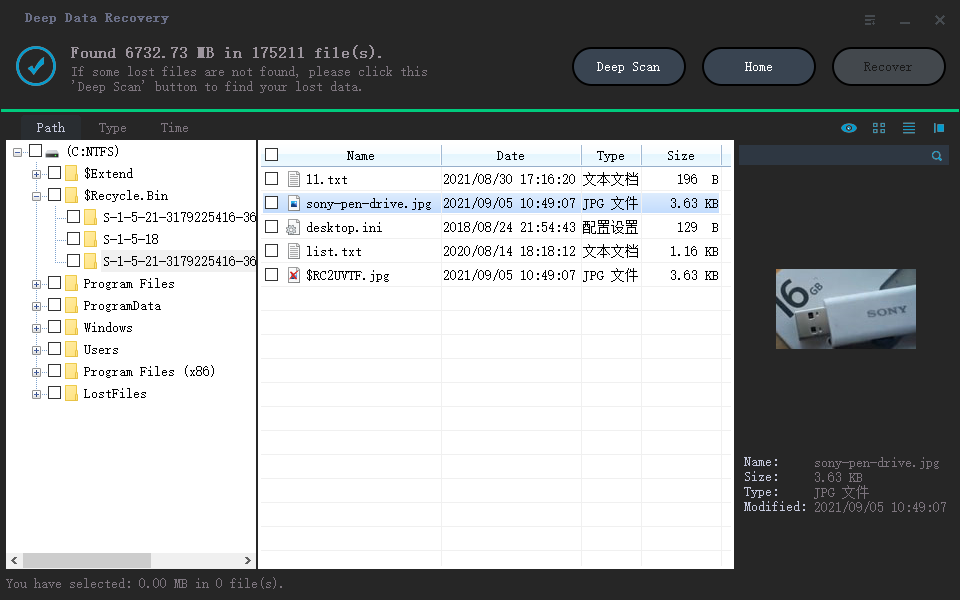
Open the Pictures category, filter to the formats you need, and preview several full-size images. If expected photos are absent, try Deep Scan before giving up.
Step 5. Recover to Another Disk
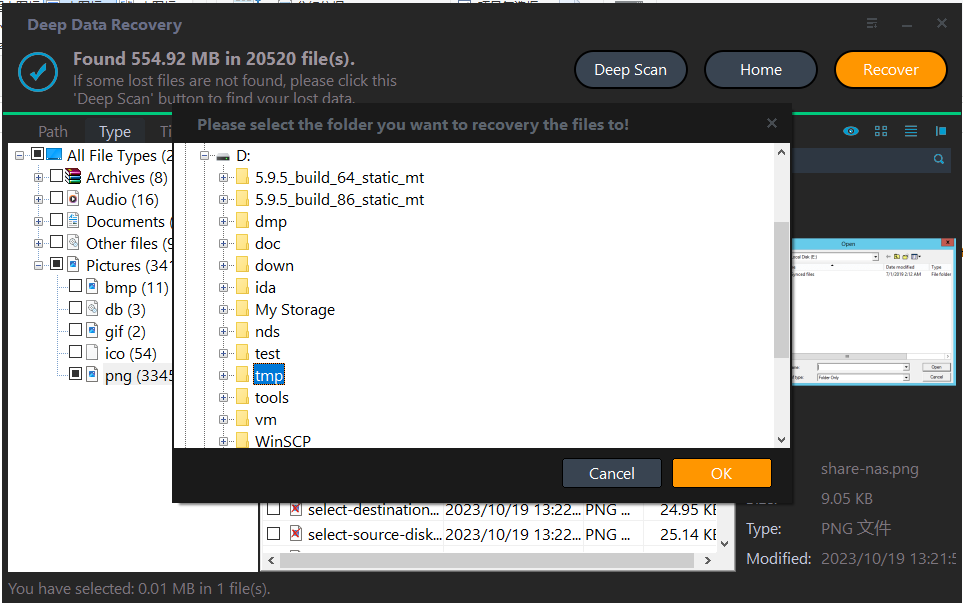
Select the photographs, click Recover, and choose the separate output drive. Open the saved images and compare their resolution with the originals you expected.
When Free Recovery Is Not Enough
A free scan or preview does not guarantee a free unlimited recovery allowance; check the product's current terms before starting a large transfer. Do not assume that a file shown in the list is undamaged.
If photos were overwritten by new camera shots, or the card is physically damaged, stop using it and consider professional recovery. For a backed-up library, restoring from the backup is usually safer.
Frequently Asked Questions
Can I recover photos after emptying Recycle Bin?
Possibly, if the underlying storage has not reused the deleted space. Stop using the drive and scan promptly.
Should I save recovered photos back to the SD card?
No. Save to a separate disk first so the recovery operation does not overwrite other missing photos.
Related Articles
- Recover Deleted Photos From Windows 10
- SD Card Recovery
- Recover Files From a Formatted SD Card
A formatted memory card needs a different scan choice from a recently deleted PC photo.
Products
Articles & Tutorials
- Data Recovery
- Data Backup
- File Recovery
- File Backup
- System Backup and Restore
- Disk and Partition Clone
- Technical articles
- Mobile articles
- Disk Master Help
- Windows Data Recovery Tutorials
- Windows Secure Delete Tutorials
- Windows Partition Management Tutorials
- Windows File Backup and Restore Tutorials
- Windows System Backup and Restore Tutorials
- Windows Disk Backup and Restore Tutorials
- Windows Clone Tutorials