NAS Backup in Windows with NAS Backup Software
Quick Navigation:
- What is NAS?
- 4 Different Strategies to Backup NAS Gadgets
- 1. Backing up through a network
- 2. NDMP Backup
- 3. NAS applications
- 4. Online information reinforcement
- Best Way to Backing UP NAS Device in Windows
- Guide to Back Up Your NAS Drive Files with NAS Backup Software
Information is a vital resource for organizations. Without access to their data, organizations may not be able to provide their clients with the expected level of service. Poor customer service, loss of sales, and team collaboration issues are all examples of what can happen when data is not accessible.
Small businesses often face unique challenges when it comes to information management. A lack of access to information can have serious consequences, including:
Lower cost alternatives
The simplicity of activity (numerous independent ventures do not have IT, staff)
The simplicity of information support (and it is continuously open when you need it)
Development ability
Network-Attached Storage (NAS) gadgets have been gaining popularity in the business world, and for good reason. These devices offer a robust, adaptable, and low-maintenance storage solution that can meet the needs of small businesses and large corporations alike.
What is NAS?
A Network-Attached Storage (NAS) gadget is a storage device that allows for the storage and retrieval of data from a central location for authorized system users and various clients. NAS gadgets are flexible and scale out, meaning that as one needs additional storage, they can add to the existing setup. NAS is like having a private cloud in the office. It's faster, more affordable, and provides all the benefits of a public cloud nearby, giving you complete control.
With a NAS, information is continuously open, making it simple for workers to team up, conveniently react to clients, and immediately follow up on deals or different issues since data is in one spot. Since NAS resembles a private cloud, accessing the information remotely is possible using a network, which means representatives can work anyplace and whenever!
4 Different Strategies to Backup NAS Gadgets
Regardless of whether protected or simply because the technology was misunderstood, backing up NAS devices was once considered a challenge. Currently, one has several options for proper NAS backup. Given below are 4 ways to backup NAS devices with ease.
1. Backing up through a network
Backing up a NAS gadget is a basic process that involves sending data from the NAS device to a backup server. This process is similar to a client-server backup, which is why it is known as a conventional network-based backup in this context.
2. NDMP Backup
The Network Data Management Protocol (NDMP) is a protocol that was created specifically for NAS backup. NDMP enables a NAS device to send data directly to a tape device or backup server using the network without the need for client mediation.
3. NAS applications
Data replication between NAS devices provides the most advanced features and the best integration with applications. Vendors use a combination of local and remote copying, along with application-specific modules, to provide NAS data security.
4. Online information backup
Some NAS device vendors that focus primarily on the SMB market are offering services that combine both online data backup and cloud services. These services are designed to give customers a simple backup and disaster recovery solution.
Best Way to Back Up NAS Device in Windows
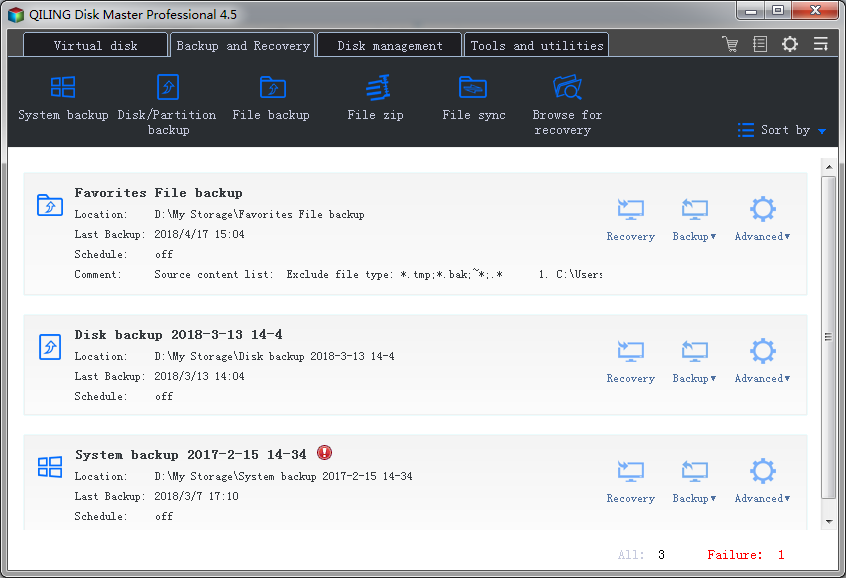
Users can turn to QILING Disk Master, a seamless NAS backup software that helps in setting up backups as and when needed in a few simple steps. This reliable software provides protection to the created backup and possesses the ability to set up backup images of the operating system, files, partitions or disks, and even content from external drives.
Your Safe & Reliable NAS Backup Software
- The file backup option in QILING Disk Master allows users to choose individual files, files from folders in internal and external drives, and even from USB sticks. This feature provides users with flexibility and control over their backup process.
- The disk clone feature in QILING Disk Master is a simple procedure to create a clone of an existing drive, ensuring complete drive backup. This feature is a priority for those who possess relevant documents and information on the drive, as it provides a reliable and efficient way to backup and restore data.
- The system backup feature is a useful tool that creates an image of the operating system, allowing users to restore their system to its previous state in case of unforeseen circumstances, such as a system crash or hardware failure. This feature is particularly helpful for users who have invested significant time and effort into customizing their system.
Guide to Back Up Your NAS Drive Files with NAS Backup Software
Restoring a PC operating system (OS) to its original factory settings or reinstalling a backup image can be a daunting task. However, with the help of NAS backup software, the process can be simplified and completed in a few easy steps.
Step 1: Backing up a PC operating system (OS) is an essential task to ensure data safety and prevent loss due to hardware failure or other issues. Using an external drive and software, you can create a backup image of your PC OS and restore it when needed.
Step 2: Creating a backup of your NAS (Network-Attached Storage) device in Windows is a crucial step to ensure data safety and prevent loss due to hardware failure or other issues. Here's a step-by-step guide to help you create a backup of your NAS device in Windows.
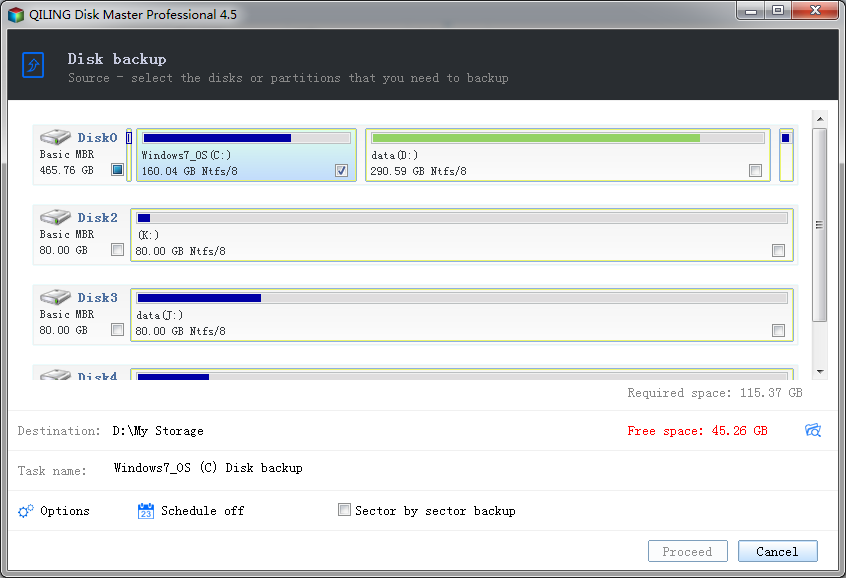
Step 3: After completion of the backup, it is possible to alter the preferences of the backup file with ease.
Related Articles
- SD Card Backup Software for Windows 10/7 to Backup SD Card
- Two Ways to Backup Windows 10 to Network Drive
- How to Backup Computer to External Hard Drive
- How to Recover Deleted Photos from Picasa
Picasa photo recovery: if you want to retrieve pictures from Picasa on Windows or Mac after you losing them coincidentally or deleted intentionally, try the simple 3 steps to recover deleted photos from picasa in this article. - How to Recover Deleted YouTube Videos
Here in the article, let's see how to recover deleted YouTube videos, how to recover deleted YouTube offline videos, and how to recover deleted YouTube videos with link. - How to Recover Files from Corrupted/Failed Hard Drive
You need to know how to recover files from failed or corrupted hard drive on Mac in the first place. After all, if files lost, you have to bear the bad result. Here we covered 3 parts in this article. - Recover Data from WD My Passport Hard Drive
WD Passport data recovery software is a helpful tool when files are accidentally deleted or a WD HDD, external HDD, or SSD becomes inaccessible, corrupted, or virus-infected. The software can be downloaded and used to recover data from a WD Passport internal or external hard drive by following a guided process.