[Full Guides] How to Record Screen with OBS Studio
Today, screen recording software is a solution to record online meetings and classes. However, they can offer more than recording. Using the right software, we can use the application to stream video-sharing platforms such as YouTube, Twitch, and Discord. Just what kind of screen-recording software can do such a feat?
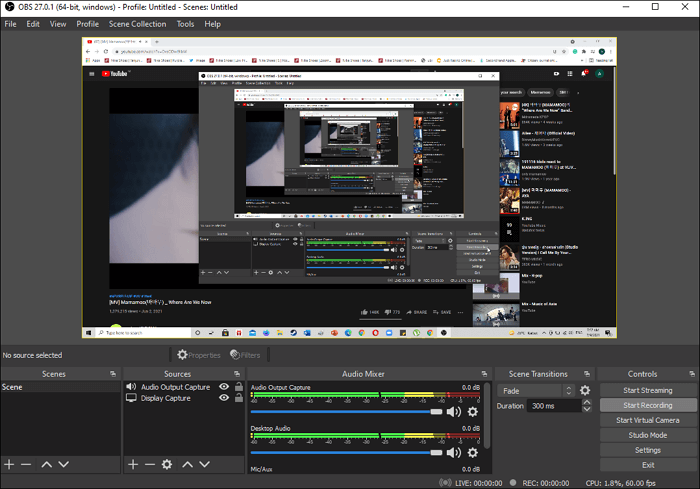
Fortunately, OBS Studio is one of the software that can do it. It has lots of features that can help you record the screen and other streaming activities for your work/entertainment. The number of features has made OBS one of the well-known recording software on the internet.
Seeing the impact OBS has on the screen-recording world, we have decided to create a guide on how to record screen with OBS and its alternative.
How to Record Screen with OBS Studio
OBS has plenty of features to try. With its help, you can record your online meetings and classes with just a click. Once the recording is done, you can go to the file destination that was set before. You will find the recorded meeting there.
OBS' latest feature is its virtual camera. The virtual camera option allows you to use it as the input for other programs. For example, you want to use the active screen on OBS as a background for online meeting platforms such as Zoom. It wasn't possible to do the feat directly until the virtual camera feature was released. Seeing all the features of OBS Studio, no wonder many use it as a recorder for their important online moments.
Getting the basics of OBS is easy, but once you've gone beyond the most fundamental techniques, you will find yourself with lots of options on OBS. This software can help you to stream your games, screencast, add personalized watermarks, and many more. Once you conquer this screen recording program, you can do anything with it.
Recording using the impactful video recorder is not hard. Here is how to record the screen with OBS:
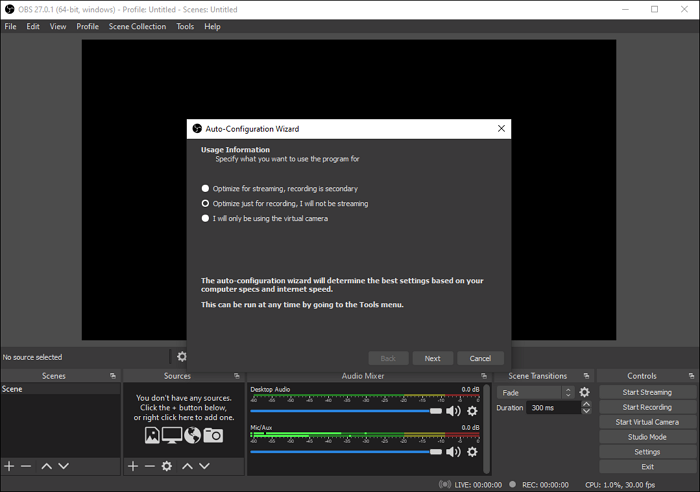
Step 1. Once you've installed OBS, a window will appear. Pick "Optimize just for recording, I will not be streaming" if you will only use it for recording.
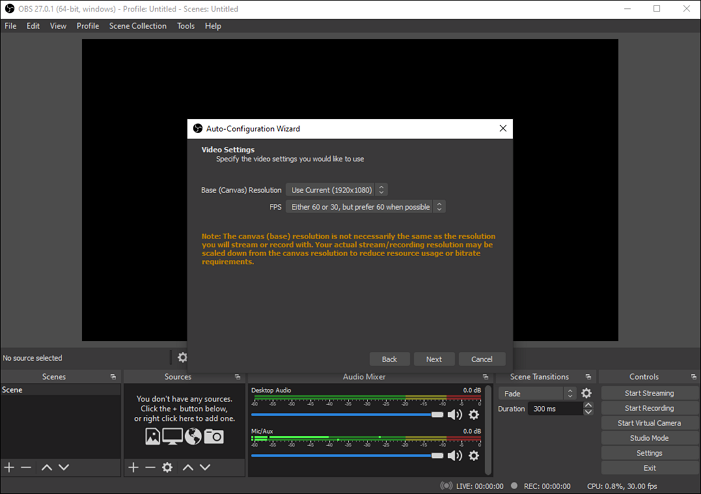
Step 2. Specify the video resolution and quality. Click "Apply" after the next option.
Step 3. Add the targeted screen by pressing the + button at the Source and choose "Display Capture." it will lead you to your screen as the display capture.
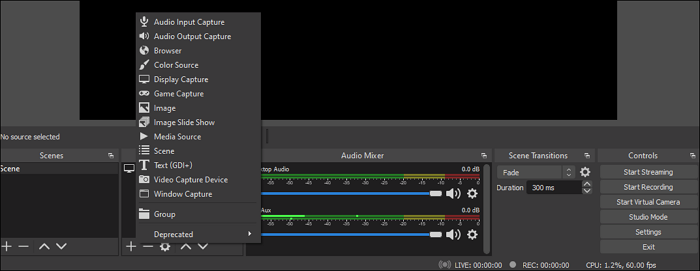
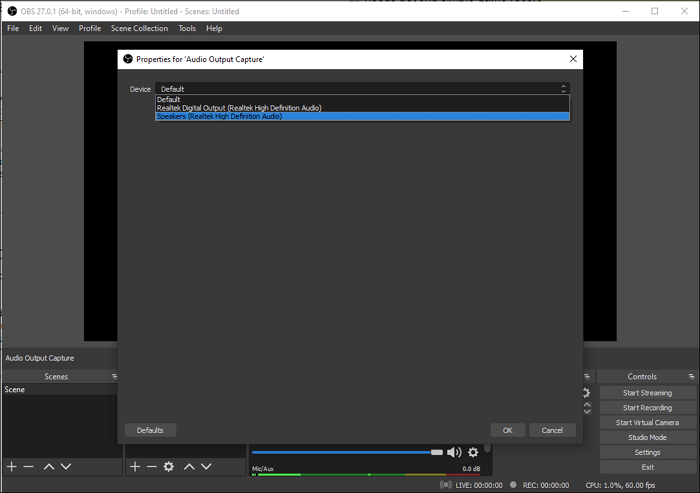
Step 4. Repeat the same step and choose "Audio Output Capture" to add the audio source for the recording.
Step 5. If you will be talking using a microphone during the recording, get the third source which is "Audio Input Capture."
Step 6. Test first before using it. Open a video on YouTube, play it, and click Start Recording. If the green bar is moving when the video plays, then the audio input is correct.
Step 7. If everything is right, prepare the recording for the meeting/online class, and you're good to go!
The steps might be a bit hard at first. However, once you're accustomed to it, it will be a breeze.
Although OBS Studio offers lots of recording functions, it also has several disadvantages:
- The features are overwhelming. Yes, you can do lots of things using OBS. Still, at the same time, the other elements are inconvenient if the main purpose of the installation is only to record.
- The setup is complicated. Unless you're a streaming expert, all the menus will sound like alien language because you have no clue what they mean.
- The software is pretty heavy. If your laptop can't handle it, OBS can crash while you record a meeting or online class. So, your device will need to be able to handle heavy multitasking.
If you want to find an easy-to-use screen recording program, you can get help from the below content.
How to Capture Screen with OBS Alternative
If you need a simpler OBS alternative, you can opt for Qiling RecExperts. This screen capture software is simpler than OBS, and the menus are written in fifth-grade language so anybody can understand it.
Working with this screen recording program, you are able to record part of screen or full screen with simple clicks. Besides, it also enables you to record audio, webcam, and even gameplay separately or simultaneously. Apart from these basic functions, RecExperts provides creating schedule recording and auto-split tasks, which will simply your recording.
Amazing Functions:
- Flexible resolution for screen recording ‒ drag and capture the desired area for recording
- Simultaneous audio recording ‒ record the audio source of the screen while using the microphone simultaneously
- Webcam recording ‒ record themselves using a webcam
- Capture as GIF ‒ make an instant GIF is possible after recording the video
- Editing ‒ Edit the video once they're done recording
By using Qiling RecExperts, there's no need to worry about crashing in the middle of recording. You can record with ease, and everything will progress smoothly without trouble at all.
Step 1. Run Qiling RecExperts on your device and you will see two recording modes. You can choose "Full Screen"to record the whole screen or choose "Region" to select the recording area manually before recording.
Step 2. After that, you can choose to record the webcam, system sound, microphone or record none of them as you like. You can also set auto split, auto recording with various functions on the interface.
Step 3. Then, you can click the red "REC" button to start recording. Here will be a menu bar on your screen. To pause the recording, click on the white double vertical bar; to end the recording, click on the red square sign.
Step 4. After recording, you will be led to the list interface. Here you can view or edit your recordings. To start a new recording, just click on the "REC" button on the top of the interface.
Conclusion
The worldwide situation forces us to adapt for the better. Recording online meetings/classes is one of the examples of adaptation we must do. Hence, it is important to invest in the software used to record the important online moments. One of the ways to do it is by using OBS. OBS not only records, but it also offers many options to utilize the software. Unfortunately, all the features of OBS might be too much for those who only seek to record meetings.
For those who want a simpler video recorder, they can try using Qiling RecExperts. This program is simpler and easier to use, making us feel less overwhelmed when using it. So if you need a video recorder that simply records, do not hesitate to use it.