6 Fixes: Windows Has Problem Ejecting USB Mass Storage Device
Windows error messages can suddenly appear, such as Windows Runtime Errors, code 43, or "You need to format the disk". These errors are often caused by hardware failures on your computer, which need to be addressed promptly to prevent further damage.
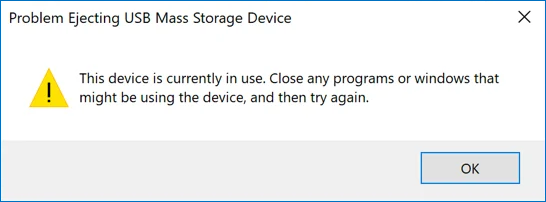
This post focuses on an error message that occurs when trying to eject a USB mass storage device, specifically the issue of "The device is currently in use." When attempting to remove the device, users may see this error message, prompting them to close any programs or windows using the device. This issue can be frustrating, and understanding why it happens and how to resolve it is essential. We will delve into the reasons behind this problem and provide a solution, so keep reading for the answer.
What Cause the Problem of Ejecting USB Mass Storage Device?
Many Windows errors, including the issue of a USB mass storage device ejecting, are often caused by simple reasons. Two main culprits behind this problem are content occupation and USB driver failure, which can be easily resolved by addressing these underlying issues.
Content Occupied: The device can't log out because a background process or application is using files stored on the storage device.
USB Driver Failure: This reason may be due to a USB driver failure in your operating system, preventing the computer from ejecting the mass storage device.
The main reasons for problems when ejecting USB mass storage devices are incorrect removal of the device while it's in use or the device being damaged. Fortunately, there are ways to solve the problem, including trying to eject the device, restarting the computer, checking for malware, checking for disk errors, checking for USB driver issues, and updating the USB driver. You can try these methods one by one until you can safely eject your USB flash drive or external hard drive from your computer.
Method 1. Close All the Open Files and Programs
To resolve the issue, first ensure all files and programs on your computer are closed, then attempt to safely remove the USB. If the problem persists, further troubleshooting steps may be necessary.
Method 2. Reboot the Computer
If you've confirmed all files and programs have been closed, you can try restarting your computer to resolve simple hardware issues. This can often solve the problem on its own.
Method 3. Run Windows Hardware and Device Troubleshooter
Microsoft developed a built-in troubleshooter, Hardware and Device Troubleshooter, to help users fix minor hardware problems that may occur from time to time. This tool allows users to troubleshoot and resolve issues on their own.
Step 1. Right-click the Windows key, choose Settings.
Step 2. Find Update and Security.
Step 3. Click Troubleshoot to enter the Windows troubleshoot panel.
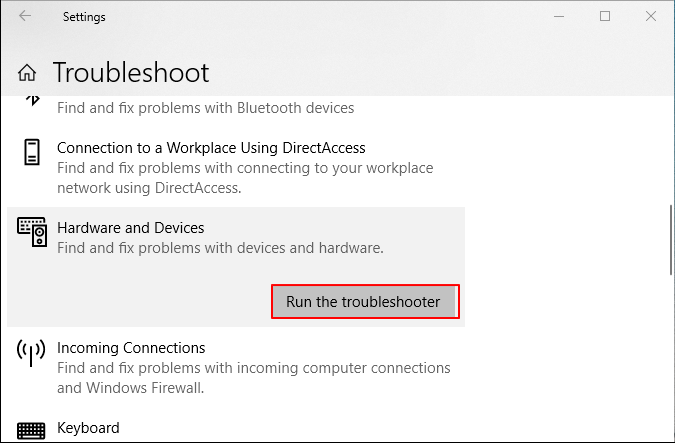
Step 4. To resolve issues with your computer's hardware or devices, go to the "Hardware and Devices" section in the Settings app, and click "Run the troubleshooter".
Step 5. Your computer will start scanning, installing drivers and updates, and then prompt you to restart. Once the process is complete, click "Apply this fix" to finalize the changes and restart your computer.
Method 4. Use Task Manager to End Tasks
To remove a mass storage device using the Task Manager, you can follow these steps. First, open the Task Manager by pressing Ctrl+Shift+Esc or by searching for it in your Start menu. In the Task Manager, click on the "Processes" tab and look for the process associated with the mass storage device.
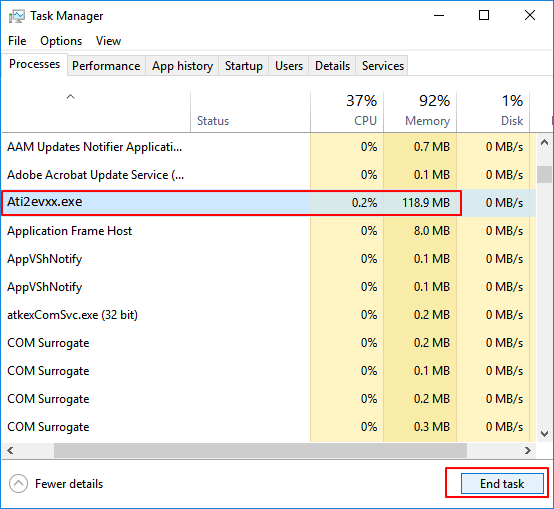
Step 1. Right-click the Windows key, choose Task Manager.
Step 2. To safely remove your drive, right-click on any process or program that seems to interfere with the safe removal of your drive and select End task to terminate it. This will prevent any ongoing activities from blocking the removal of your drive.
Method 5. Eject with Device Manager
To eject a USB mass storage device on a Windows computer, open the Device Manager, expand the "Disk drives" section, right-click on the device you want to eject, and select "Eject" or "Stop" from the context menu. Alternatively, you can also press the Windows key + E to open File Explorer, and then navigate to the device's drive letter, right-click on it, and select "Eject" or "Safely remove hardware" to safely remove the device. This will safely disconnect the device from your computer, preventing any data loss or corruption.
Step 1. Right-click the Windows key, choose Device Manager.
Step 2. To check the configuration of each device under disk drives, click on the "Disk drives" option. This will display a list of all disk drives connected to the system, including internal and external drives.
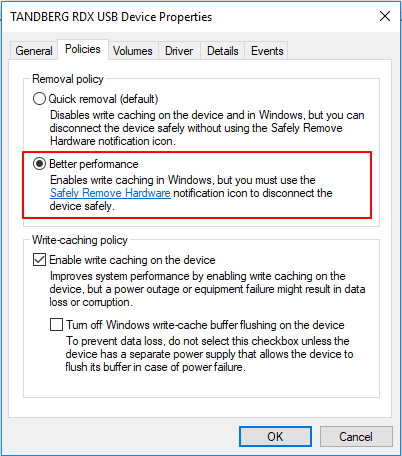
Step 3. The option allowed users to choose between "quick removal" and "performance" for the removal process.
Step 4. To change the performance mode, you need to shut down your computer, then power it back on. This will allow the new mode to take effect. Once you've done this, you can safely eject your external hard drive.
Method 6. Update USB Drivers
If none of the previous methods work, the last resort is to update USB drivers, which might resolve the issue if a malfunctioning driver is the cause of the problem. To update USB drivers, follow the steps below.
Step 1. Right-click the Windows key, choose Device Manager.
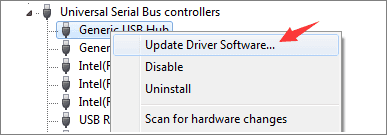
Step 2. To access the Universal Serial Bus controllers category in Device Manager, navigate to the Device Manager, locate the category, and expand it. This will list all the USB devices connected to the system, allowing you to view and manage them as needed.
Step 3. Right-click the USB device, choose Update driver, then select "Search automatically for updated driver software" for Windows to look for and install a newer version of the USB driver.
Safely Remove: You Might Don't Need it Anymore
We've been advised to eject mass storage devices before unplugging them to prevent data corruption. This is because pulling the device out without ejecting it first can cause damage to the device and its stored data. By ejecting the device, we can ensure that the data is safely written to the device and then safely removed, protecting it from corruption.
Microsoft has added a feature called "quick removal" to Windows 10, allowing users to unplug USB drives at any time, except when writing files to them. This feature is now the default setting for new drives plugged into Windows 10 version 1809, making it unnecessary to manually eject USB flash drives.
Bonus Tip: How to Recover Lost Files from Mass Storage Devices
Data loss on a USB drive or external hard drive can occur due to various reasons such as accidental deletion, virus attack, OS crash, or partition loss, which are more severe than simply pulling out the device. In such situations, users need to use data recovery software to retrieve their data, and Qiling data recovery software is a suitable option.
Deep Data Recovery, designed for data recovery, has helped millions of users for over 17 years. Its user-friendly interface makes it easy to operate, requiring only three simple steps to recover desired data. Users can download the software for free and follow a detailed guide to learn how to use it to recover their data.
Step 1. Select file types and click "Next" to start
Launch Deep Data Recovery, select file types, and click "Next" to begin the recovery process.

Step 2. Select a location and start scanning
To recover deleted files, hover over the partition/drive where the files were stored and click "Scan" to initiate the file search process.

Step 3. Select the files you want to recover
When the scanning has finished, select the deleted files you want to recover by clicking on them. You can filter the results by file type or search for a specific file name using the "Search files or folders" box. This is the fastest way to find the target file.

Step 4. Preview and recover deleted files
Preview the recoverable files, select the desired files, and click "Recover" to save them to a new storage location, bypassing the original disk where the data was lost.
Conclusion
If you're experiencing issues ejecting a USB mass storage device, try closing all files and programs, then attempt the troubleshooting methods one by one until the issue is resolved. If you're interested in recovering data, consider downloading a free data recovery software like Deep Data Recovery to see if it can help.
Related Articles
- Fixed: Why My PS4 Won't Turn On
- Recuva Review (Free Download)
- Qiling Data Recovery Software Full Review [Updated in 2022]
- Windows 11 ISO Download Full Version 64 Bit or 32 Bit
- [All Methods to Fix] Selected Boot Image Did Not Authenticate
Is your PC continuously showing the - How to Set Separate Wallpapers on Dual Monitors in Windows 10/11
Adding wallpapers to the dual monitors can be done in multiple ways. The easiest way is to use the settings app to personalize the dual monitor wallpaper setup. In the article, we will discuss ways to set up the same or different wallpapers for dual monitors. You can also spread or extend a single image over both monitors using the display options.