How to Fix Windows 10 Stuck at Getting Files Ready for Installation
Getting Files Ready for Installation Stuck When Installing Windows
Some users have experienced Windows 10 getting stuck at the "Getting files ready for installation" screen, with the installation process freezing at various percentages. This issue has occurred repeatedly, preventing users from continuing the installation or booting their computer as desired. The problem has been reported at different stages of progress, such as 8%, 49%, or 17%. To resolve this issue, follow the steps below.

IMPORTANT: Restore Vital Files Before Fixing "Getting Files Ready" Error
Before attempting to fix Windows when it gets stuck on the "Getting Files Ready" error, it's crucial to back up any vital files, as the process may result in file loss. This precautionary step ensures that your important data is safe, making the repair process less stressful.
It's suggested that you recover and export your data to an external device.
To restore and export data from a stuck computer with a "Getting file ready" message, consider using Deep Data Recovery Pro with Bootable Media, a reliable data recovery software that can assist with the process.
This tool allows you to recover and export data when your PC won't boot or gets stuck at the "getting files ready for installation" screen in Windows 10/8/7/Vista. Follow the step-by-step process below.
Step 1. Create a bootable disk
Before creating a bootable disk with Deep Data Recovery WinPE Edition, prepare an empty USB drive. If the USB contains important data, transfer it to another device to avoid losing the information. Once the USB is empty, you can use Deep Data Recovery WinPE Edition to create a bootable disk on it.
Connect a USB drive to your PC, then launch Deep Data Recovery WinPE Edition. Select the USB drive and click "Create" to create a bootable disk.
Step 2. Boot from the bootable USB
Connect a bootable disk to a PC that won't boot and change the boot sequence in the BIOS settings, usually by pressing F2 at startup to access the BIOS.
To boot the PC beyond the hard drive, press F10 to save and exit, selecting either "Removable Devices" (bootable USB disk) or "CD-ROM Drive" (bootable CD/DVD) as the boot priority.

Step 3. Recover data from a hard drive that won't boot
When you boot from a USB drive, you can run Deep Data Recovery from the WinPE bootable disk. It will allow you to select the drive you want to scan to recover lost files.
Click "Scan" to start the scanning process.

After scanning the computer or laptop, you can preview and select the targeted files to recover. Once you've chosen the files you want to recover, click the "Recover" button to restore them. To avoid data overwriting, it's recommended to save the recovered data to another location.

After scanning and recovering your data, be sure to transfer them to an external device for safekeeping.
Fix Windows 10 Stuck at Getting Files Ready for Installation
If you're experiencing the issue of Windows 10 getting stuck at "getting files ready for installation" after exporting your data, you can try to resolve it by following certain methods.
Method 1. Reset the BIOS
Step 1. Enter your BIOS, go to the Boot section and check your boot priority list.
Step 2. If your boot drive (SSD/HDD) is not at the top, prioritize making it your number one priority, rather than other options like Windows Boot Manager, USB HDD, or DVD Rom.
Step 3. Save and exit the BIOS.
Step 4. Reboot your computer.
Method 2. Try Booting Your Computer in Safe Mode
Safe Mode starts your computer with only necessary drives and services, limiting Windows operations to basic functions, serving as a troubleshooting tool.
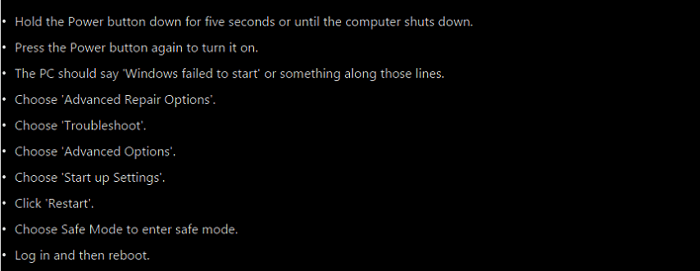
Step 1. Hold the power button down for five seconds or until the computer shuts down.
Step 2. Press the power button again to turn it on.
Step 3. The PC should display a message indicating Windows failed to start.
Step 4. Choose "Advanced Repair Options" > "Troubleshoot" > "Advanced Options" > "Start up Settings".
Step 5. Click "Restart" and choose "Safe Mode" to enter the safe mode.
Step 6. Log in and then reboot your computer.
Method 3. Delete Problematic Files
Restart your PC and you will see the Windows Boot Options page, where you can select the operating system you want to boot into, including the Safe Mode option.

Step 1. In Windows Boot Options menu, choose "Troubleshoot" > "Advanced Options" > "Command Prompt".
Step 2. In the command line, type C: cd Windows\System32\LogFiles\Srt. SrtTrail.txt and press "Enter".
If you see a message saying that a critical file, such as c:\windows\system32\drivers\vsock.sys, is corrupt, you can fix it by deleting the file from the Command Prompt. To do this, navigate to the specified location and enter the command "Del" followed by the name of the file to delete it.

Method 4. Fix Windows 10 Stuck Issue with Windows Repair Services
If you're experiencing the issue of Windows 10 getting stuck at "Getting Files Ready for Installation," you can try using manual fixing services from Qiling. Our professional technical team can assist you in resolving system startup errors, including system failure, system blue screen, system black screen, and other issues, to get your system up and running smoothly.
Consult with Qiling data recovery experts for one-on-one manual recovery service, which includes the following services after a FREE diagnosis:
- Fix Windows boot issues, including BSOD
- Fix Windows error and configure Windows environment
- Restore the system when it fails to boot
- Optimize Windows computer to make it run quickly
Conclusion & FAQs
If all previous solutions fail, you can still try to solve the issue by performing a clean install of Windows 10. You can refer to tips for a clean install without losing data. If you are concerned about the time and potential missteps, you can also seek help from a professional support center nearby.
1. How long does it take for Windows 10 to install?
The estimated time for a Windows 10 clean install is around 2-3 hours, but it can take up to 4 hours for outdated machines or the Enterprise version.
2. How to restart Windows 10 installation?
If you need to restart a Windows 10 installer, there are several ways to do so, but the most direct method is to follow.
1. Press Windows + R, type services. msc and hit Enter.
2. Scroll down and find the Windows Installer.
3. On the General tab, confirm the service is started under Service status.
4. If the service is not currently running, click on "Start" under the "Service status" section and then click "OK".
3. How do you fix Windows cannot install required files?
To resolve the "Windows cannot install required files" issue during Windows installation, follow these steps. First, check if the installation media is corrupted by burning a new copy of the Windows ISO file.
1. Make sure that your DVD drive is clean.
2. Remove overclock settings.
3. Attach your hard drive to a different SATA port.
4. Make sure that you're installing the correct version of Windows.
5. Disable Execute Disable Bit option in BIOS.
6. To avoid issues, ensure that the partition size for Windows installation is not too large. A general guideline is to keep it under 1 TB (terabyte).
7. Change the hard drive type to IDE.
8. Check your hardware.
4. What to do if the computer gets stuck installing updates?
Here are some suggestions to fix a stuck Windows update: Check for any issues with your internet connection, ensure your computer is turned off and then on again, and try restarting your computer in Safe Mode. If the issue persists, you can try running the System File Checker to scan and replace any corrupted system files, or use the Windows Update Troubleshooter to identify and fix any problems with the update process.
- Make sure the updates really are stuck.
- Turn it off and on again.
- Check the Windows Update utility.
- Run Microsoft's troubleshooter program.
- Launch Windows in Safe Mode.
- Go back in time with System Restore.
- Delete the Windows Update file cache yourself.
- Launch a thorough virus scan.
Related Articles
- Top 7 Ways To Fix A Disk Read Error Occurred in Windows 10/8/7
- Mac Won't Boot or Start After macOS Big Sur/Catalina/Sierra Update
- Fix Windows Update Keeps Saying Update and Restart
- How to Fix Corrupted Recycle Bin in Windows 10 and Restore Lost Data
- How to Download and Install ADB Drivers on Windows 11[2024 Updated]
We can extend the uses of Android ecosystems on our PC using Android development tools like ADB and Fastboot, but to do so, we need to download and install ADB software and drivers on our devices, which can be done on Windows 11 using various methods and ways. - How to Fix Drag and Drop Not Working [8 Ways Included]
The Windows drag-and-drop feature allows for quick movement of objects across the OS, streamlining tasks. However, users may encounter a drag and drop not working error, which can be frustrating. Fortunately, this issue can be resolved, and the article provides a solution and an additional layer of data protection.