How Long Does It Take to Image a 1TB 7200 RPM Hard Drive?
A 1TB label does not mean an image always reads a full terabyte. An ordinary backup can process only selected data, while a sector-by-sector image reads much more. Connection speed and disk health often matter more than the 7200 RPM rating.
Estimate from bytes actually read
A rough lower bound is data read divided by sustained throughput. For example, reading 500GB at a steady 100MB/s takes about 1.4 hours before compression, metadata, verification, and destination writes. A full 1TB at that rate takes roughly 2.8 hours. Real jobs can take longer because speed changes across the platter and small files add overhead.
A USB 2.0 bridge, crowded network share, slow target, or on-the-fly encryption can become the bottleneck. A healthy HDD may run faster on SATA or USB 3.x, but a nearly full or fragmented file system is not itself a reliable stopwatch.
Why estimates vary during the backup
A normal image can skip unused blocks. Sector-by-sector mode reads every accessible sector and usually takes longer and more space. Compression may shorten output but use CPU time; highly compressed media files shrink little. Incremental backups are typically shorter than the first full image.
A sudden drop to very low speed, repeated read retries, clicking, or disconnections signals trouble. Do not keep retrying a mechanically failing disk just to obtain a faster backup. Protect the most important files and assess the drive first.
Measure and verify your own result
Run the first full backup when the PC can remain powered and idle. Note the reported processed bytes and elapsed time after an initial interval; divide to estimate the remaining time instead of trusting an early progress estimate. Keep laptops on AC power.
When it finishes, inspect the backup task log and test a sample restore. Scheduling future images and retaining more than one version matters more than optimizing away a few minutes from a single run.
Measure a 1TB Disk Image with Qiling Disk Master
Use the standard Disk/Partition backup path for a practical timing test. The interface shows an estimated required space before starting; do not infer a universal completion time from the example screenshot.
Step 1. Connect a separate destination drive with adequate free space. Open Qiling Disk Master and select Backup and Recovery > Disk/Partition backup. Prefer a reliable USB 3.x or direct SATA destination with enough capacity.
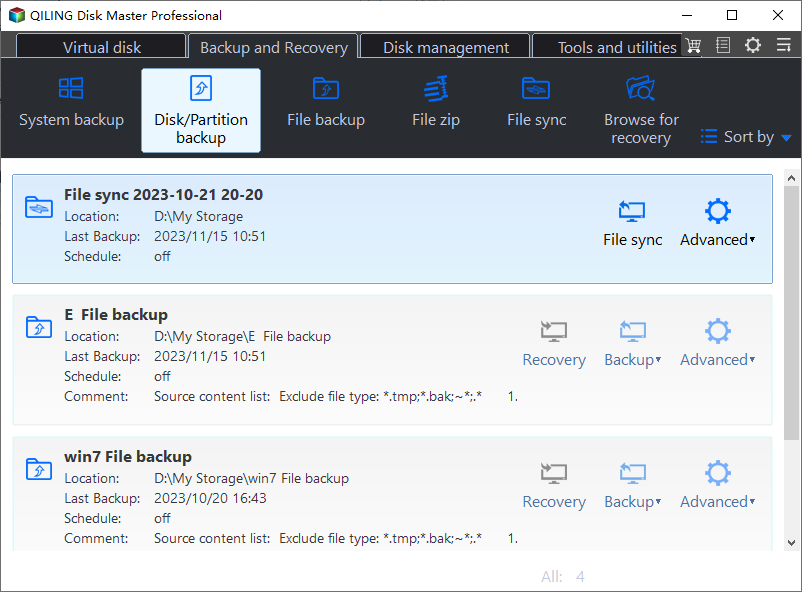
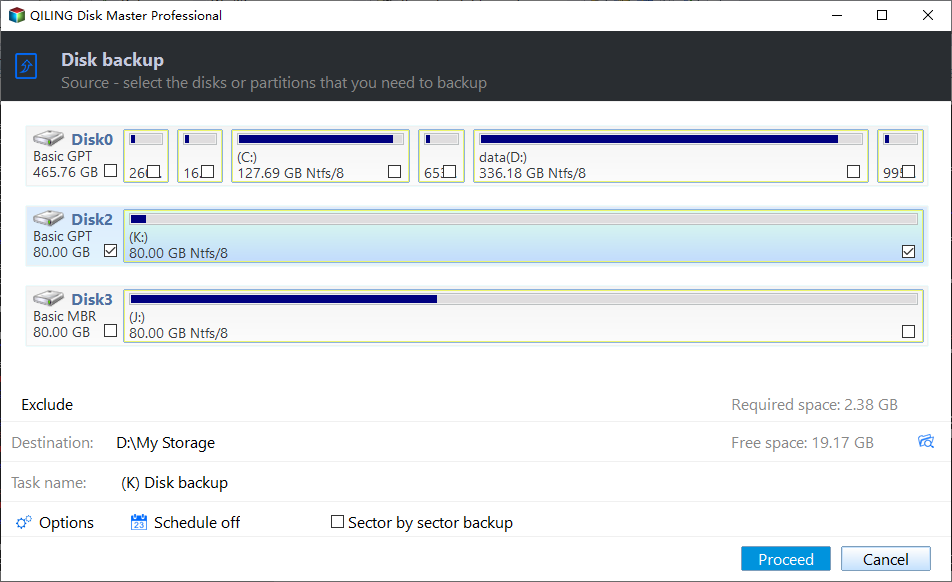
Step 2. On the source screen, select the entire physical disk by model and capacity if you need a restorable disk image; select individual partitions only if the article calls for that narrower scope. Choose the 1TB physical HDD, not a single partition, if the goal is whole-drive recovery.
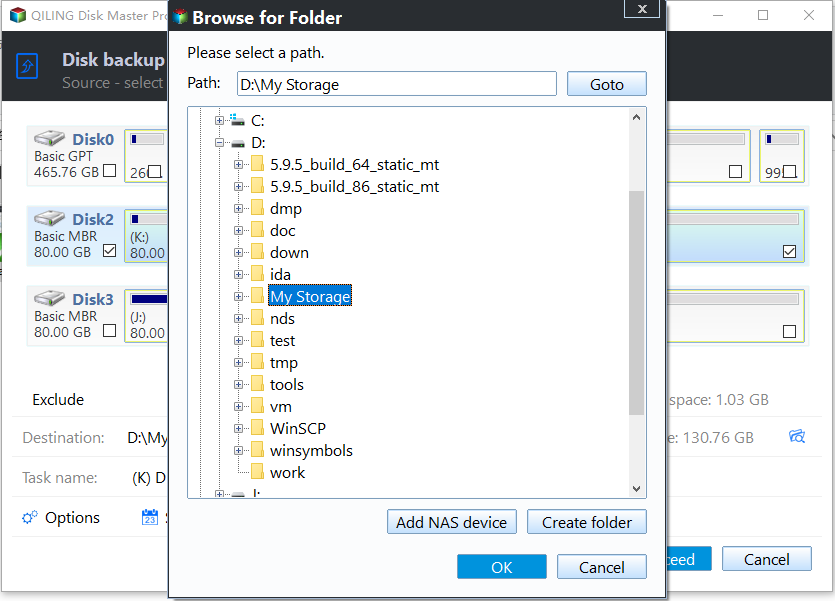
Step 3. Click the destination browse control and choose a folder on the separate drive. Check the estimated required space and confirm that the image is not being saved on the disk being protected. Confirm the destination is a different physical drive.
Step 4. Review the selected source, destination, task name, and any optional schedule. Click Proceed and leave both drives connected until the backup completes. Keep sector-by-sector backup disabled for a routine image unless an exact sector copy is needed.
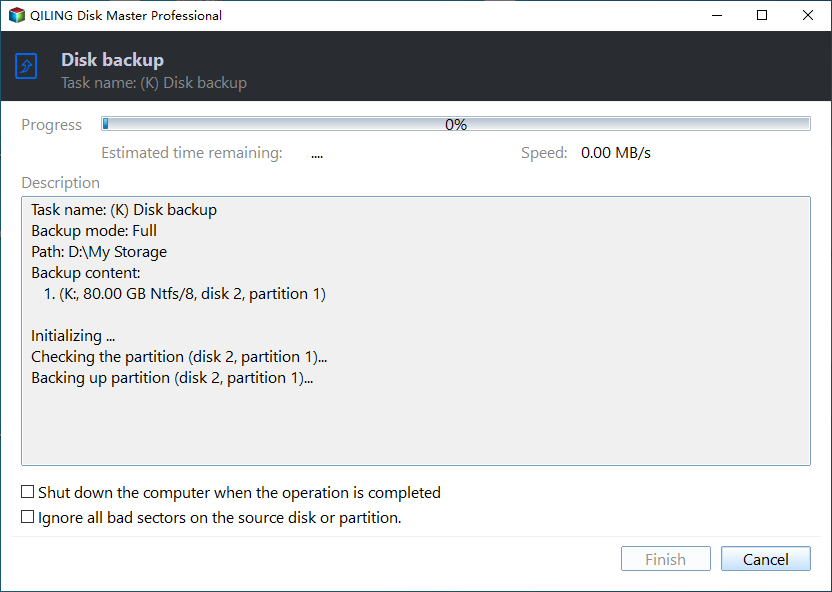
Step 5. Check the backup task result and use a test restore or recovery environment to verify that the image is usable. Record elapsed time and run a test restore so speed is not the only success measure.
Frequently Asked Questions
Will 7200 RPM always image faster than 5400 RPM?
No. Interface, disk condition, density, file layout, and destination speed also matter.
Why is the first backup slower?
A full backup processes the initial data set; later incremental jobs may process only changes.
Conclusion
Estimate from actual bytes and sustained speed, allow extra time for overhead, and verify the resulting image.
Related Articles
- Best Way to Image a Drive
Select the image scope and recovery plan. - HDD-to-SSD Clone Time
Compare image and clone duration factors.
Products
Articles & Tutorials
- Data Recovery
- Data Backup
- File Recovery
- File Backup
- System Backup and Restore
- Disk and Partition Clone
- Technical articles
- Mobile articles
- Disk Master Help
- Windows Data Recovery Tutorials
- Windows Secure Delete Tutorials
- Windows Partition Management Tutorials
- Windows File Backup and Restore Tutorials
- Windows System Backup and Restore Tutorials
- Windows Disk Backup and Restore Tutorials
- Windows Clone Tutorials