Windows Server Migration Tools: How to Migrate Operating System to A New Server
With advancements in technology, hard drives have become smaller, lighter, and more spacious, while also becoming more affordable. This has made it possible for small businesses to easily invest in new servers without breaking the bank. To take advantage of this, finding a reliable Windows server migration tool is a great idea, allowing you to transfer your well-configured, stable, and smoothly running OS and applications to a new server with minimal disruption.
Other top reasons you may want to migrate Windows server
- You're looking to upgrade an old machine to improve its OS performance and speed.
- You're experiencing frequent server crashes and downtime, and you're planning to migrate your OS and data to a new server to prevent these issues.
- Many scenarios exist where you have no choice but to switch to a new machine, including software failure, hardware failure, user error, and natural disasters, among others.
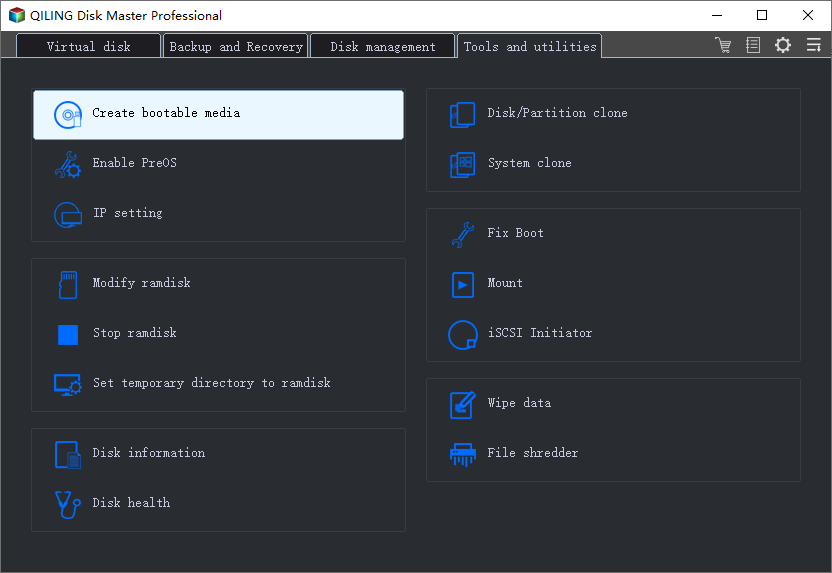
Windows Server built-in tool
Migrating from an existing computer running Windows Small Business Server 2003 to new hardware involves several key operations. This process includes migrating the operating system, applications, and data to the new hardware, as well as configuring the server to run on the new system.
1. Evaluate the current status of the source server, then proceed to install Windows Small Business Server (SBS) 2003 on a new server and join it to the existing domain.
2. Transfer Exchange Server 2003 settings and folders.
Migrate shared folders and data folders.
3. Install and configure the Dynamic Host Configuration Protocol (DHCP) and then configure Windows Small Business Server (SBS) 2003 settings.
4. Migrate Internet Information Services (IIS) Web sites.
Install and migrate Windows Server Update Services (WSUS).
5. Migrate Internet Security and Acceleration (ISA) Server settings.
6. Migrate Microsoft SQL Server databases.
7. Remove the source server from the network.
Third Party Windows Server migration tool
The Windows server disk image software is effective in creating a backup image of the old Server operating system. This image can then be restored to a new computer with different hardware, preserving the original system's settings, such as machine ID, domain name, and configuration, making it seem like the system was never changed.
Qiling Backup offers a 'System Transfer' feature to facilitate the migration of Windows Server to a new one, supporting both Windows Server and PCs. The process involves backing up the old Server OS to an image, followed by a step-by-step guide on how to restore the OS to dissimilar hardware.
Step 1. Create an Qiling Backup emergency disk
Run Qiling Backup, click Tools, then click "Create bootable Media".
Select a USB flash drive to create the rescue media.
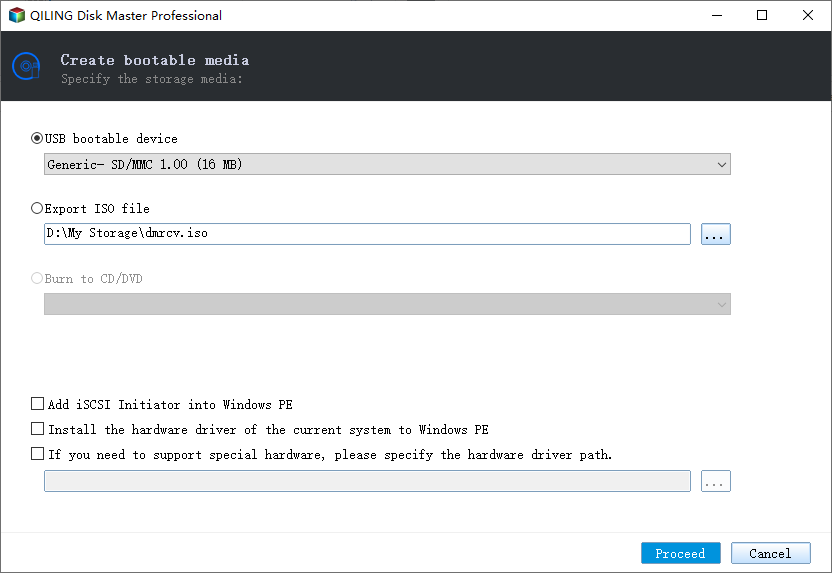
Click "Proceed".
Tip: You can burn the ISO image to a CD/DVD using tools like Nero to create a bootable disc.
Step 2. Create a Server system backup
Run Qiling Backup, and click the "System Backup" option on the top pane.
Choose a bootable USB drive to store the system backup image, or use any other location that the new server can detect and access.

Click Proceed.
Step 3. Boot the dissimilar hardware/computer from Qiling Backup emergency disk
Connect the USB flash drive or external hard drive containing the emergency disk and system backup image to the new computer.
Restart PC and press F2/F8 to boot into BIOS.
Change the computer's boot drive to the Qiling Backup emergency disk, which will allow it to boot from that drive instead of its original boot drive. This is typically done to troubleshoot issues or run the computer from a known-good state.
Then you'll enter Qiling Backup main interface.
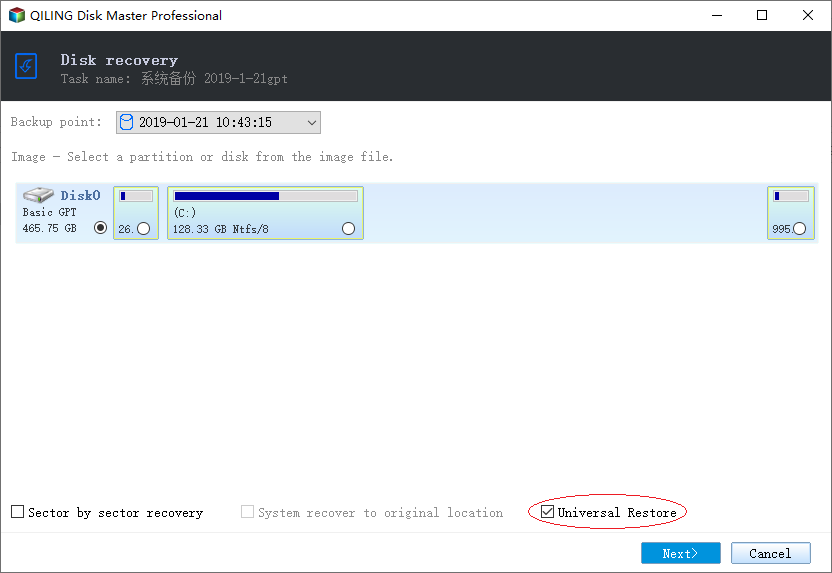
Step 4. Start to transfer system to the new server
To start a Qiling Backup recovery, click on "Browser to Recover" on the main interface.
Select the system image on your USB external drive and click "OK" to continue.

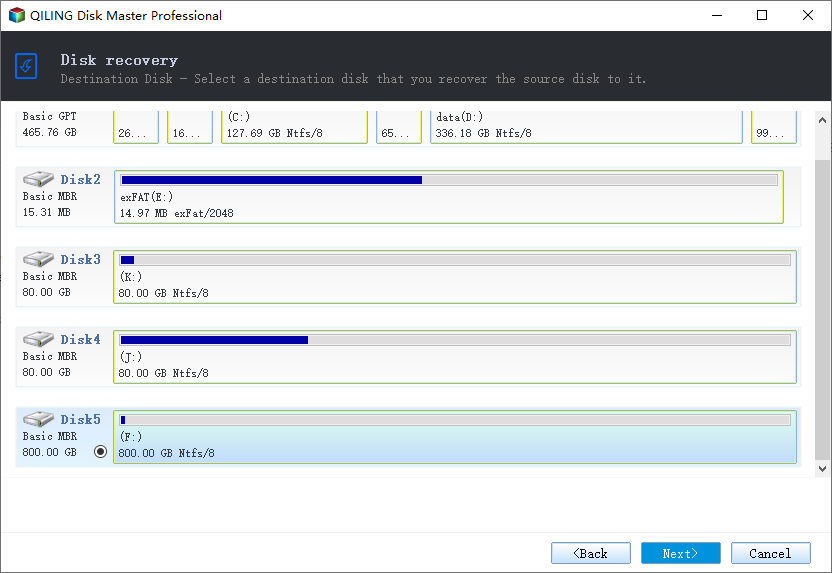
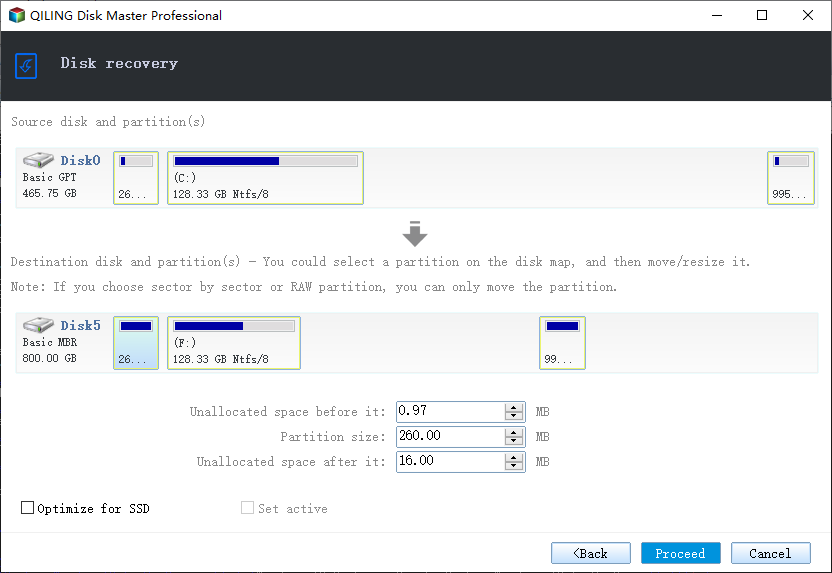
To restore a system image to a new disk, select the target disk where you want to restore the system image, and check the box next to "Universal Restore" to ensure that the system is properly configured for the new hardware.
Select the destination disk and click "Next" to continue.
Click "Proceed".
Related Articles
- What's the Difference between Differential and Incremental Backups
- How to Upgrade Windows 7/10 System Hard Drive without Reinstalling Windows
- How to Ghost a Hard Drive in 3 Steps
- Free Download Qiling Backup Full Crack + Serial/Keygen
- Restore Deleted Files in Windows 10/8/7 for Free
If you find your important files deleted accidentally, don't stress out until you try these 4 methods to restore deleted files in Windows 11/10/8/7. - Restore or Reset NTFS Permissions in Windows 10 Effectively (5 Ways)
This article provides 5 effective ways to backup and restore NTFS permissions, reset NTFS permission to default, or achieve similar tasks, offering helpful solutions for users who need to manage NTFS permissions.