Reconnect Your File History Drive in Windows 11
The warning means File History cannot reach its configured destination. It does not necessarily mean the backup files are gone. A loose USB cable, an offline network share, or a drive letter change can cause it. First identify the original backup disk; selecting an unrelated disk may start a new history without your earlier versions.
Identify the original File History drive
Open File Explorer and compare the backup drive's name, capacity, and stored FileHistory folder with what File History displays in Control Panel. For a network destination, confirm that you can open the share and that your account still has permission. If the USB drive does not appear at all, try a known-good cable and port before changing settings.
Reconnect the drive and check the latest version
Step 1. Attach the original drive or reconnect to the original network share. Unlock it if the destination is encrypted. Wait until it appears in File Explorer.
Step 2. Open Control Panel > System and Security > File History. If the original destination is recognized, click Run now. If Windows asks you to choose a drive, select the verified original destination.
Step 3. Check the last backup time. Use Restore personal files to preview an older version, then restore a test file to a different folder. Do not overwrite a current document as a test.
If the original drive is unavailable
Use Select drive to choose a healthy replacement with enough free space and run a new backup. Keep the old drive unchanged until you have extracted any older versions you still need. A replacement drive protects files going forward; it does not automatically make the old versions available. If the drive itself is failing, prioritize copying readable files and consider professional assistance for physical faults.
Create a second copy with Qiling Disk Master
When the warning persists, a separate file backup is better than waiting unprotected. Qiling Disk Master can back up selected folders to another disk, independent of File History.
Step 1. Connect the replacement backup disk and choose Backup and Recovery > File backup in Qiling Disk Master.
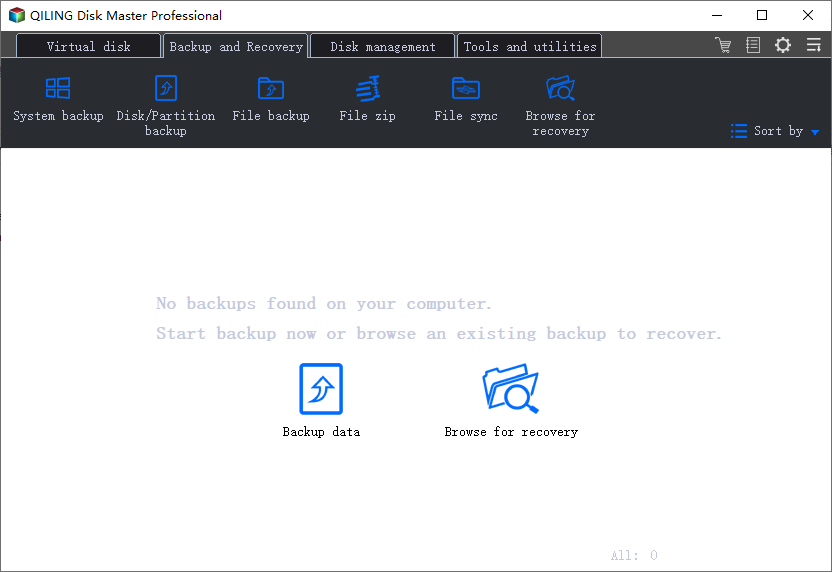
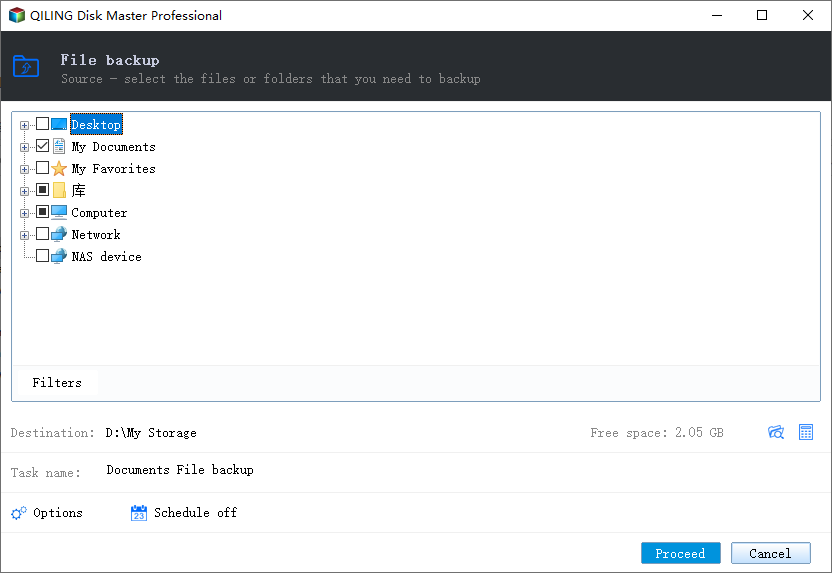
Step 2. In the source tree, expand the folders that contain your files and select the folders to protect. Check that the selected folders are the ones you need.
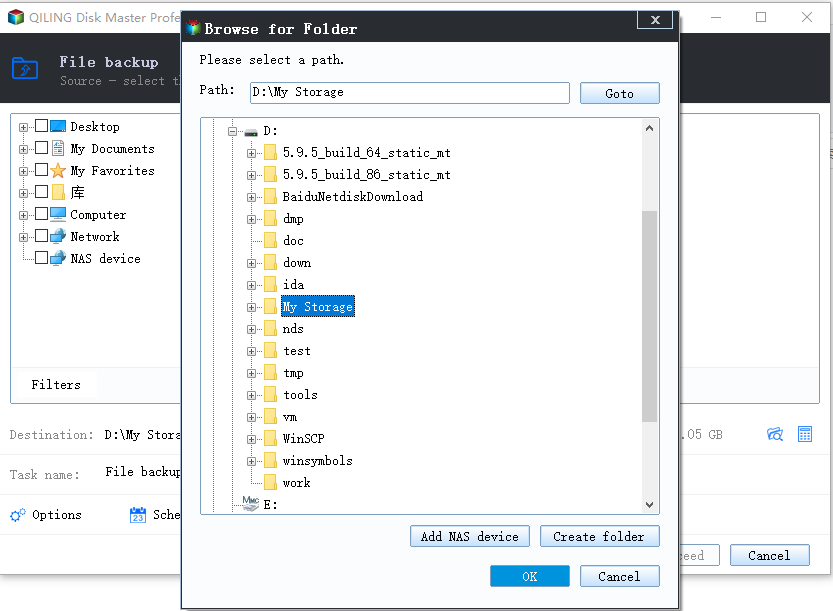
Step 3. Open the destination browser and choose a folder on the replacement backup disk. Confirm its drive name and available space before clicking OK.
Step 4. Review the selected source folders and destination, then click Proceed. After completion, restore a small test file to another location to confirm that the backup works.
For a stopped task following an update, see File History not working after Windows Update.
Related Articles
- Fix File History Not Working
Troubleshoot other backup errors.
Products
Articles & Tutorials
- Data Recovery
- Data Backup
- File Recovery
- File Backup
- System Backup and Restore
- Disk and Partition Clone
- Technical articles
- Mobile articles
- Disk Master Help
- Windows Data Recovery Tutorials
- Windows Secure Delete Tutorials
- Windows Partition Management Tutorials
- Windows File Backup and Restore Tutorials
- Windows System Backup and Restore Tutorials
- Windows Disk Backup and Restore Tutorials
- Windows Clone Tutorials