SATA-to-NVMe Clone Will Not Boot: Check the Cause
A completed clone does not guarantee the new NVMe disk is bootable. The problem may be physical detection, firmware boot order, a missing boot partition, encryption recovery, or a damaged source installation. Diagnose in that order before changing partitions.
First check whether firmware sees the NVMe SSD
Power off, inspect the installation and compatible M.2 slot, then open UEFI setup. If the NVMe drive is absent, verify slot protocol support, seating, and any disabled or shared port. No Windows repair command can fix a drive the firmware cannot detect.
If detected, check for a Windows Boot Manager entry on the new SSD and temporarily disconnect the old SATA boot disk. A PC that starts only with the old disk attached may still be loading boot files from that disk.
Then check boot mode and copied partitions
Compare the source and destination layouts in Disk Management from a working system or Windows installation media. UEFI installations normally need a GPT disk with an EFI System Partition; older Legacy installations use different boot files. Do not randomly switch between UEFI and Legacy or run MBR repair commands on a GPT/UEFI setup.
If the clone included only C:, redo the migration using System clone or a full-disk clone with the necessary boot partitions. If the complete layout is present but startup files are damaged, Windows Startup Repair from official installation media is an appropriate next step. Keep the original disk unchanged.
Handle encryption and recovery separately
A BitLocker recovery prompt is not the same as a missing boot entry. Enter the saved recovery key and confirm Windows can unlock the volume; do not delete partitions to bypass encryption.
If startup still fails, record the exact error and whether firmware detects the drive. Check storage controller settings and manufacturer guidance. Use Microsoft's installation media for Startup Repair or a clean installation when the clone cannot be repaired. Restore files from a separate backup if needed.
Redo a Complete Windows Clone with Qiling Disk Master
Use this path only after confirming that the NVMe SSD is supported and that an incomplete original clone is the likely cause. System clone selects the Windows boot partitions automatically; a full-disk clone is needed if separate data partitions must also move.
Step 1. Connect a compatible destination SSD and open Qiling Disk Master. Choose Tools and utilities > System clone. Reconnect both drives on a working Windows system and back up the NVMe target if it holds any useful data.
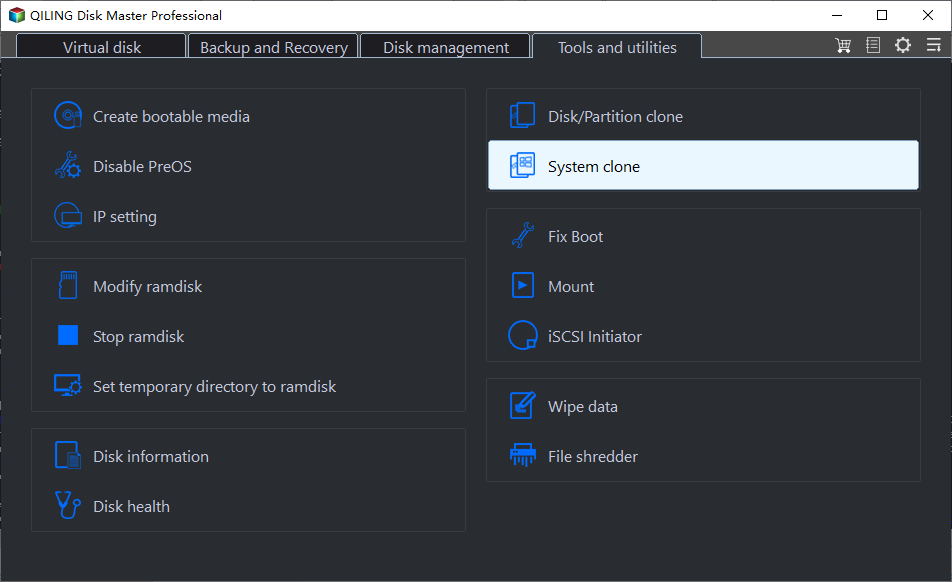
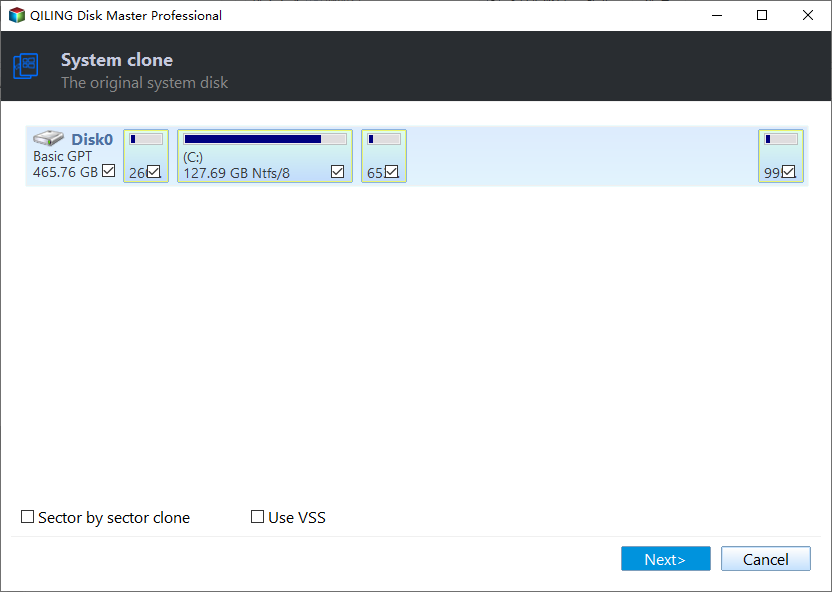
Step 2. The wizard automatically selects the Windows system partitions. Confirm that it found the intended installation, then click Next. Confirm the selected Windows installation is the one on the SATA disk.
Step 3. Select the destination disk by model and capacity and click Next. Choose the NVMe destination by its real model and capacity. The destination will be overwritten.
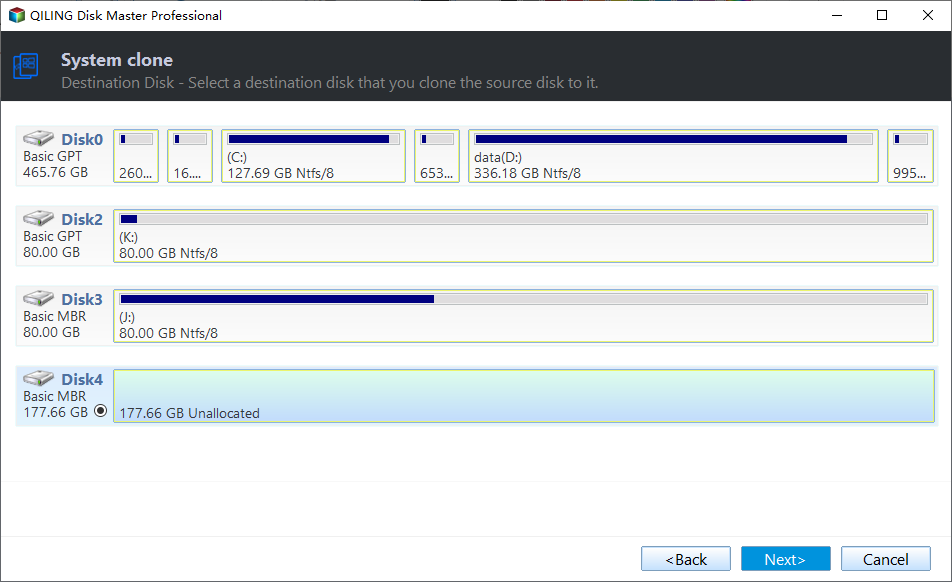
Step 4. Review the source, target, and proposed layout. Make sure boot and Windows partitions are included; do not confuse a sample screenshot with your layout. Click Proceed, confirm the overwrite warning, and wait for the operation to finish.

Step 5. Disconnect the SATA disk for the first test, select the NVMe Windows Boot Manager, and record any exact error message. Keep the old boot disk unchanged until you have verified the new one.
Do not mix Fix Boot and Rebuild MBR instructions: those address different boot paths and neither solves an undetected or physically incompatible NVMe SSD.
Frequently Asked Questions
Should I rebuild the MBR on a UEFI/GPT NVMe installation?
No. First identify the actual boot mode. UEFI/GPT boot uses an EFI System Partition rather than an MBR boot path.
Why does Windows boot only while the old SATA disk is connected?
The firmware may be loading boot files from the old disk. Check the NVMe boot entry and copied EFI or System Reserved partition.
Conclusion
Start with hardware detection, then boot mode and partition layout. Re-clone only when the copied Windows layout is incomplete, and preserve the original until startup is verified.
Related Articles
- Transfer Windows from SATA to NVMe
Review the correct migration prerequisites. - Clone a Windows Boot Drive
Check boot partitions before a second clone.
Products
Articles & Tutorials
- Data Recovery
- Data Backup
- File Recovery
- File Backup
- System Backup and Restore
- Disk and Partition Clone
- Technical articles
- Mobile articles
- Disk Master Help
- Windows Data Recovery Tutorials
- Windows Secure Delete Tutorials
- Windows Partition Management Tutorials
- Windows File Backup and Restore Tutorials
- Windows System Backup and Restore Tutorials
- Windows Disk Backup and Restore Tutorials
- Windows Clone Tutorials