How to Transfer a Windows Boot Drive to Another Drive
Transferring the boot drive means moving the Windows installation plus the partitions and firmware entry it needs to start. Copying C: in File Explorer is not enough. Decide whether only Windows or every data partition must move.
Identify the boot disk and all needed partitions
Use Disk Management to locate C:, EFI System Partition or System Reserved, recovery, and any data volumes. Confirm whether the boot partition is on the same physical disk as Windows. Mixed-disk boot setups require extra care because cloning only the Windows disk may leave boot files behind.
Check source health, target interface and capacity, and the BitLocker recovery key. Preserve separate copies of important files. The target will be overwritten.
Choose system clone or whole-disk clone
System clone selects the Windows system partitions for an OS-only move. Whole-disk clone also carries unrelated data partitions on the source. Select the latter if those data volumes must move together and the target can hold them.
If the current Windows system is corrupt or the drive has read errors, a clean installation or verified image restore may be safer. Sector-by-sector mode is generally unnecessary for a routine boot-drive upgrade.
Test the new boot drive by itself
After the clone, shut down, put the target in the intended internal slot, and disconnect the old boot drive if practical. Select Windows Boot Manager on the new drive in UEFI and confirm that Windows starts.
Check activation, applications, encryption, recovery access, and multiple restarts. If extra capacity remains unallocated, inspect partition order before extending C:. Keep the original untouched until the target is reliable.
Transfer Windows with Qiling System Clone
Use System clone when the goal is to move Windows and its boot partitions but not unrelated data volumes. The wizard automatically identifies the system partitions; the screenshots are examples.
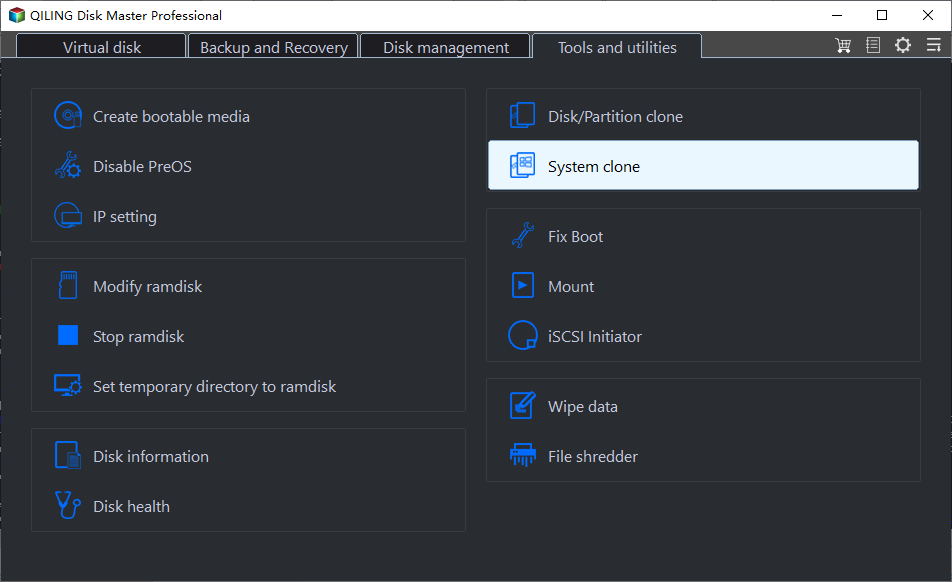
Step 1. Connect a compatible replacement drive and open Tools and utilities > System clone in Qiling Disk Master. Attach the target with a compatible enclosure or spare port.
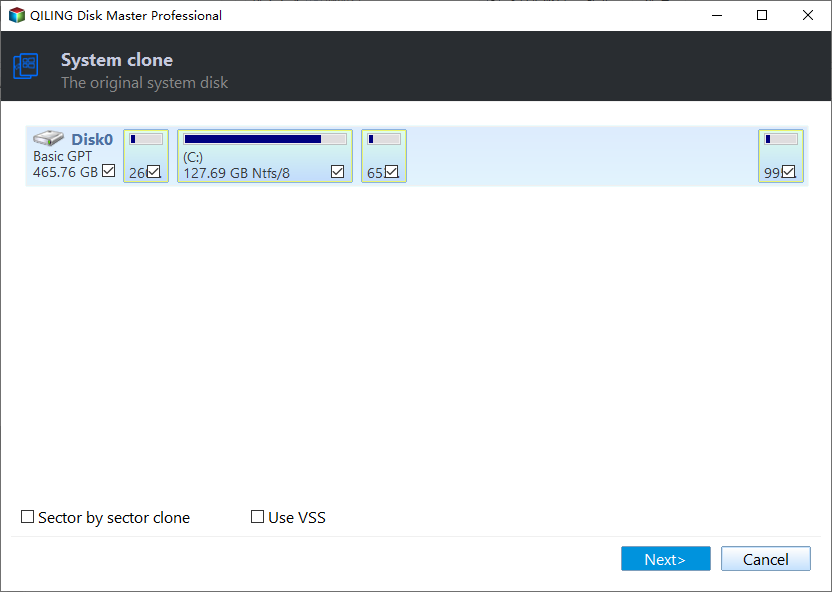
Step 2. Confirm the wizard automatically selected the intended Windows installation and its system partitions; click Next. Confirm the displayed Windows installation is the one you intend to move.
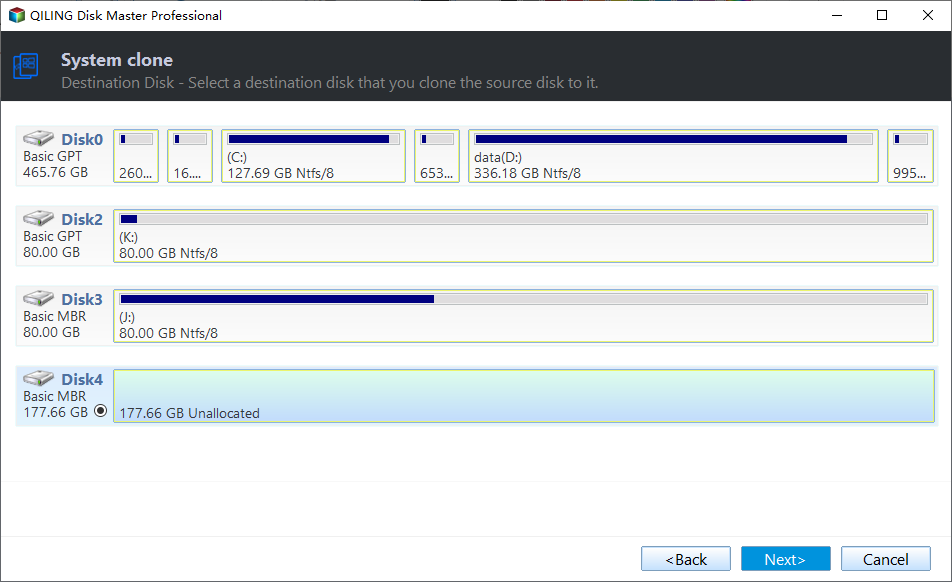
Step 3. Choose the replacement disk by model and capacity and click Next. All files on that destination will be overwritten. Select the replacement by model and capacity and back up its existing files.
Step 4. Review the source, target, and proposed layout. Click Proceed, accept the destination overwrite warning, and wait for completion. Check the proposed boot layout and available capacity.

Step 5. Shut down and test the new drive without the original boot disk connected, if practical. Select the target Windows Boot Manager and verify independent startup.
Frequently Asked Questions
Will copying C: make the new disk boot?
Not reliably; EFI or System Reserved boot files may be elsewhere.
Can I keep the old drive installed?
Yes after an independent first-boot test, but do not erase it prematurely.
Conclusion
Move the complete boot layout, not just visible files, and confirm the new disk starts Windows without help from the old one.
Related Articles
- Clone a Boot Drive to SSD
Review boot partitions and first-boot verification. - Windows System Backup
Keep a recovery copy before migration.
Products
Articles & Tutorials
- Data Recovery
- Data Backup
- File Recovery
- File Backup
- System Backup and Restore
- Disk and Partition Clone
- Technical articles
- Mobile articles
- Disk Master Help
- Windows Data Recovery Tutorials
- Windows Secure Delete Tutorials
- Windows Partition Management Tutorials
- Windows File Backup and Restore Tutorials
- Windows System Backup and Restore Tutorials
- Windows Disk Backup and Restore Tutorials
- Windows Clone Tutorials