Install Windows 10 on a New Hard Drive from USB
A bootable USB installer and a disk clone solve different problems. Use installation media when you want a fresh Windows system on a blank drive. Use a clone only when you intend to retain an existing healthy installation and its applications.
Before you replace the drive
Check the new disk's interface and capacity, save personal files to separate storage, and record the BitLocker recovery key. Note the current Windows edition and activation state. Use Microsoft's official installation-media instructions on a working PC to make a USB installer.
Windows 10 reached end of standard support on October 14, 2025. A PC eligible for Windows 11 should normally use a supported installation instead; use Windows 10 only when there is a specific compatibility and security plan.
Install from the USB drive
Step 1. Install the new blank HDD or SSD, connect the official installer USB, and enter the one-time boot menu using the computer maker's key. Select the USB entry matching your intended UEFI mode.
Step 2. Choose language and keyboard settings, then select Install Windows. Enter a valid product key if required, or use the available skip option when an appropriate digital license exists. Select the edition that matches the license.
Step 3. Choose a custom installation and identify the new disk by capacity. If it contains no data you need, select its unallocated space and let Setup create the required partitions. Do not delete partitions on any other disk. Disconnect other drives first if practical to reduce selection mistakes.
Step 4. After Setup restarts, remove the USB or choose Windows Boot Manager on the new drive. Complete account and privacy setup, install the PC maker's drivers, connect to Windows Update, and check activation.
Restore data and verify recovery
Reinstall applications from legitimate installers; copying Program Files does not reinstall them. Restore documents, photos, browser data, and game saves from the separate backup. Open representative files and check that updates, networking, and recovery options work.
Keep the original drive unchanged until all data is accounted for. If the new disk is not detected by firmware, troubleshoot its physical connection before repeating Windows Setup.
Back Up Files with Qiling Before a Clean Install
Use Qiling File backup to preserve personal data before erasing or replacing storage. This workflow does not create the Microsoft installation USB; use Microsoft's official media instructions for that.
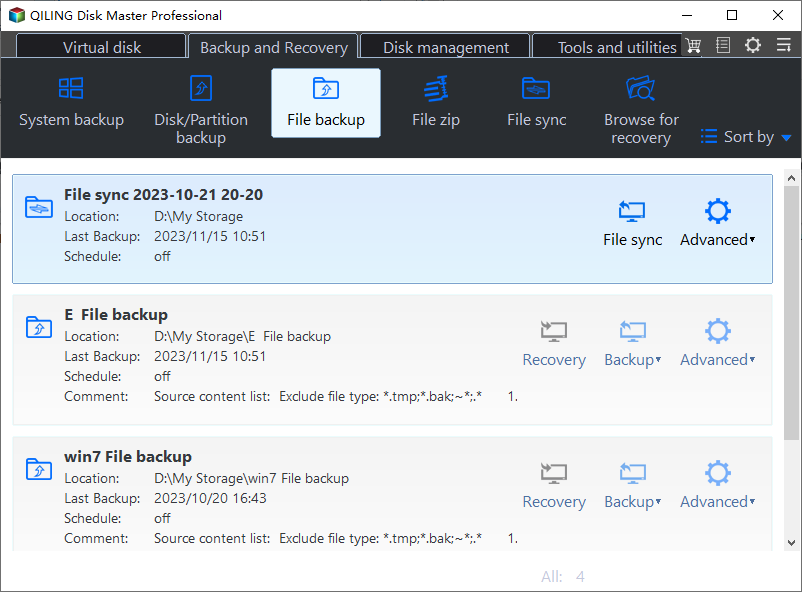
Step 1. Connect a separate backup drive. In Qiling Disk Master, open Backup and Recovery > File backup. Use a drive that will remain available after Windows is reinstalled.
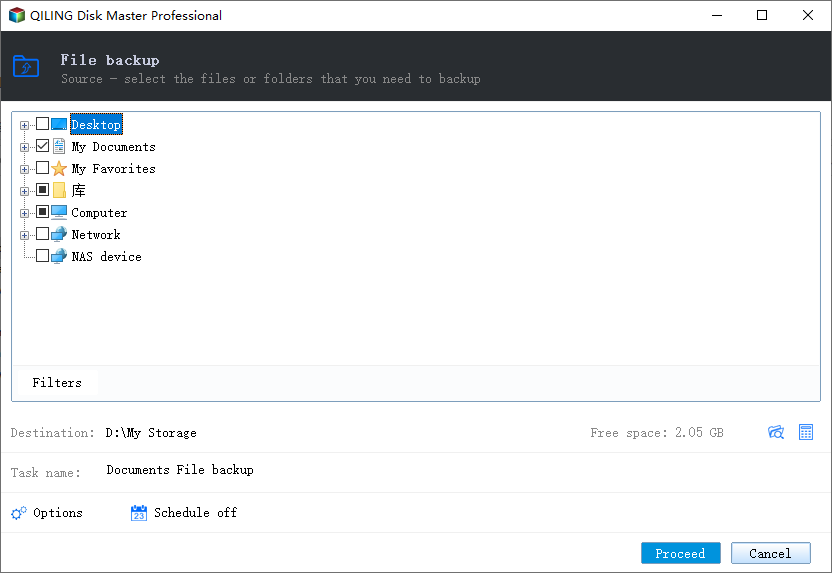
Step 2. Select the important folders in the source tree. Include user folders and application-specific data such as mail archives and local game saves.
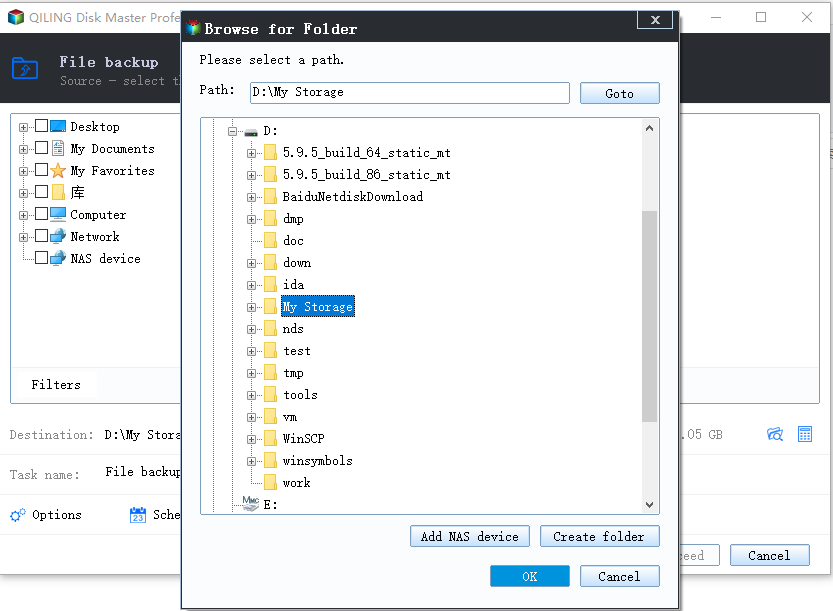
Step 3. Browse to a destination on the separate drive and confirm sufficient space. Do not place the only backup on the disk you plan to erase.
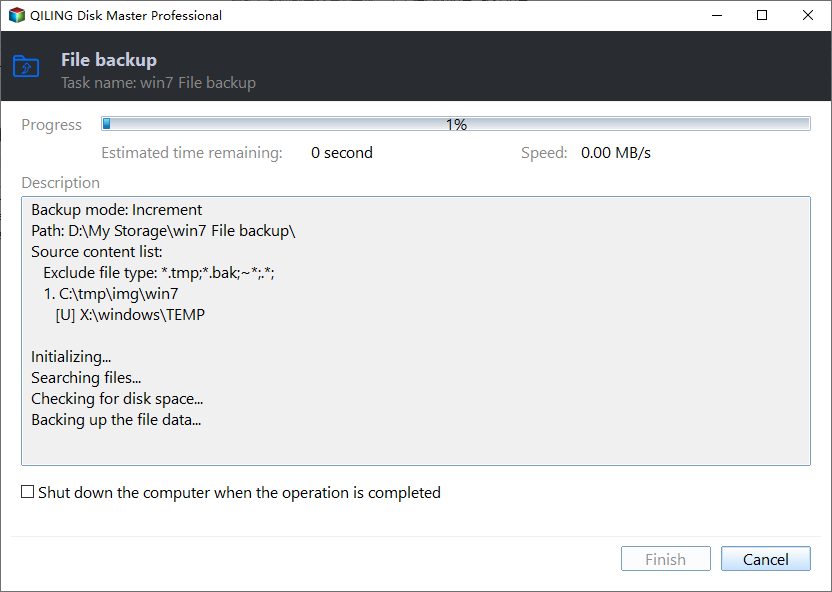
Step 4. Review the folders and destination, then click Proceed. Wait for completion without disconnecting the storage. Check the folder list and backup destination before running.
Step 5. Restore a sample to a different folder and open the files. After installation, restore files and reinstall applications separately.
Frequently Asked Questions
Does the USB installer preserve my apps?
A clean installation does not. Back up files and plan to reinstall apps.
Can I install Windows 10 on a blank SSD?
Yes when the device and license support it, but consider Windows 10's ended standard support.
Conclusion
Use official Windows media for a clean install, protect files first, choose the correct disk, and verify the restored system afterward.
Related Articles
- Windows File Backup and Restore
Plan file recovery after installation. - Clone a Windows Boot Drive
Keep the current installation instead of reinstalling.
Products
Articles & Tutorials
- Data Recovery
- Data Backup
- File Recovery
- File Backup
- System Backup and Restore
- Disk and Partition Clone
- Technical articles
- Mobile articles
- Disk Master Help
- Windows Data Recovery Tutorials
- Windows Secure Delete Tutorials
- Windows Partition Management Tutorials
- Windows File Backup and Restore Tutorials
- Windows System Backup and Restore Tutorials
- Windows Disk Backup and Restore Tutorials
- Windows Clone Tutorials