Move Windows 11 to Another Drive Without Losing Data
Moving the Windows 11 installation is different from copying documents. The new drive must contain the partitions Windows uses to start, and the old installation should stay intact until the replacement boots on its own.
Choose system clone or entire-disk clone
System clone is suitable when you only need Windows, its boot partitions, and the system volume. A whole-disk clone also copies separate data partitions. Check the old layout in Disk Management before choosing; do not assume every partition on Disk 0 is expendable.
Windows 11 normally uses UEFI and GPT on supported hardware. Keep EFI and recovery partitions with the operating system. A file copy of C: cannot recreate firmware boot entries. Save the BitLocker recovery key and a separate file backup before changing drives.
Prepare the destination
Choose an SSD that fits the PC and provides enough actual space for the selected partitions. If only one slot exists, attach the new drive through a suitable enclosure. Check the device model and capacity in Windows; destination drive letters can change and should not be your only identifier.
Cloning overwrites the target. Copy any target files you need to keep first. If Windows is unhealthy, consider repairing or backing up important data before migrating an installation that may already contain errors.
First boot and recovery checks
After completion, power off and install the new drive internally. If possible, disconnect the old Windows disk for the first boot. Select the new Windows Boot Manager in UEFI, log in, test applications and files, and check activation and encryption.
If the new disk does not boot, reconnect the old one and inspect partition selection, UEFI boot order, and connection before repeating a clone. Keep the original until the replacement passes several restarts.
Move Windows 11 with Qiling Disk Master System Clone
Qiling Disk Master has a separate System clone option. It selects the Windows-related partitions as the source; do not use this method if you also need unrelated data partitions copied.
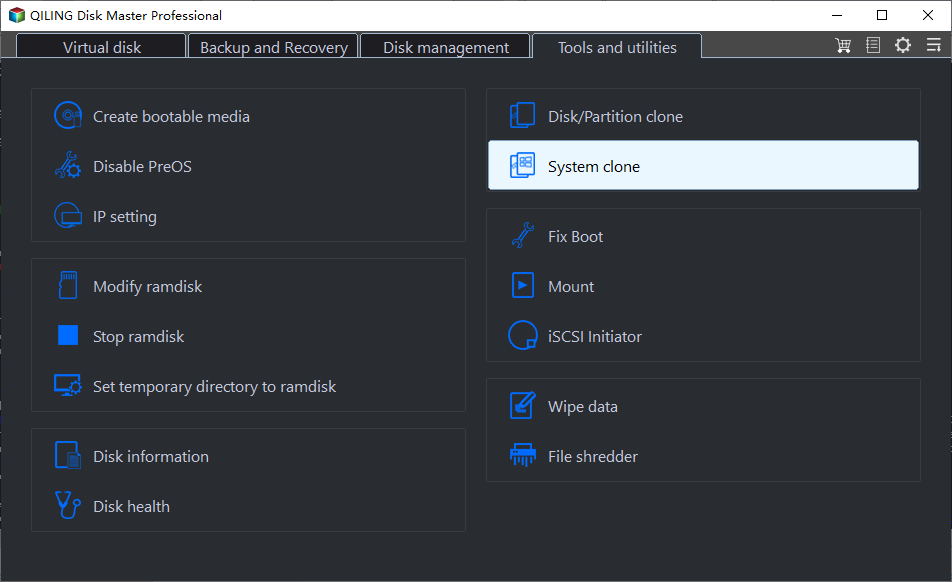
Step 1. Connect a compatible destination SSD and open Qiling Disk Master. Choose Tools and utilities > System clone. Connect the target SSD and confirm that Windows detects it. Save any data already on the target.
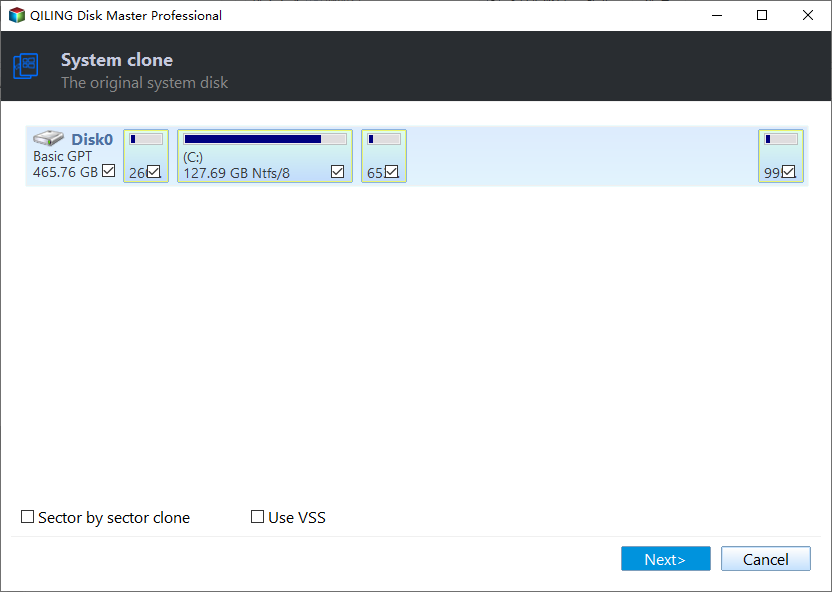
Step 2. The wizard automatically selects the Windows system partitions. Confirm that it found the intended installation, then click Next. Check the automatically selected Windows 11 disk and included EFI, C:, and recovery partitions on the source screen.
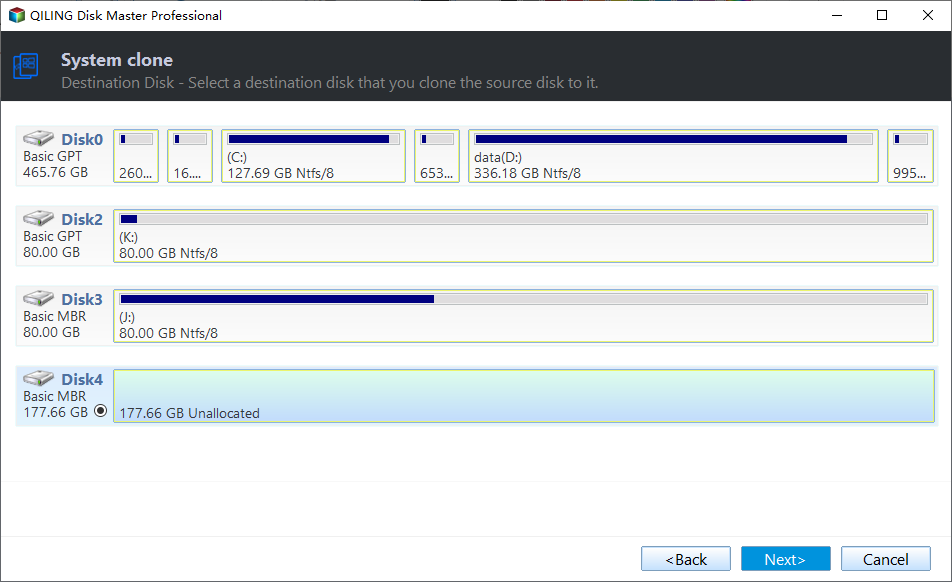
Step 3. Select the destination disk by model and capacity and click Next. Select the new SSD, not the running Windows disk, and confirm its size and interface. The destination will be overwritten.
Step 4. Review the source, target, and proposed layout. Check the partition layout and available target space. Enable SSD optimization when available. Click Proceed, confirm the overwrite warning, and wait for the operation to finish.

Step 5. Install the target internally and boot with the old Windows disk disconnected if practical; then check files and applications. Keep the old boot disk unchanged until you have verified the new one.
Use whole-disk cloning instead if a separate data volume on the source must move with Windows.
Frequently Asked Questions
Will my documents remain?
Files on the selected Windows volume move with the system clone, but separate data partitions may not. Back them up or use whole-disk clone.
Can I move the installation to a different PC?
A different motherboard can require drivers and separate activation. File migration and a fresh installation may be safer.
Conclusion
Select a method that matches the partitions you need, protect data first, and verify Windows 11 boots from the new disk before reusing the old one.
Related Articles
- Migrate Only Windows to an SSD
Understand which boot partitions accompany the OS. - Windows System Backup and Restore
Prepare an independent recovery route.
Products
Articles & Tutorials
- Data Recovery
- Data Backup
- File Recovery
- File Backup
- System Backup and Restore
- Disk and Partition Clone
- Technical articles
- Mobile articles
- Disk Master Help
- Windows Data Recovery Tutorials
- Windows Secure Delete Tutorials
- Windows Partition Management Tutorials
- Windows File Backup and Restore Tutorials
- Windows System Backup and Restore Tutorials
- Windows Disk Backup and Restore Tutorials
- Windows Clone Tutorials