How to Format a Disk on Mac? 2023 Step-By-Step Guide
You can format a disk on your Mac, and it's free! To do so, follow this page to learn the best format for your Mac disk or hard drive, and then use one of the two reliable disk formatting tools to successfully format the disk.
The solutions provided here are not only applicable to formatting a Mac's internal drive, but also work for formatting external hard drives, USB drives, and SD cards on a Mac. Let's get started.

What Does It Mean to Format a Disk on Mac?
Formatting a disk on Mac refers to preparing a device for data storage or changing the device's file system format, similar to the general purpose of formatting a disk.
- Clear disk drive for storing more data and files
- Set a new HDD/SSD ready for upgrading the Mac disk
When upgrading your Mac's disk with a new hard drive or SSD, formatting the disk to a macOS-supported format is necessary. The best format for a Mac disk or hard drive is APFS (Apple File System), which is the default and recommended format for modern Macs, offering improved performance, security, and reliability. APFS provides features such as snapshots, encryption, and optimized storage, making it the ideal choice for Mac upgrades.
What Is the Best Format for a Mac Disk or Hard Drive
When setting up a hard drive on a Mac, you'll need to choose a suitable format for the Mac computer. The two best formats for use on a Mac disk are APFS and Mac OS Extended (Journaled).
APFS, or Apple File System, is the latest file system provided by Apple for Mac users, first released in 2016 and now widely used on macOS High Sierra and later systems.
Mac OS Extended (Journaled) was set as the default file system on Mac computers in 1998, and is only used on hybrid and mechanical drives on Mac, with support from macOS High Sierra or newer systems.
The main difference between APFS (Apple File System) and Mac OS Extended (Journaled) is the level of security and efficiency they provide. APFS is the newer file system developed by Apple, offering improved performance, security, and reliability, while Mac OS Extended (Journaled) is the older file system that was widely used on Macs. To check which file system is currently being used on your Mac, go to About This Mac > Storage, and look for the file system type.

[macOS Format] APFS vs. Mac OS Extended
Choosing the best file system for your Mac system depends on your specific needs. APFS (Apple File System) and Mac OS Extended (Journaled) are two popular options. APFS offers features like built-in encryption, snapshots, and improved performance, while Mac OS Extended (Journaled) provides a more traditional file system experience with journaling for data protection. Understanding the differences between these two file systems can help you make an informed decision for your system.
In a word:
- If your Mac is running macOS Mojave or later, use APFS format.
- If your Mac is running macOS High Sierra or older versions, use Mac OS Extended (Journaled).
Mac computers have various file systems available, including APFS, HFS+, and exFAT, among others, which can be listed in a table.
| File System | Abbreviation | Suitable Storage Device |
|---|---|---|
| Mac OS Extended (Journaled) | JHFS+ | Internal disk |
| Mac OS Extended | HFS+ | Internal disk |
| MS-DOS fat32 | FAT32 | USB (32GB or smaller) |
| exFAT | exFAT | USB or external hard drive (64GB or larger) |
While exFAT is a suitable file system for large external storage devices, it's not recommended for Mac internal hard drives. Instead, consider using exFAT for external hard drives, especially those larger than 32GB. This format is designed for big external storage devices, making it a better choice for external drives rather than internal Mac hard drives.
How Do I Format a Disk on Mac? 2022 Complete Guide
After determining the suitable file system format for a Mac disk, you can proceed with formatting it on your Mac. To do this, you can use one of two internal disk formatting tools: the Disk Utility app, which comes pre-installed on Macs, or the built-in formatting function in the Disk Utility app, which allows you to format the Mac hard drive or SSD.
For inexperienced Mac users, Disk Utility is a good choice as it's more user-friendly and allows for simple disk management operations, whereas Terminal is more like DiskPart on Windows, requiring command-line input to execute disk management tasks.
To format a disk on Mac using these tools, follow these steps: First, connect the external drive to your Mac. Then, open Disk Utility from the Utilities folder in Applications. Select the external drive from the sidebar and click the "Erase" button.
#1. Format Disk on Mac with Disk Utility
Step 1. Connect your hard drive to your Mac via a connection cable, treating it as an external hard drive to access its contents.
Step 2. Go to Finder, click "Applications", and click "Utilities".
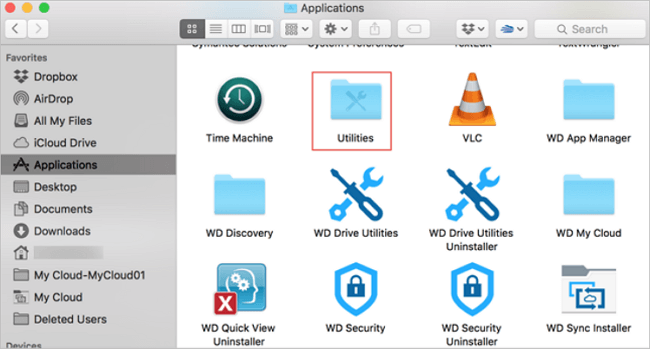
Step 3. Double-click "Disk Utility" to open this tool.
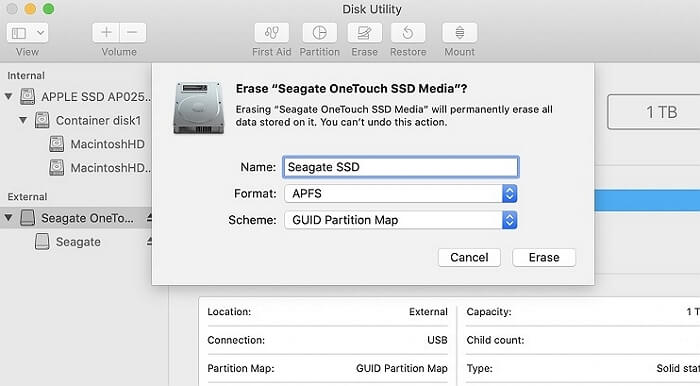
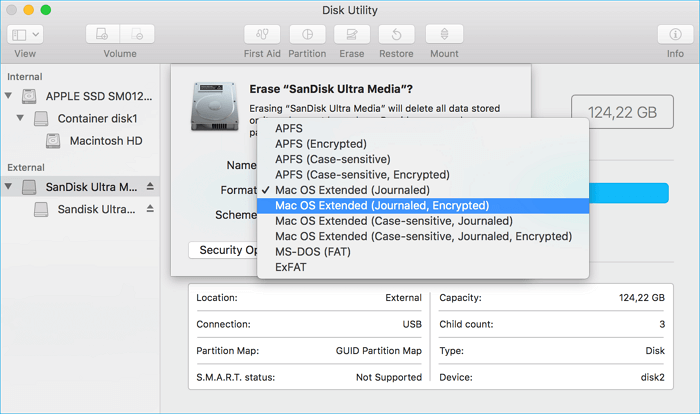
Step 4. Select the new target disk in Disk Utility, click "Erase" at the top pane, and set a new format to the disk - APFS or Mac OS Extended. Click "Erase" to confirm.
#2. Format Disk on Mac Using Terminal
Step 1. To keep the new hard drive connected to your Mac computer, you can use a connection cable, such as a USB cable or a Thunderbolt cable, to attach it to the computer. This will allow you to transfer data and files from the old hard drive to the new one, and also keep the new drive powered and ready for use.
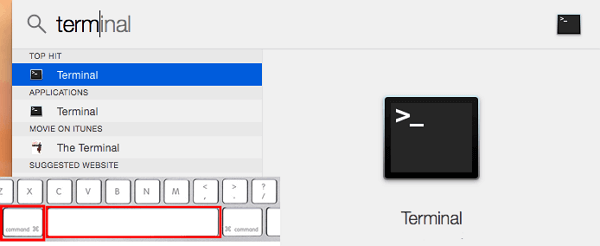
Step 2. To open the Terminal app on a Mac, press the Command (⌘) and Space keys simultaneously to open Spotlight, type "Terminal" in the search field, and then press the Return key to open the Terminal app.
Step 3. Here's a one-paragraph version of the instructions:
- diskutil list
- sudo diskutil eraseDisk APFS MBRFormat /dev/disk2.
You can replace APFS with Mac OS Extended if your Mac uses macOS High Sierra or older operating systems.
To transfer files and macOS to a new disk on Mac, you can either clone the existing disk using Disk Utility or use the built-in Migration Assistant. After cloning or migrating, you can then format the old disk. This process also works for formatting other types of storage devices, such as USB drives.
You can also apply them to change storage devices' file system formats, such as formatting a USB to FAT32 on a Mac.
Formatting Disk on Mac Is Easy with Proper Formatting Utility
Formatting a disk on a Mac can lead to various outcomes, including data loss and formatting to a specific format such as APFS or Mac OS Extended. To avoid data loss, it's essential to back up your data before formatting. For internal hard drives and SSDs, there are reliable disk formatting tools available for Mac users, allowing them to format their disks to the desired format.
You May Also Be Interested In:
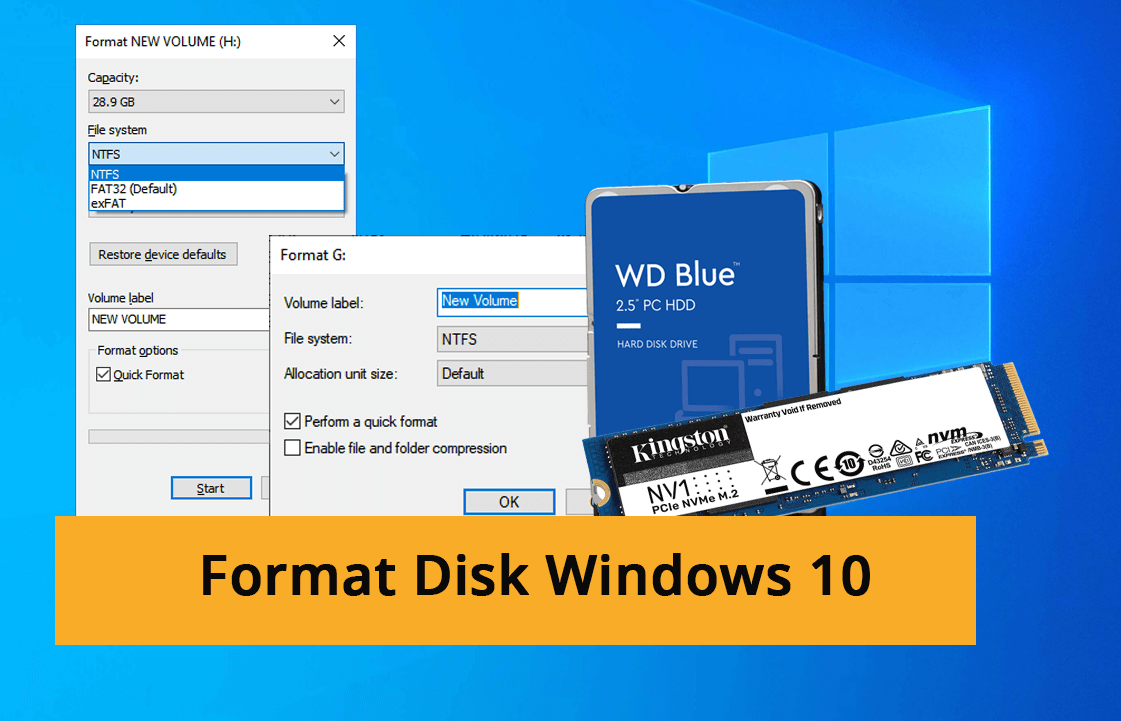
To format a disk in Windows 10, go to File Explorer, right-click on the drive you want to format, and select "Format." Alternatively, you can go to the Start menu, type "This PC," and right-click on the drive, then select "Format.
If you need help formatting a disk on your Windows computer, you can follow a detailed guide for Windows 10/11, etc. Alternatively, if you have a Mac and need a detailed guide to format a disk, you can follow this guide for assistance.
FAQs about Formatting Disk on Mac
To format a disk on a Mac, you can follow these steps:
1. How to format external hard drive on Mac Monterey?
If you're having trouble formatting an external hard drive on your Mac with macOS Monterey, don't worry! You can try the following tips: first, make sure the drive is properly connected to your Mac and that the drive is not corrupted or damaged.
- First, connect your external hard drive to Mac and see if it's readable and writable on Mac.
- If you have valuable files on your Mac, back them up to an external hard drive. Then, transfer those files from the external drive to another drive on your Mac to create a redundant backup.
- To erase the external hard drive on a Mac, open Disk Utility, select the external drive, and choose to erase the disk. This will completely wipe the drive, so be sure to back up any important files before proceeding.
To use an NTFS external hard drive on your Mac, you need to add read-and-write access to the drive using a reliable NTFS for Mac software. After that, back up all essential files, and then format the disk. This will allow you to make changes to the drive.
2. Do I need to format the external hard drive for Mac?
If your external hard drive is formatted with exFAT or FAT32, you don't need to format it for a Mac as both are compatible with Windows and macOS.
If you need to clear data on an external hard drive or make it readable and writable on a Mac, you'll need to format the disk, especially if it's formatted with NTFS. This will erase all data on the drive.
3. Is exFAT for Mac?
exFAT (Extended File Allocation Table) is a file system format that is supported on both Mac and Windows computers. It's commonly used on external storage devices with large storage capacities, such as USB drives, external hard drives, and SD cards, making it a convenient option for transferring and storing files between devices.
Related Articles
- How to Choose and Set the Roku SD Card Format [2022 Best Ways]
- Nintendo Switch SD Card Format: How to Format SD Card for Nintendo Switch
- Internet Browsers Not Working after Windows Upgrade? Fix It Now!
- 6 Ways to Fix Mac Won't Restart After Update (Include Ventura/Monterey/Big Sur)
- Does SSD Need the Power to Retain Data? Answers Are Here!
You plan to keep all backups on an SSD drive, but do you know how long an SSD can hold data? SSDs don't need power to retain data, but they have drawbacks, such as being fast but built differently from HDDs. If you have data loss problems, consider Qiling data recovery software. - Download Windows 10 Builds 14393.67/14393.51 ISO Images
You can download Windows 10 Version 1607 with updates KB3176931 (OS Build 14393.67) and KB3176495 (OS Build 14393.51) either directly or as an ISO image for a clean install.