[SOLVED] How to Open BitLocker Drive on Mac Ventura, Monterey, Big Sur
Microsoft introduced BitLocker, a data encryption system, to secure data on portable and USB flash drives, but it's currently unavailable for Mac.
This article provides a quick guide on how to open BitLocker drives on a Mac, offering solutions for users who need to access BitLocker-encrypted drives on their Mac computers.
| Workable Solutions | Step-by-step Troubleshooting |
|---|---|
| Fix 1. Open BitLocker in VirtualBox | Using VirtualBox from Vmware as the data delivery tool can attach your BitLocker...Full steps |
| Fix 2. Extension to Open BitLocker | Allowing extensions can open BitLocker's encrypted drive. This measure won't lower...Full steps |
| Fix 3. Open with Dual Boot | Installing Windows using Boot Camp on a Mac is one of the simple and free ways...Full steps |
| Fix 4. Find Another PC | As BitLocker is a Windows tool, its encrypted drives won't work with other systems like Mac...Full steps |
Help! I Can't Open My BitLocker-Encrypted Drive on Mac
Here is a user's case on Microsoft Q&A:
Unfortunately, BitLocker is a Windows-specific encryption feature that isn't natively supported on Macs. This means you can't directly open your encrypted USB drive on your MacBook Pro without additional software. However, you can use the built-in "Disk Utility" on your Mac to create a new, empty disk image, and then restore the contents of your encrypted USB drive to that image. This process doesn't decrypt the drive, but it allows you to access the data without using third-party software. Follow the steps below to choose a safer way to access the drive.
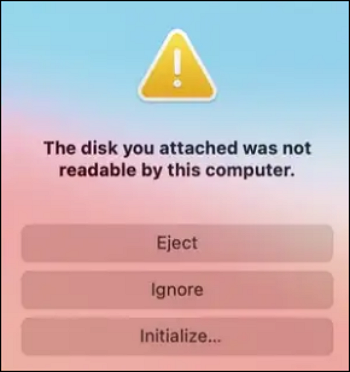
When you insert a If you try to access a BitLocker-encrypted drive on a Mac, you may see a notification saying "The disk you inserted was not readable by this computer." Don't worry about this message - instead, follow the steps to learn how to open a BitLocker drive on your Mac.
What Is BitLocker and BitLocker-Encrypted Drive
On Windows, BitLocker encrypts external hard drives and USBs, securing data with a password, making it breach-proof and only accessible with the pre-set password.
Users who create an encrypted drive on Windows with BitLocker may have difficulty accessing it on a Mac, as there isn't a native Mac version of BitLocker, making it challenging to unlock the drive directly on a Mac.
How to Open BitLocker Drive on Mac
To access and open a BitLocker-encrypted drive on Mac, you can watch a video and follow a tutorial that guides you through the process.
- 00:20 - Download and install the BitLocker for Mac utility
- 01:24 - Unlock the Drive
- 01:32 - In File Manager
- 03:12 - Mount in the Finder
- 03:48 - Questions
Method 1. Open BitLocker USB Drive on Mac Using VirtualBox
To run Windows 10 on your Mac using VirtualBox, install VirtualBox on your Mac, then create a new virtual machine and install Windows 10 on it. This allows you to use Windows-specific programs, such as opening a BitLocker-encrypted USB drive, on your Mac.
Step 1. If you've already installed Windows 10 into the VirtualBox on your Mac, you can launch it by opening VirtualBox, selecting the Windows 10 virtual machine from the list, and clicking the "Start" button. This will boot up the Windows 10 operating system within the virtual machine, allowing you to interact with it as you would with a physical Windows 10 machine.
Step 2. If VirtualBox doesn't recognize your BitLocker drive on Mac, your machine is likely missing the VirtualBox Extension Pack. To fix this, you need to disable the security and privacy option on your Mac's System Preference.

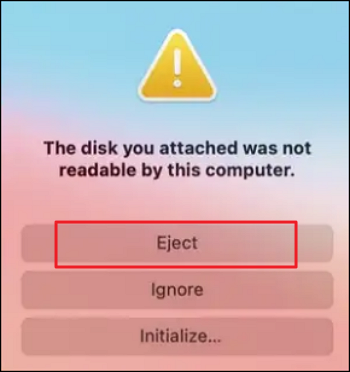
Step 3. To use a USB drive with Windows in VirtualBox, first, join your Mac device with your USB drive. Since only one local OS can recognize a USB drive at a time, your USB flash drive will initially be identified by your macOS. To change this, click to eject your USB drive from your macOS, and then VirtualBox will recognize your USB drive, allowing you to see it in the Windows OS.
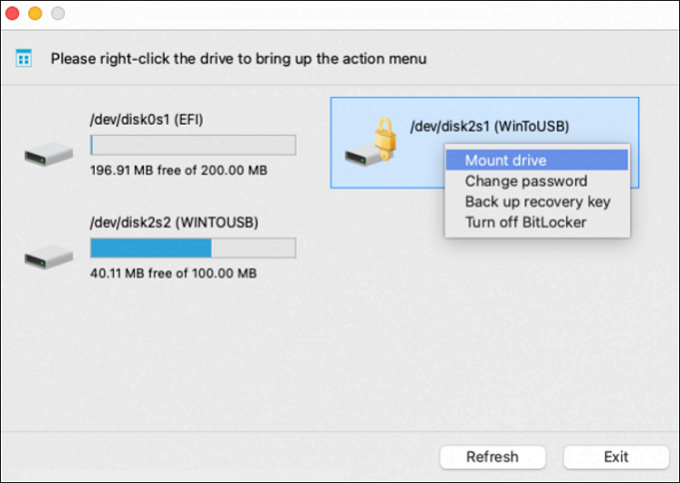
Step 4. To unlock your BitLocker drive in VirtualBox, Windows 10 will first identify your USB drive, and then you can use the BitLocker To Go tool included with Windows 10 to unlock it.
Step 5. You can copy, move, transfer, and delete files or folders on your USB flash drive.
- Warning
- To install Windows OS into a virtual machine on a Mac, you'll need to disable and adjust startup security and privacy settings, which may lead to startup issues and potentially allow malware to corrupt your disk, so be mindful of your data security.
[Bonus Tip] VMware Data Recovery with Software
To recover lost data from a VMware virtual hard drive, you can try using VMware's built-in tools or third-party software specifically designed for virtual machine recovery. These tools can help scan and recover data from damaged or corrupted VMware files, including virtual hard disks and configuration files. Additionally, you can also try using data recovery software that supports virtual machine recovery, such as VMware's own recovery tools or third-party software like Disk Drill or Deep Data Recovery Wizard. It's essential to act quickly, as the longer you wait, the lower the chances of successful recovery.
You can use Deep Data Recovery to recover data from VMware.
- Recover lost or deleted files, including VMware files, pictures, music, and emails, with a tool that can restore them.
- Mac Trash recovery and data restoration from various storage devices, including memory sticks, flash drives, hard drives, and VMware disks, can be achieved through various methods. This process involves retrieving deleted files from the Trash, as well as recovering data from external storage devices that have been lost or corrupted.
- Data recovery software can help recover lost data due to sudden deletion, hard drive failures, power errors, and system crashes. This software can retrieve deleted files, restore corrupted files, and even recover data from physically damaged storage devices.
You can download Deep Data Recovery for Mac. Then, install it and follow the steps below.
Step 1. Select the drive to be scanned
In the main Deep Data Recovery window, select the drive you need to recover lost/deleted files from and click the "Search for lost files" button.
Step 2. Select your lost data/files
Deep Data Recovery for Mac scans the selected disk volume, displaying the results on the left pane, allowing users to sort and find specific files if needed.
Step 3. Recover lost/deleted data
Once you have found the desired files, preview them and then click "Recover" to start the recovery process for your deleted or lost Mac files.
Method 2. Install Extra Extension to Open BitLocker
Allowing system extensions can allow access to BitLocker's encrypted drive, but this won't compromise Mac security. Enabling system extensions will restore the original "Security Policy..." preference.
Step 1. To access settings, click the "lock button" after launching the security options screen.
Step 2. Click "Enable system extensions..." - "Shut down".
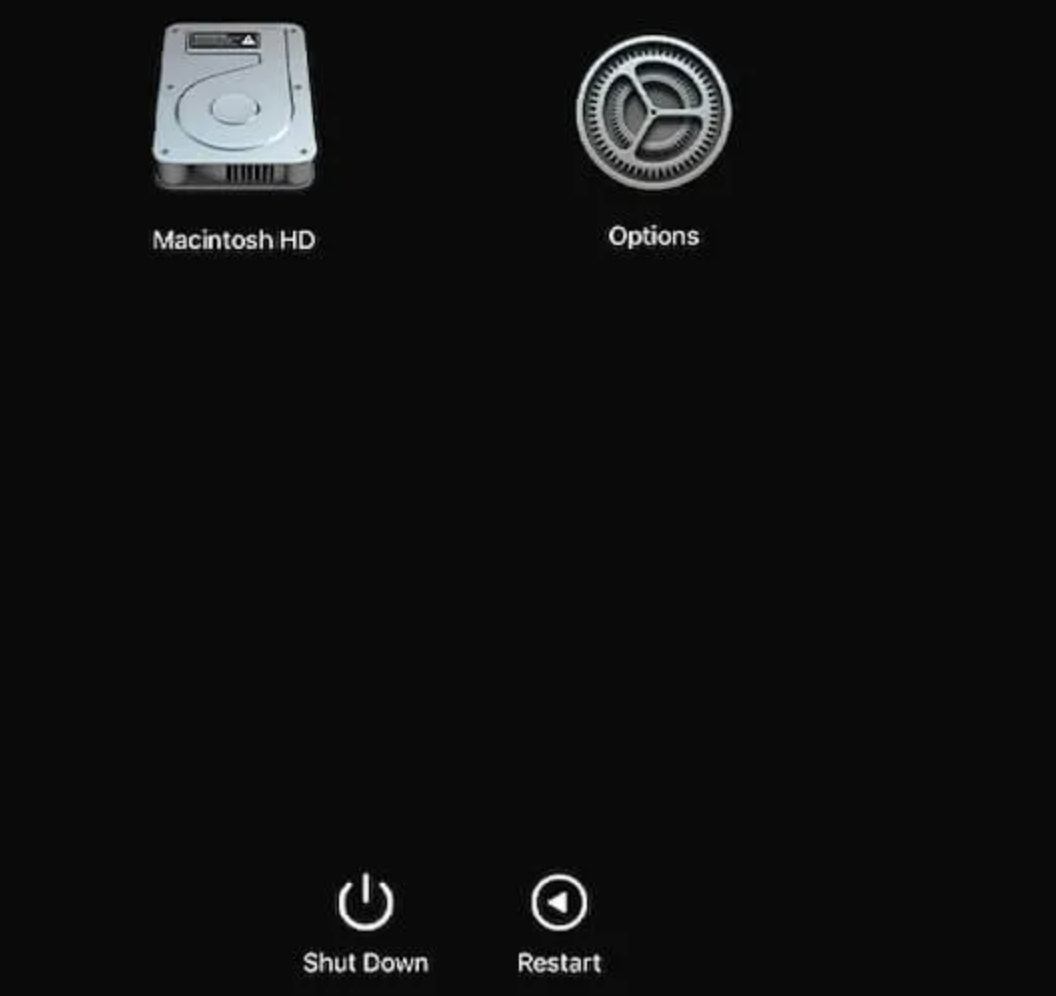
Step 3. Boot your Mac Safe Mode. To proceed, click "Options."
Step 4. To access the Security Policy, select "Startup Security Utility " from the Utilities menu.
Step 5. Select the "Allow user management of kernel extensions from identified developers" and "Reduced Security" options, then click "OK".
Step 6. Restart your Mac.
Method 3. Open BitLocker Drive on Mac with Dual Boot
Installing Windows using Boot Camp on a Mac allows you to easily switch between operating systems and access BitLocker-encrypted drives, giving you a seamless experience without the need for a virtual machine.
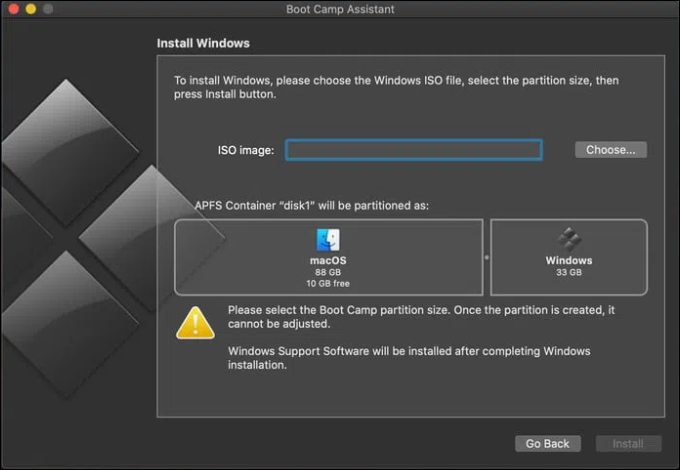
Step 1. To open and launch the Boot Camp on your Mac, navigate to the Applications - Utilities folder and click the Continue button.
Step 2. Choose to load your Windows 10 ISO file.
Step 3. Ensure that you have at least 64GB of free space on your Windows partition, but Apple recommends a minimum of 128 GB.
Step 4. To start the task, click the install button and Boot Camp will begin to install the Windows drivers and create the partition.
Step 5. Enter your administrator password and hit OK, then follow the step-by-step installation process after the Windows installation screen appears.
Step 6. You should continue downloading and installing the software for Windows 10 on your computer, and it will take some time.
Step 7. To convert your Mac to Windows, restart your Mac while pressing the Option (Alt) key. This will prompt you to choose the drive from which to boot.
Method 4. Find Another PC to Open and Decrypt BitLocker Drive
Microsoft does not have an official solution to access BitLocker-encrypted drives on non-Windows systems, making it incompatible with Mac and other operating systems.
To use a Windows-encrypted drive on a Mac, you'll need to decrypt it first. If you don't have access to a Windows PC, try using one of the three methods mentioned above to complete the decryption process. This will allow you to access the drive's contents on your Mac.
How to Format a BitLocker Drive on Mac
Enabling Bitlocker on a USB drive formatted on a Mac results in a blank disk, so it's essential to back up important files before proceeding.
You can open Disk Utility on your Mac and delete the BitLocker-encrypted drive just like any other external drive. When the error notice appears, instead of quitting, choose to "Initialize" which will take you to the Drive Utility window where you can clean the disk and give it a functional file system.
Don't Worry if You Format a Hard Drive by Accident
If you accidentally formatted an external hard drive on your Mac while backing up data to Time Machine, don't panic. Qiling data recovery software has a high chance of successfully recovering formatted hard drives on Mac.
Final Thoughts
The BitLocker USB flash drive is only compatible with Windows OS, but you can access, unlock, or open a BitLocker drive on a Mac using the steps provided, despite Microsoft and Apple not offering official solutions.
Open BitLocker Drive on Mac FAQs
To get some additional help, read these questions and answers below.
1. Does BitLocker work on Mac?
The Bitlocker USB flash drive is exclusive to Windows operating systems and cannot be opened on Mac using official Microsoft or Apple programs.
2. What is the Mac equivalent of BitLocker?
When FileVault is enabled on a Mac, the data is encrypted and can only be accessed with the login password, and additional security measures are also activated to ensure security.
3. How do I enable BitLocker on my Mac?
You can use the methods to open a BitLocker drive on Mac.
- Create a virtual machine
- Perform extra extension
- Enable it with dual boots
- Find another PC
- Use third-party tools
4. How do I encrypt a Mac hard drive?
- Click the Apple icon - System Preferences.
- Click Security and Privacy
- To encrypt a Mac hard drive, click the FileVault tab and select "Turn it on" to activate encryption.
Related Articles
- How to Free Download Candy Crush Saga on PC/Android
- Fix Error Code 1309 Mac [2023 Guide]
- Fix IE Browser Shuts Down Suddenly in Windows 10/8/7 Error
- How to Turn on Bluetooth on Windows 10
- Top Twitch Clip Downloaders | Download Twitch Clips Within Seconds
If you want to download Twitch clips quickly and easily, you can use any of the simple and user-friendly Twitch clip downloaders mentioned in this guide to get the job done. - Types of Hard Drives 2023 | Which One to Choose - Qiling
Choosing the right hard drive depends on various factors, including the type of computer, storage needs, and budget. There are four main types of hard drives: Hard Disk Drives (HDDs), Solid-State Drives (SSDs), Hybrid Hard Drives (HHDDs), and External Hard Drives. HDDs are traditional hard drives that use spinning disks and mechanical heads to store data, offering high storage capacities but slower performance.