[Fixed] Ubuntu Format Disk: How to Format Disk on Ubuntu
Formatting storage disks is a common task on Ubuntu, and as a regular user, it's essential to know how to perform this task quickly. This article will guide you through two approaches to format a disk on Ubuntu, but first, it will briefly discuss the five best file systems for the operating system.
[Ubuntu Disk Format] Which File System Is Best for Ubuntu?
Choosing the right file system for Ubuntu is crucial for efficient file management and optimal computer performance. When starting with Ubuntu, selecting a suitable file system can be overwhelming, but knowing the top options can make the decision easier. Fortunately, there are five file systems that are highly recommended for Ubuntu, allowing you to pick the one that best suits your preferences.
1. Ext4
The Extended File System 4 (Ext4) is the primary file system for Ubuntu, making it ideal for new users who want a user-friendly file system to get started with. As an improved version of its predecessors, Ext4 allows for larger volumes and has a more efficient defragmentation system, making it a reliable choice. Additionally, tools like Qiling Partition Master Linux can be used to easily format and partition Ext4 on Ubuntu.
Ext4 is a standout file system due to its enhanced reading capabilities and faster load times, making it a top choice for users seeking improved performance.
2. BtrFS
BtrFS is an excellent file system for reading and writing large pools of files and databases, outperforming Ext4 due to its adaptability and long-term viability. It supports various unique features, including.
- Enhanced snapshot capability
- Drive pooling
- Defragmentation via online networks
Btrfs is the best file system on Ubuntu due to its ability to handle large drive spaces effectively, unlike Ext4. Despite being considered unstable, Btrfs is still being updated and improved, making it a viable default choice.
3. ReiserFS
ReiserFS is a stable alternative to Ext4 with improved features and efficient storage management, but its development has been discontinued, meaning it no longer receives updates.
4. XFS
XFS is a file system suitable for Ubuntu, with similarities to Ext4, including delayed allocation and reduced fragmentation. However, it's less suitable for smaller files, but excels with larger files compared to other file systems.
5. ZFS
Sun Microsystems developed ZFS, a file system that integrates a volume manager, considered an improvement over BtrFS. ZFS features include enhanced volume management, snapshots, and drive pooling, allowing for easy recovery from drive failures with its advanced Raid-Z feature.
This file system is used by default to manage containers in Ubuntu.
[Ubuntu Format Disk] How to Format Disk in Ubuntu
To format a disk on Ubuntu, you can perform a quick format or use GParted, both of which are effective in cleaning the disk and allowing you to start saving new files.
Perform a Quick Format
To quickly format a disk on Ubuntu, start by opening the terminal and running the command `sudo mkfs.ext4 /dev/sdX1`, replacing 'X' with the letter of the disk you want to format (e.
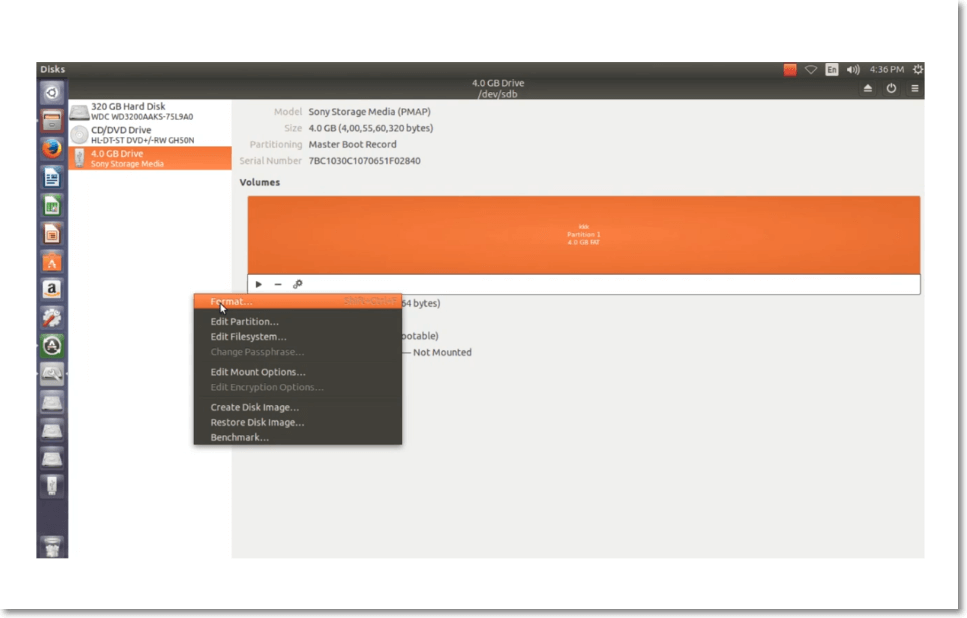
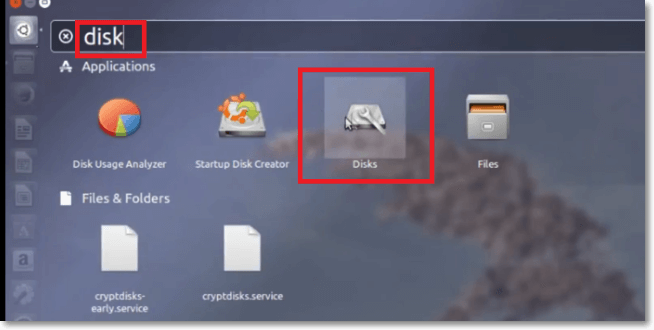
Step 1. Open the Disks program on your device.
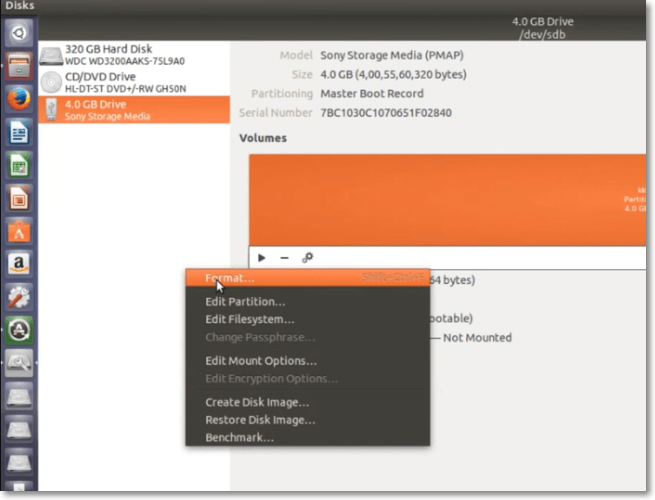
Step 2. Click on the disk you want to format.
Step 3. Next, click on the Gear button and choose "Format."
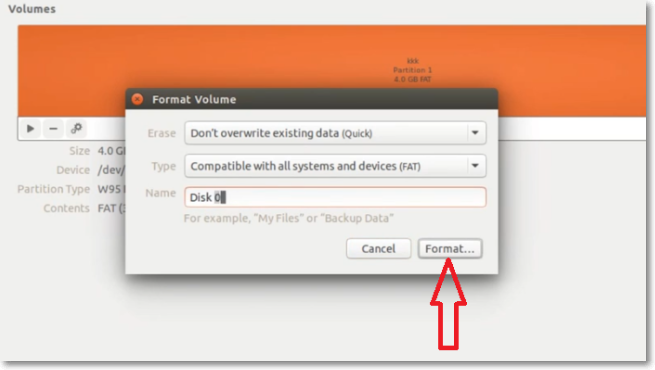
Step 4. Under the "Erase" section, click on the dropdown and select whether you want to overwrite existing data.
Step 5. To set up a file system, select the desired type from the options provided, such as NTFS, FAT, or Ext4.
Step 6. Provide a name for your format volume.
Step 7. Click on the "Format" button and confirm your selection. Formatting the disk will then begin, taking a varying amount of time depending on the drive's size.
Step 8. Once the formatting completes, click on the "Mount" button under your volumes graph to make the partition available for storage.

Step 9. Please provide the instructions in one paragraph shortly. Click on the displayed link to open the formatted disk in your File browser.
Use GParted
If formatting your disk through a quick format fails, you can try using GParted, a free and open-source partition editor, to format your disk. To do this, you can follow these steps:
Step 1. Press Ctrl+Alt+T to open the Terminal.
Step 2. Enter the command below and hit Enter to install GParted.
sudo apt-get install gparted
Step 3. Press Y to continue.
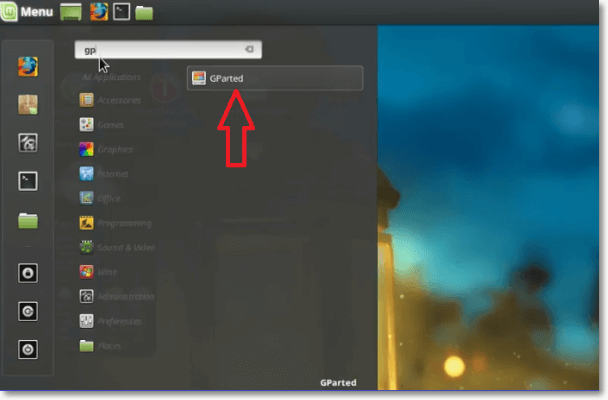
Step 4. Open the Dash and type gparted to open the GParted Partition Editor.
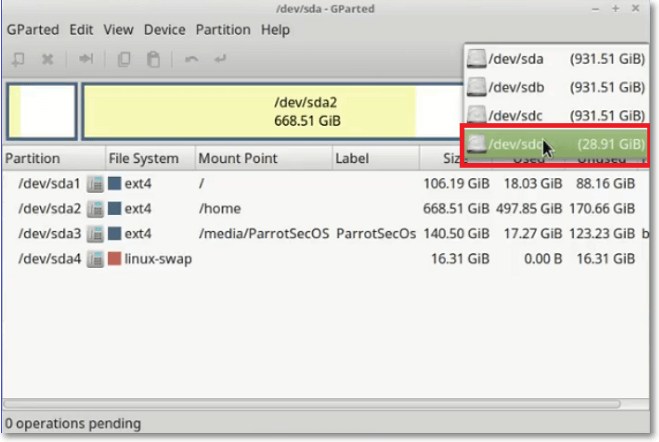
Step 5. To format a drive, go to the upper-right corner of the screen and click on the dropdown menu, then select the drive you want to format from the list.
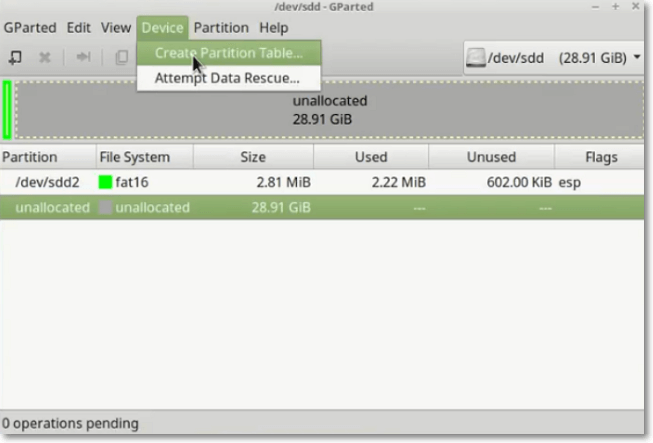
Step 6. Next, click on "Devices" then "Create Partition Table."
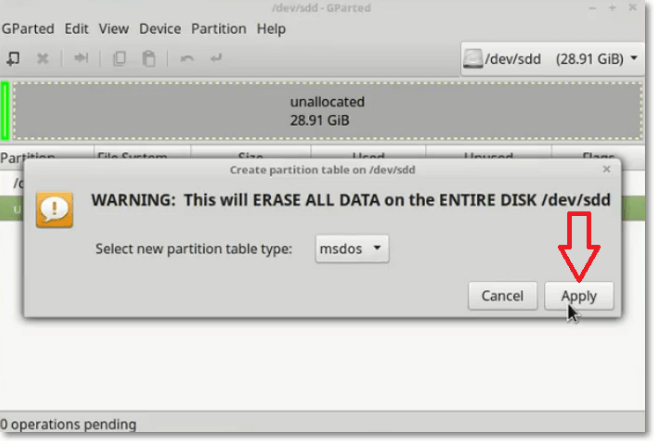
Step 7. To delete all data on a selected drive, click on "Apply" in the popup message. This will completely wipe out all data on the selected drive.
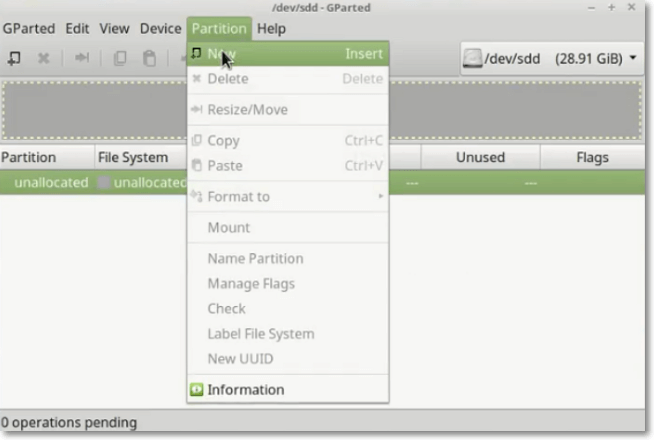
Step 8. In the upper part of your screen, click on "Partition" and select "New."
Step 9. The command to create a new partition is `parted /dev/sda set 1 boot on` followed by `parted /dev/sda mkpart primary 1 100%` and then `mkfs.ext4 /dev/sda1`.
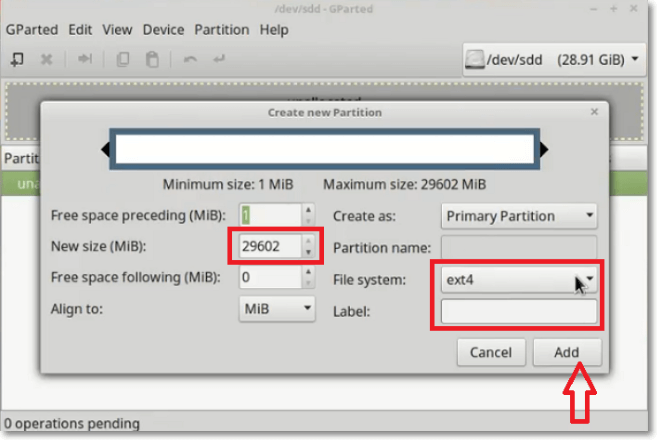
Step 10. Next, choose a file system for your partition.
Step 11. Name your partition under "Label."
Step 12. Once you've finished configuring the partition, click the "Add" button.
Step 13. To resize a partition in GParted, right-click on the partition and select "Resize/Move."
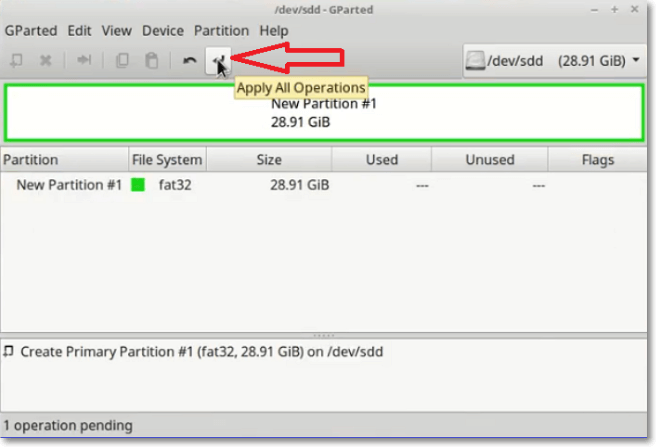
Step 14. To save the changes you've made, click on the apply checkmark button at the upper section of the screen.
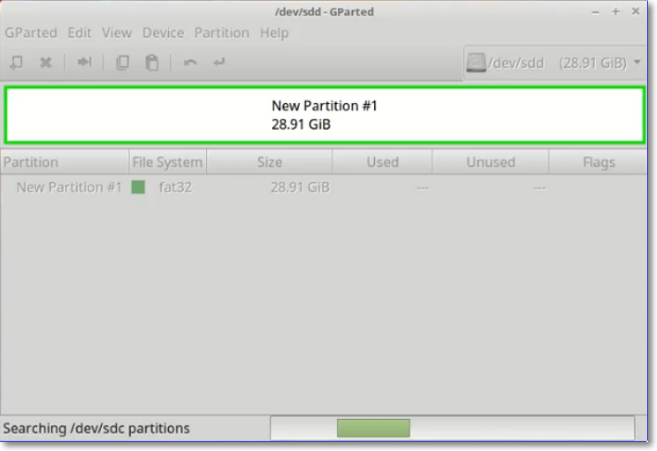
Step 15. Once the formatting process finishes, the newly-formatted drive will display.
Conclusion
Ubuntu's top file systems include Ext4, BtrFS, ReiserFS, XFS, and ZFS. Ext4 is a great starting point, offering improved read capabilities and faster load times. For large drives, BtrFS is a suitable choice. Alternatively, ReiserFS provides stability and enhanced features, making it a solid option.
On Linux, alternatives to ext4 like XFS and ZFS are available, with XFS not supporting smaller files and ZFS standing out for its volume manager integration feature. To format a disk on Ubuntu, you can either perform a quick format or a detailed format using GParted.
GParted is a great alternative if the quick format fails, offering a sure way to format a disk on Ubuntu. It has detailed steps but is effective.
Bonus Tip: Partitioning and Mounting a Hard Drive on Ubuntu
Learning how to format a disk on Ubuntu is just the beginning - it's also essential to know how to partition and mount a hard drive. By following a series of steps, you can achieve this, including formatting the disk, creating a partition table, creating a file system, and mounting the drive.
Step 1. Remove old partitions from your hard drive using the command:
sudo fdisk -1
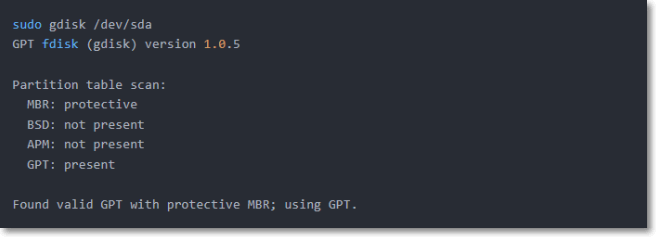
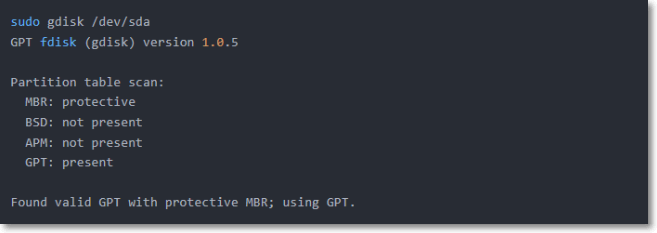
Step 2. Open gdisk.
Step 3. Delete old partitions.

Step 4. Create a new GPT partition table using the command:
sudo gdisk /dev.sda
Step 5. Type n followed by "1 "to create a new partition.

Step 6. Accept all further prompts.
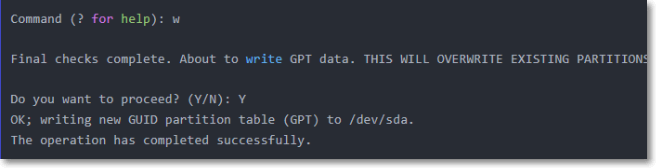
Step 7. To confirm the changes to your drive, type 'Y' to proceed. You can also type 'N' to cancel.
Step 8. Format a previously created partition by pasting the following command:
sudo mkfs.ext4 /dev/sda1
Step 9. Next, paste the following command to obtain the UUID for the drive to mount:
sudo blkid
Step 10. Specify where to mount your drive using the following command:
sudo nano /etc/fstab
Step 11. To create a mount point, run the command `sudo mkdir -p /mnt/mount_point` (replace "mount_point" with your desired mount point location), where `/mnt/mount_point` is the directory where the file system will be mounted. This command uses `sudo` to run with superuser privileges, `mkdir` to create a new directory, and `-p` to create the directory and any parent directories that do not exist.
The command `sudo mkdir /mnt/"mount_point"` is used to create a new directory named "mount_point" under the "/mnt" directory. The "sudo" part is used to run the command with superuser privileges, which is necessary to create directories in certain system directories like "/mnt".
Step 12. Lastly, paste the following command to mount the hard drive:
sudo mount -a
Related Articles
- How to Install Windows 10 on New PC [Step-by-Step Guide]
- How to Factory Reset Laptop Windows 7[2022 Ultimate Guide]
- Windows 10 Backup Command Line - How to Backup Files Using (from) Command Prompt in Windows 10
- Windows 10 Keeps Restarting or Continuously Reboots? Fix It Now!
- Can I Use My SD Card as RAM on Android and Windows?
You can use your SD card as RAM on both Android and Windows devices, but it's not a straightforward process. This article explains how to do it correctly, providing a step-by-step guide on how to utilize your SD card as a makeshift RAM to improve your device's performance. - Can SSD Overheat? Full Explanation and Reasons Here!
Yes, solid-state drives (SSDs) can indeed overheat, just like any other electronic device. This is because they contain flash memory cells that can generate heat during operation. If your SSD is overheating, it can lead to reduced performance, data corruption, or even complete failure. To check SSD overheating temperatures, you can use software tools like CrystalDiskInfo or HWMonitor, which can monitor the drive's temperature and alert you to any potential issues.