How to Transfer Files from Windows Vista to Windows 10 [Step-by-Step Guide]
| Workable Solutions | Step-by-step Troubleshooting |
|---|---|
| #1. Qiling Disk Master | Step 1. Open Qiling Disk Master on both of your computers. Choose "PC to PC" to go to the next step...Full steps |
| #2. OneDrive | Step 1: On the OneDrive website, sign in with your Microsoft account, and then browse to the location where you...Full steps |
| #3. External Storage | Step 1: Connect your external storage device to your PC with Windows Vista; Step 2: On the taskbar, select...Full steps |
| Tip: Back up Essential Data before Transferring | Step 1. To start backup, click the Select backup contents; Step 2. There are four data backup categories...Full steps |
Introduction
If you're planning to transfer files from Windows Vista to Windows 10, you'll need to take some steps to ensure that your files are transferred correctly without data loss. Since Microsoft Easy Transfer is not available in Windows 10, there are still a few ways to get the job done. With a little preparation, the process is surprisingly simple, and by following our guide, transferring files from Windows Vista to Windows 10 doesn't have to be a nightmare.
How to Transfer Files from Windows Vista to Windows 10?
When upgrading from Windows Vista to Windows 10, users may encounter issues with transferring data. To resolve this, users can explore various methods for transferring files from one PC to another. Additionally, it's essential to back up data before upgrading to prevent potential losses in case of any accidents during the process.
Choosing the right method to transfer files from Windows Vista to Windows 10 depends on your specific needs and preferences. Both methods, using a USB drive and using a cloud storage service, have their advantages and disadvantages, so it's essential to select the one that best suits your requirements. By considering your options carefully, you can successfully transfer your files to the new operating system.
#1. Transfer Windows Files with Qiling Disk Master
Transferring files between Windows computers has been simplified with the help of Qiling Disk Master, which provides an easy-to-use interface for transferring files from Windows Vista to Windows 10 and between different operating systems.
Step 1. Open Qiling Disk Master on both of your computers. Choose "File sync" to go to the next step.

Step 2. Connect two PCs via the network by entering the target PC's password or verification code, choosing the correct transfer direction, and clicking "Connect" to proceed.
The verification code is located on the top right corner of the main screen for the "PC to PC" feature on the target computer.

Step 3. To transfer files, select "Files" and choose the specific files you want to transfer, and you can also customize the storage path for the transferred data by clicking the Edit icon.

Step 4. Click "Proceed" to begin transferring files from PC to PC, and wait for the transfer time, which depends on the size of the file.
#2. Transfer Windows Files with OneDrive
OneDrive is a cloud-OneDrive is a cloud storage service from Microsoft that allows users to upload and sync files across all their devices, storing photos, videos, documents, and more, and also enables sharing files with others, available for free with a Microsoft account.
To transfer files from a Windows Vista computer to a Windows 10 computer using OneDrive, set up OneDrive on both computers by signing in with the same Microsoft account. On the Windows Vista computer, select the files to transfer and right-click on them to sync with OneDrive. On the Windows 10 computer,
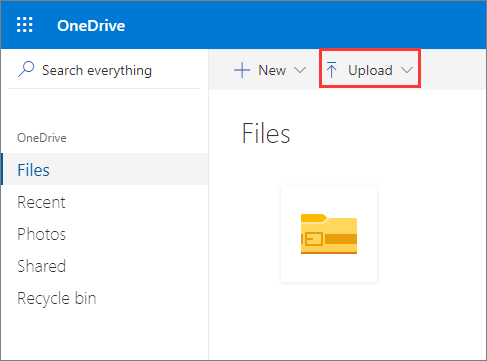
Step 1: To add files to OneDrive on the website, sign in with your Microsoft account, and then navigate to the location where you want to add the files.
Step 2: Select "Upload".
Step 3: To upload files, select the desired files and click "Open". This allows you to upload files up to 250GB in size, with the limit being per file rather than total.
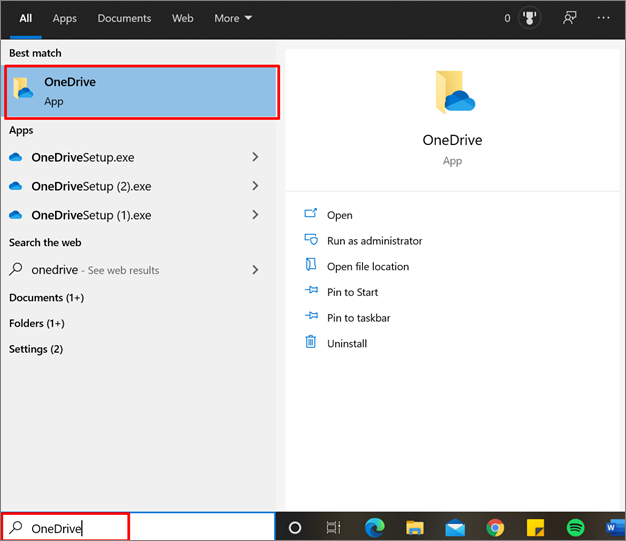
Step 4: Set up OneDrive on your current PC with Windows 10 operating system.
Step 5: To sign in to OneDrive with the same Microsoft account you used on your other PC, click on the OneDrive icon on your taskbar, then click on the "Help and Settings" button. From there, click on "Sign in" and enter the Microsoft account email address and password you used on your other PC.
Step 6: To access OneDrive, open File Explorer or select the OneDrive cloud icon in the Windows notification section of your taskbar.
Step 7: To access your OneDrive folder, simply open it on your device. You will then be able to view the files you need.
#3. Transfer Windows Files with External Storage
You can also choose external storage to transfer Windows files, which is relatively portable and helps avoid leakage of personal information.

Here's how to do it:
Step 1: Connect your external storage device to your PC with Windows Vista.
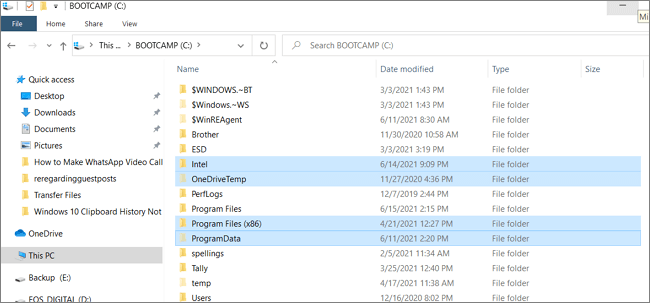
Step 2: On the taskbar, select "File Explorer".
Step 3: To copy multiple files, hold "Ctrl" as you select additional files or folders, or click on a folder and then press "Ctrl + A" on your keyboard to select all files within it.
Step 4: Select the files you want to transfer, right-click on them and select "Copy" from the menu.
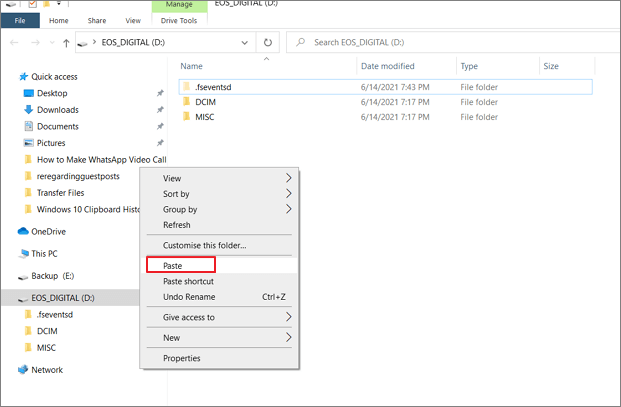
Step 5: To transfer files from your computer to an external storage device, first, open your external storage device and click on the "Paste" option. This will allow you to copy files from your computer to your external storage device. Your selected files will then be copied to your external storage device.
Step 6: Connect your external storage device to your current PC.
Step 7: Select the files you need in external storage, right-click on them and select "Copy".
Step 8: Open the destination folder and click "Paste".
Your files and folders will begin copying to your drive. If you have files stored in multiple locations, you may need to repeat the process for each location.
Tip: Back up Essential Data before Transferring
Before transferring files from Windows Vista to Windows 10, it's crucial to back up your essential data to avoid losing important documents, photos, and other irreplaceable files. A great tool to help with this task is Qiling Backup, which offers various features to create and maintain backups of your important data.
Qiling Backup allows you to create a complete backup of your system, including files, settings, and applications, making it easy to restore your data if anything goes wrong during the transfer process. This ensures that your essential data is not lost. It is recommended to back up your data before transferring it to a new computer.
Step 1. To start backup, click the File backup.
Step 2. On the left-hand side, a list of local and network files is displayed, with files to be backed up selected by expanding the directory.

Step 3. Select the location where you want to store the backup, following the on-screen instructions.

Step 4. In the Backup Options section, you can click on Options to add a password to encrypt the backup. This allows you to customize the backup process to suit your needs.

In the Backup Scheme section, you can specify the frequency of backups, such as daily, weekly, or monthly, and choose the events at which to start the backup, like at system startup or at a specific time of day. This allows you to customize the backup process to fit your needs.

Step 5. Backups can be stored on a local disk, Qiling's cloud service, or a network attached storage device (NAS).

Step 6. Qiling Backup provides customers with the option to back up their data to either a third-party cloud drive or the company's own cloud storage.
If you wish to back up your data to a third-party cloud drive, select Local Drive, scroll down to add Cloud Device and enter your account information.
Step 7. To initiate a backup, select the "Proceed" option. Once the backup process is complete, it will be displayed as a card on the list view panel. To access and manage the backup job in more detail, click on it.

Conclusion
To transfer files from Windows Vista to Windows 10, we recommend using Qiling Disk Master, a software that makes it easy to transfer files, installed programs, and settings between computers, and is compatible with both Windows Vista and Windows 10. It offers a trial version, allowing you to try it out before committing to a purchase, making it a convenient solution for transferring from Windows Vista to Windows 10.
Related Articles
- How Do I Transfer My Avira to New Computer/Another Drive
- Move Windows 11/10 Installed Apps & Programs to Other Drive
- How Do I Move My Google Drive Folder to Another Location? [Step-by-Step Procedure]
- How to View, Find, and Clear IE History [Full Guide]
- Top 10 Best OS Imaging Software for Windows 10/11 [Free Trials]
Qiling Disk Master software is a great option among the top 10 OS imaging and deployment software. - 8 Best Portable Backup Software Examples in 2022
If you're looking for portable backup software, this page offers eight top options for Windows, Mac, and Linux users. Each program can be chosen based on individual needs, providing a suitable solution for users.