How to Format HDD/Disk/Hard Drive using CMD
Quick Navigation:
- Part #1: Step-by-step Guide for How to Format Drive using CMD
- Part #2: Step-by-step Guide for How to Format Drive using Qiling Disk Master
- Part #3: How to Recover Files after CMD to Format Drive
- Guide to Recover Formatted Hard Drive using Deep Data Recovery
It is crucial to format HDD before using. Irrespective of the operating system, there are several ways through which one can perform the formatting action. Among them, the easiest and most effective way is to use the Command prompt to format disk or format drive using CMD. However, every operating system has a different approach to manage the hard drive, and only a formatted disk structure is recognizable. After formatting a hard drive, one can install the OS and create new partitions to store data.
Part #1: Step-by-step Guide for How to Format Drive using CMD
The following is the procedure that helps anyone obtain the right answer to how to format hard drive using CMD. It is advisable to follow the steps carefully to avoid mistakes.
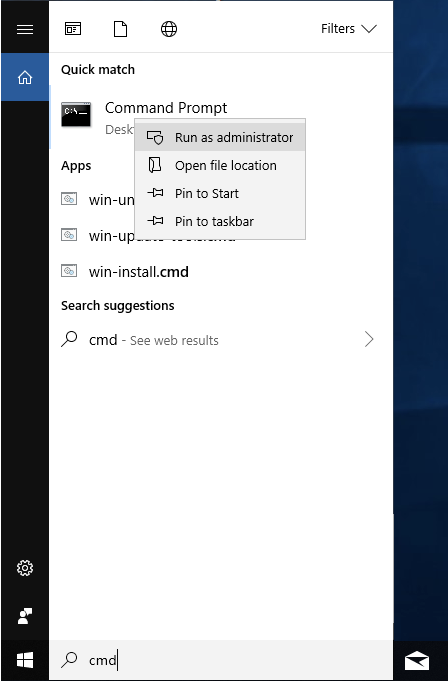
1. Type "cmd" in the search box, which is at the bottom left corner of the screen. The list will display Command Prompt as the matching application. Select the same, right click on it, and click on "Run as administrator".
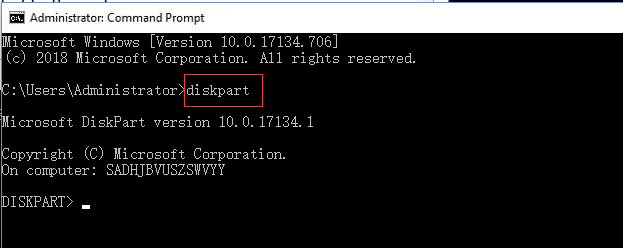
2. Once the Command Prompt window opens, input "diskpart" and press enter.
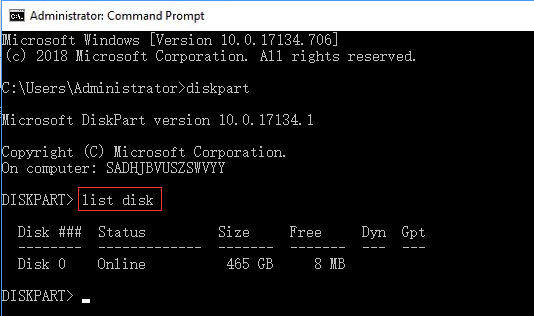
3. Input "list disk" and press enter. The command will display all the disk drives along with the partitions and external disk drives connected to the system.
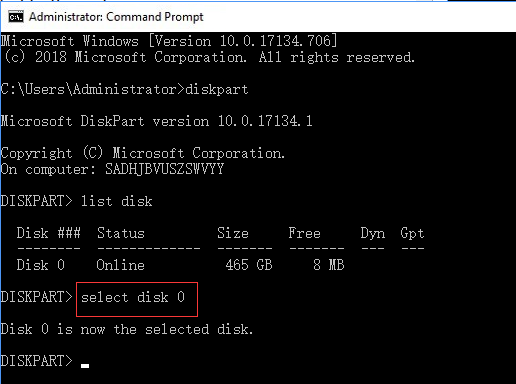
4. Each of the drives has a particular disk number. Input "Select disk" with disk number. For example, "select disk 0." The input is conveying the message to the system to select disk 0 and format the same.
5. Now, input "clean" in the command box. The step will help the computer to clean all the files and folder present on the disk, then you can successfully complete format hard disk using CMD.
6. Input "create partition primary" in the command box and press enter.
7. Once the diskpart command successfully creates the needed partition, input "format fs=ntfs or format fs=exfat" and hit the enter key. The command is telling the diskpart to format the new drive with either NTFS or exFAT file system.
8. Input "assign" and choose a drive letter to assign the same to the newly created partition or hard drive.
The above steps are simple and help anybody to format HDD using CMD or format external hard disk using CMD. However, the downside to the procedure is that it will erase complete data present on the hard drive or the selected partition on the hard drive.
Part #2: Step-by-step Guide for How to Format Drive using Qiling Disk Master
Step 1: The first step involves downloading and installing the software. One can visit the official website of the program and download the application. Upon clicking the execution file, one will complete the installation of the program and start to format hard disk using QILING.
Step 2: Click on "Disk Management" tab and select the hard disk that you want to format
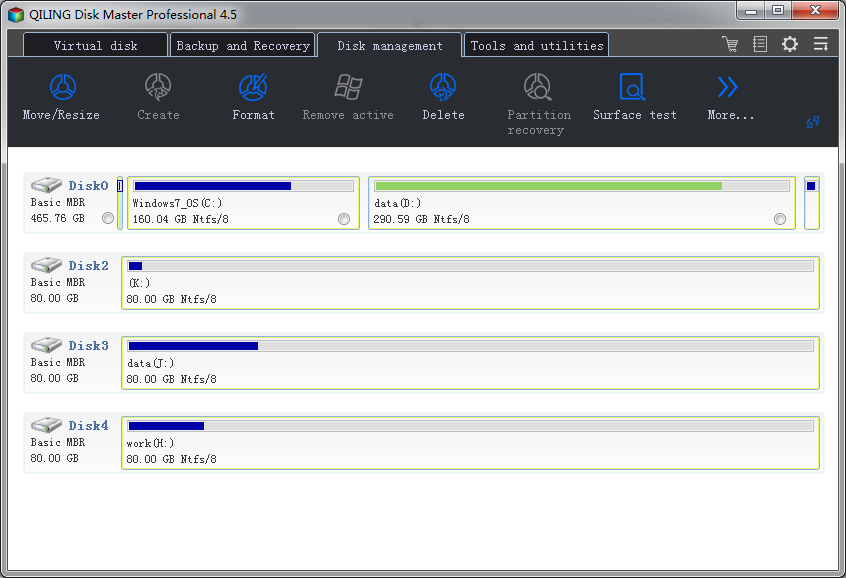
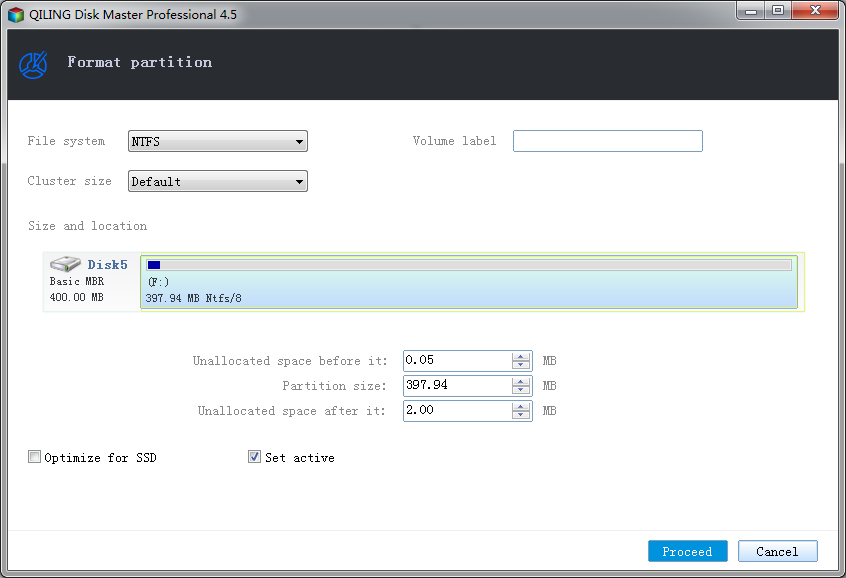
Step 3: Click on "Format" button on the top tool bar, select file system type and click the "Proceed" button. This may take some seconds.
Part #3: How to Recover Files after CMD to Format Drive
The Command prompt to format a hard drive is a simple process. But, recovering lost files after format drive using CMD requires the use of Command prompt format hard disk recovery software. At this point, the best tool to perform this action is Deep Data Recovery. It possesses the great capability to restore the data even after people used command prompt to erase hard drive data.
Deep Data Recovery software is a reliable program that helps in retrieving lost, corrupted or data from HDDs, USB drives, external hard disks after CMD format in a few simple steps. The software uses a robust algorithm that scans the selected drive and displays the recoverable files and folders. User can then proceed by choosing the records they wish to recover. The best element of the software is its strength to scan irrespective of the scenario under which there was a loss of data. Furthermore, it provides assistance to scan any hard disk and external hard drives and flash drives.
Your Safe & Effective Format Drive Recovery Tool
- It provides two scan modes can easily and completely recover formatted HDD or other format drives in Windows PC or Mac.
- Recovery of hard drive data lost due to format HDD using CMD, deleted/lost partitions, displaying the file system as RAW, virus attack, reinstallation of operating system and other unknown reasons.
- The format drive recovery software can also recovery of deleted files where the user moved the files to Recycle Bin and clear it, used "Shift+Delete" key, or just used the Delete button.
You can also click this download link to get Format Drive Recovery Tool
Guide to Recover Formatted Hard Drive using Deep Data Recovery
Even after completing format hard drive from command prompt Windows 7, Windows 8, Windows 10 and Windows XP action, with the assistance of format recovery program, it is possible to get back the lost data after format a hard drive using CMD in a few simple steps.
Step 1: The first step involves downloading and installing the software. One can visit the official website of the program and download the application. Upon clicking the execution file, one will complete the installation of the program and start to recover data after format hard disk using CMD.
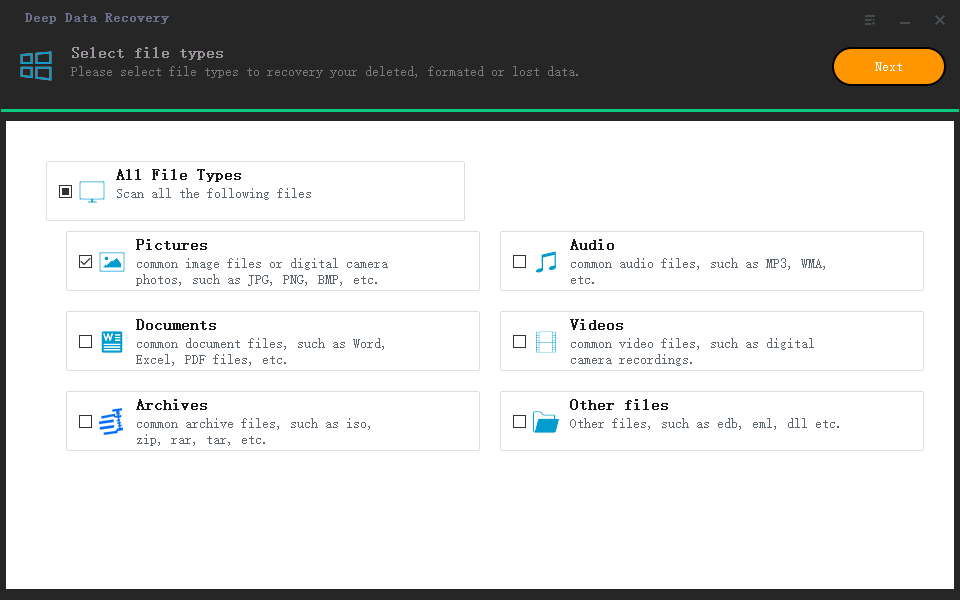
Step 2: After completion, the program creates a shortcut on the desktop. Clicking the icon will launch the program. The primary window shows all the file formats that the software is capable of recovering. Users can pick multiple file formats from the window such as documents, videos, audio, and other files and hit the "Next" button to recover data from hard drive on Mac or Windows.
Step 3: Deep Data Recovery shows all the partitions of the hard drive including any external storage devices connected to the system. Users have to pick the location to allow the application to perform the scan and complete the action of recovering the data after format drive using CMD. Press the "Scan" button from the same screen to begin the scanning process. The time to complete the process depends on the amount of the data in the selected partition.

Step 4: After completion of the scan, the application will display them in a new window. The window consists of three columns – the left that shows the directory in tree formation, the center that shows the recoverable files, and the right that shows the thumbnails of the selected files. Users can pick the needed files from the center of the window or click an entire folder from the left side where the application places files according to their file system – pictures, videos, audio, documents, and so on. After completion of the selected files or folder, press the "Recover" button. The program will ask for a location on the system to begin the recovery process. Ensure to choose a different drive/location other than the formatted partition.

Note: Deep scan is available, which allows the program to perform a deep scan and search for additional files.
Related Articles
- How to Format Flash Drive Using CMD
- How to Format Memory/SD card for Canon Camera
- How to Format SD Card for GoPro Hero 4/5 Sesssion
- Best Way to Clone Windows 11 to NVMe SSD
This article provides the best way to clone Windows 11 operating system to NVMe SSD drive in order to gain faster transfer speed and better performance. - How to Convert MBR to GPT During Windows Installation
Are you struggling with how to convert MBR to GPT during Windows installation? This post will show 2 ways by using CMD and a tool. - How to Deploy Window 11 Image via WinPE USB Disk
The tutorial teaches you how to deploy Windows 11 image by WinPE USB disk. And methods of creating Windows 11 WinPE USB drive are also provided. Please read on.