How to Transfer Photos from iPhone to PC in Windows 11
Windows 11 has been released with many new features. But what keeps almost the same as Windows 10 are the ways to transfer photos from an iPhone to a computer. No matter whether you are using Windows 10 or the newest Windows 11, the tools used to copy iPhone photos to Windows remain unchanged. Read on to check the details.
File Explorer: Direct Way to Transfer Photos from iPhone to PC Running Windows 11
Whether you are using a laptop or desktop PC, no matter which brand of computer you use, the easiest way for you to transfer photos from an iPhone to Windows 11 is using File Explorer. It requires no iTunes and third-party software, all you need is a USB cable to connect your iPhone to the PC running Windows 11. Afterward, you can transfer your iPhone photos, either specific items or the whole photo library, to Windows 11.
To transfer photos from an iPhone to a PC in Windows 11:
Step 1. Connect your iPhone to the PC with a USB cable.
Step 2. Make sure the computer recognizes the iOS device successfully.
Step 3. Then unlock the iPhone and tap "Allow" to give permission to the PC to assess your iPhone photos.
Step 4. Open "File Explorer" and then head to "This PC" > "Apple iPhone" from the panel on the left side.
Step 5. Double-click "Internal Storage" > "DCIM" and then you will see folders that contain your iPhone photos.
Step 6. Copy these folders to your Windows 11 PC to transfer iPhone photos to the PC easily.

Photos: Built-in App to Transfer Photos from iPhone to Windows 11
The Photos app is still available on Windows 11 which enables you to import photos to a PC from an external device like your iPhone. The Photos app works similarly to File Explorer. It frees you from software installation and performs well to transfer pictures according to your needs.
To import photos from an iPhone to Windows 11:
Step 1. Use a USB cable to connect the iPhone to the computer.
Step 2. Unlock the iPhone screen and click "Allow" in the prompt to continue.
Step 3. Launch Photos on Windows 11.
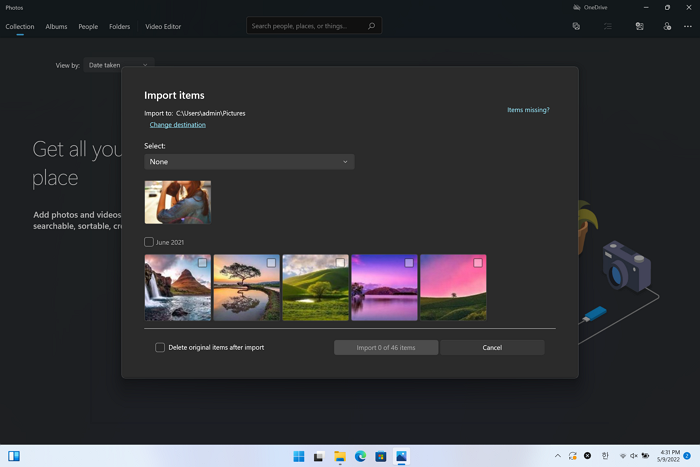
Step 4. Click the "Import" button and choose "From a connected device."
Step 5. Wait for Photos to look for the device and load all photos from the external device.
Step 6. Click "Change destination" to select a folder you'd like to save your iPhone photos.
Step 7. Select the photos you want to transfer and click "Import [number] items" to start transferring photos from your iPhone to the PC in Windows 11.
Step 8. When the importing process has been completed, click "OK" and go to the selected folder to check your iPhone pictures.
Qiling MobiMover: Versatile Tool to Transfer Photos from iPhone to Windows 11 PC
Getting photos from an iPhone to a PC running Windows 11 needs no third-party program to help in most cases. However, if you want to enjoy more advanced data transfer features or transfer other types of files, using File Explorer or Photos can't meet your needs.
When it comes to transferring photos, videos, music, ringtones, contacts, books, and other types of iPhone content, it's necessary to use professional iPhone transfer software like Qiling MobiMover. Unlike File Explorer and Photos which only transfer photos and videos from an iPhone to a PC, Qiling MobiMover works to transfer files between an iPhone/iPad/iPod touch and a PC, be it is running Windows 11 or earlier versions. That means you can easily:
- Transfer photos from a PC to an iPhone without iTunes
- Put music on an iPhone
- Transfer contacts from one iPhone to another
- Download text messages from an iPhone to a computer
Other than being an iPhone data transfer tool, Qiling MobiMover is also an iPhone backup tool, a WhatsApp manager, and a HEIC converter. All these features will help you manage your iPhone content better.
To transfer photos from an iPhone to a Windows 11 PC:
Step 1. Connect your iPhone to PC running Windows 7 or later. Run Qiling MobiMover, choose "Phone to PC" and click the "Next" button to go on.
Step 2. Check the category/categories you want to transfer from your iPhone to the computer. As you can see, you can copy other supported files together with photos from your iPhone to PC all at once. Besides, you can customize the storage path for the exported photos. Otherwise, MobiMover will save them on your desktop.
Step 3. Now, click the "Transfer" button to start transferring photos from your iPhone to PC without iTunes. Exporting files from iPhone to PC with MobiMover is the right way for backup to avoid unexpected data loss.
iCloud: Wireless Solution to Sync Photos from iPhone to Windows 11
iCloud is also a workable solution on Windows 11. Actually, other cloud-based services, like Dropbox, OneDrive, and Google Photos are also practical ways to transfer photos from an iPhone to a Windows computer. Such services store your iPhone photos in the cloud storage and then you can let them sync your photos to other devices that use the same account as your iPhone.
Whenever you use a cloud storage service, you need to make sure there is enough free space to save these pictures and there are stable and fast network connections on your devices.
To transfer photos from an iPhone to a PC in Windows 11 using iCloud:
Step 1. Enable iCloud Photos on your iPhone.
Step 2. On your Windows 11 computer, go to iCoud.com and sign in with the Apple ID used on the iPhone.
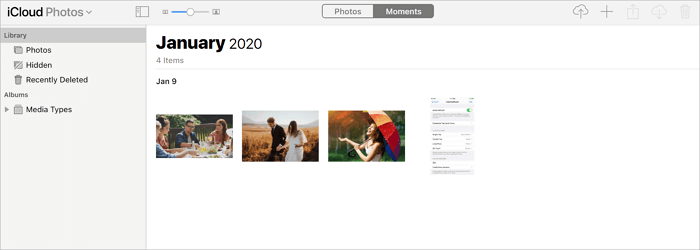
Step 3. Go to "Photos" and you will see the photos synced from your iOS device.
Step 4. Select the photos you want to transfer and click "Download" in the top-right corner to save them to your computer.
The Bottom Line
Photo transfer from an iPhone and a Windows PC could be easy and you can get it done using File Explorer or Photos in most situations. But when you need to transfer photos from a Windows 11 PC to an iPhone or share other types of files between a computer and an iDevice, using a tool like Qiling MobiMover will fulfill your needs better.
By the way, if your computer doesn't have too much space left, you can choose to transfer photos from your iPhone to an external hard drive instead, which can also be done in one of the ways shown above.
Related Articles
- 3 Easy Methods to Convert iPhone Video to MP4
- How to Send Photos via Bluetooth on iPhone to Computer
- How to Download Any Videos from Any Site on PC & Mac
- How to Sync Photos from Mac to iPhone X/iPhone 8 in 3 Ways