How to Transfer Photos from iPhone to External Hard Drive
After reading this article, you will learn all the workable ways to transfer photos from iPhone to an external hard drive on Windows/Mac or without a computer. To back up your iPhone photos to an external hard drive within minutes, you can use the methods outlined below.
Compared to an iPhone's storage, external hard drives have significantly larger capacities, ranging from 500GB to 2TB from brands like Seagate, Western Digital, and Toshiba. They also offer excellent read and write speeds, are highly portable, have a long lifespan, and are a popular choice for backing up and copying data, such as iPhone photos, to an external drive.
Here are the details on how to import photos from an iPhone to an external hard drive with or without a computer:
How to Transfer Photos from iPhone to External Hard Drive on PC
You can transfer photos from your iPhone to an external hard drive on a Windows PC in four ways, each with its own set of steps and requirements. Depending on your needs, you can choose to transfer photos directly from your iPhone to the external hard drive, or get photos from your iPhone to the external storage device without using a USB cable.
Method 1. Back Up iPhone Photos to External Hard Drive with Qiling MobiMover
If you want to transfer all your iPhone photos to an external hard drive at once, or copy other files like videos, audio files, messages, books, and more together with the pictures, Qiling MobiMover, an iOS data transfer software, can help.
Qiling MobiMover enables the transfer of files between devices, including iPhone and Mac, PC, or two iOS devices, as well as between an iOS device and external storage devices like external hard drives, USB flash drives, SD cards, and more.
To transfer photos from iPhone to an external hard drive on Windows:
Step 1. Connect devices and launch Qiling MobiMover.
Connect both the iPhone and the external hard drive to the PC, ensuring they are recognized by the computer. Then, launch the photo transfer tool and select "Phone to PC" followed by "Next."
Step 2. Select the category.
Check "Pictures" among all the supported categories. You can also transfer other files from your iPhone to the external hard drive, along with photos. If the default destination is the desktop, change it to your external hard drive by clicking the storage path.
Step 3. Start transferring photos from iPhone to hard drive.
To import photos from your iPhone to an external hard drive, click the "Transfer" button on the app, and then verify the photos in the selected folder on the hard drive once the process is complete.
If your iPhone photos are lost, you can use a tool to transfer them back from an external hard drive to your iPhone. The process is similar to transferring photos from a PC to an iPhone, which can be found in a separate guide.
Qiling MobiMover allows you to manage iPhone data from computer and convert iPhone photos to JPG, making it a convenient helper.
Method 2. Import Photos from iPhone to External Hard Drive on Windows 10 with Photos
On Windows 8 and 10, the built-in Photos app allows you to manage photos on your PC, import photos from a folder or USB device, and even transfer photos from your iPhone to your PC and external hard drive without using iTunes.
To import photos from iPhone to an external drive on PC:
Step 1. Connect devices to PC.
Connect the external hard drive to your computer, then unlock your iPhone and connect it to a PC running Windows 10 or Windows 8, ensuring the external storage device is recognized by the computer.
Step 2. Trust the computer.
When a prompt appears on your iPhone asking for permission, click "Allow".
Step 3. Launch the Photos app.
To import photos from your iPhone to your PC, open the Photos app on your PC and click on "Import" followed by "From a USB device" to allow Photos to detect the items on your iPhone.
Step 4. Select photos.
After finding all the photos and videos on your iOS device, you will be prompted with a window in Photos asking you to select the items you want to import. Simply choose the photos you want to transfer.
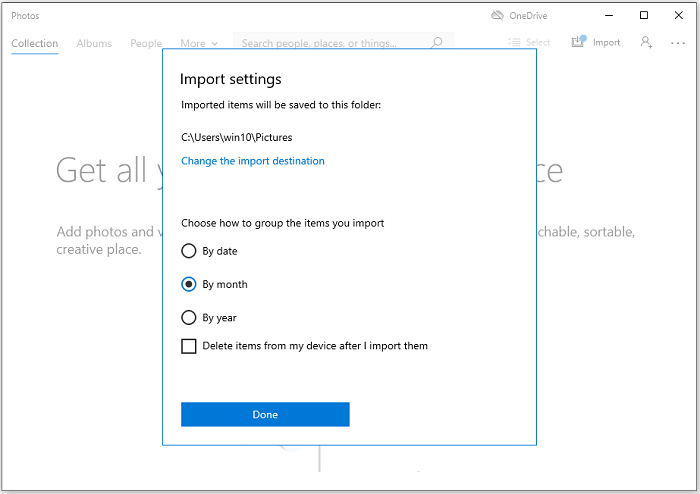
Step 5. Change the storage path.
To import settings, click on "Import setting" and then select a location on your external hard drive to change the import destination, and finally click on "Done."
Step 6. Start importing photos.
To transfer photos from iPhone to an external hard drive, click "Import Selected" to initiate the process.
If the Windows 10 Photos app isn't working, don't worry - there are fixes to get it up and running again.
Method 3. Back Up iPhone Photos to External Hard Drive Using iCloud
To transfer iPhone photos to a computer, a suitable method for both Windows and Mac users is to use iCloud Photos. By enabling iCloud Photos on both your iPhone and computer, you can transfer your iPhone photos to the computer and then download them to an external hard drive. This method also allows you to transfer photos from iPhone to iPad if needed.
To upload photos from iPhone to an external hard drive via iCloud:
Step 1. Turn on iCloud Photos on iPhone.
To turn on iCloud Photos on your iPhone, go to the "Settings" app, select your name, tap "iCloud", then choose "Photos", and finally toggle the switch next to "iCloud Photos" to the "On" position.
Step 2. Turn on iCloud Photos on the computer.
- Download and install iCloud for Windows.
- To use the Find My iPhone feature, sign in with the Apple ID you use on the iOS device. This means you must ensure that you are using the same Apple ID on both your iPhone and PC.
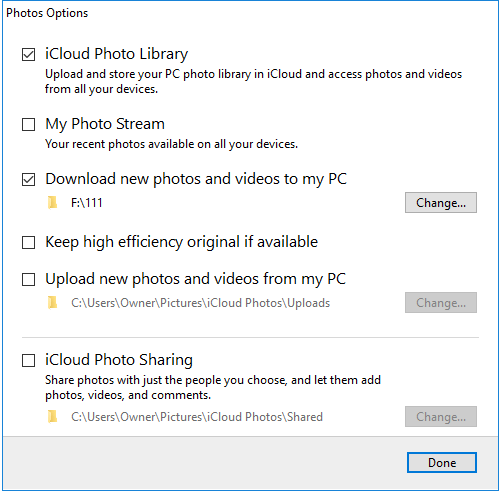
- To switch to iCloud Photo Library and set the default download location to an external hard drive, click the "Options" button next to Photos, select "iCloud Photo Library", and "Download new photos and videos to my PC". Then, click "Change" under "Download new photos and videos to my PC" to specify the external hard drive as the default download location.
- Click "Done" > "Apply".
Step 3. Wait for the syncing process to finish.
After syncing, the photos on your iPhone will be transferred to the external hard drive successfully.
Method 4. Transfer Photos from iPhone to Hard Drive on Windows PC via File Explorer
To transfer photos from iPhone to PC, you can use File Explorer in Windows 10 or Windows Explorer in Windows 8/7, which allows you to copy photos directly to an external hard drive without software installation. However, this method only transfers photos in the DCIM folder by date, and if you want to transfer photos by album, a third-party software like Qiling MobiMover is recommended. If your iPhone photos are not showing up on PC, you can try troubleshooting first.
To import photos from iPhone to external hard drive:
Step 1. Connect devices to the computer.
To transfer data from your iPhone to an external hard drive connected to a Windows PC, unlock your iPhone and connect both the iPhone and the external hard drive to your PC using a reliable USB cable.
Step 2. Allow transferring photos.
Then a prompt will pop up on your iPhone asking for your permission. Click "Allow" to continue.
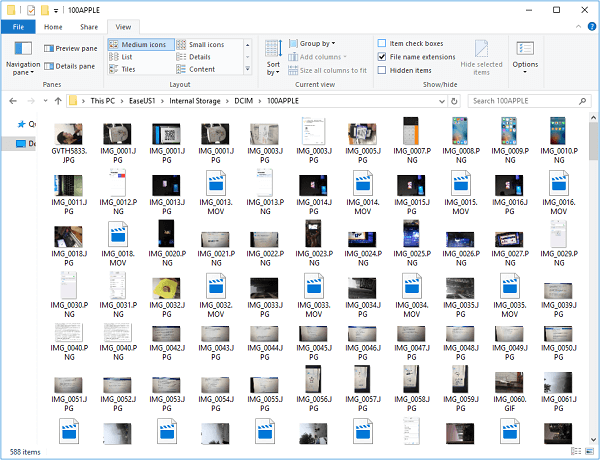
Step 3. Access iPhone photos on PC.
To view your iPhone's Camera Roll photos, go to "This PC" > "Apple iPhone" > "Internal Storage" > "DCIM" > "100APPLE".
Step 4. Copy iPhone photos to the external hard drive.
To back up photos from your iPhone to an external hard drive, simply copy the photos from your iPhone and paste them to the external hard drive, allowing for a quick and easy backup process.
How to Transfer Photos from iPhone to External Hard Drive on Mac
As a Mac user, you have additional solutions beyond using iPhone transfer software or iCloud to transfer photos from your iPhone to your Mac. Besides these methods, there are two more ways that also work for this purpose. (Note: the following methods also apply to transferring photos from iPhone to Mac.)
Method 1. Import Photos from iPhone to External Hard Drive on Mac via Image Capture
Image Capture is a Mac program that allows users to import and upload photos from digital cameras, iOS devices, and other camera-equipped devices, making it easy to transfer photos and videos to an external storage device from an iPhone or iPad.
How to back up photos from iPhone to external hard drive:
Step 1. Connect Your External Hard Drive to your Mac.
Connect the hard drive to your Mac using a USB cable, ensuring it's recognized by the Mac.
Step 2.Connect Your iOS Device To Your Mac.
Connect your iPhone to the Mac with a USB cable.
Step 3.Launch Image Capture.
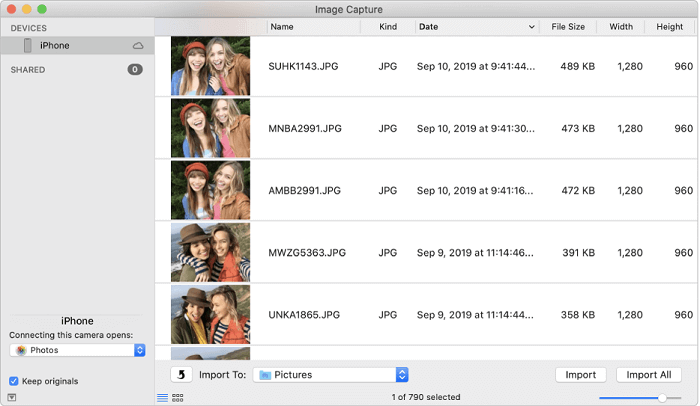
To start the process, open the "Image Capture" app on your Mac and select your iPhone from the list of available devices in the "Devices" section. This will allow you to transfer photos from your iPhone to your Mac.
Step 4. Select Destination.
Click the "Import To" pop-up menu. To save the images to your external hard drive, go to the "Save to" option in the menu and select "External Hard Drive" from the list of available options. This will allow you to choose which images you want to save and where on the external hard drive you want to save them.
Step 5. Click Import.
To transfer items, select the desired photos and click "Import All" to transfer all of them, or choose specific photos to transfer by clicking "Import".
Method 2. Move Photos from iPhone to External Hard Drive via Photos
On Mac OS X 10.10.3 or later, you can use the Photos app to transfer photos from iPhone to Mac, and subsequently to an external hard drive using a USB cable, replacing the need for iPhoto in earlier versions.
To transfer photos from iPhone to external hard drive on Mac:
Step 1. Connect devices to Mac.
Connect your iPhone and the external hard drive to the Mac.
Step 2. Launch the Photos app.
To access your iPhone's photos on a Mac, you can use the Photos app. First, make sure that your iPhone and Mac are connected to the same Wi-Fi network.
Step 3. Choose the storage path.
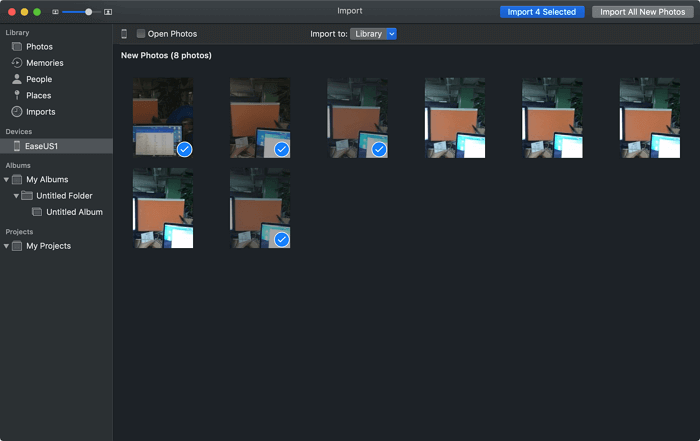
To save imported photos to an external drive, click the "Import to" option and select the drive as the destination.
Step 4. Import photos from iPhone to the external drive.
To transfer photos from a camera or phone to a Mac, click "Import All New Photos" or select the desired photos by clicking on them and then click "Import [number] Selected".
For more workable solutions to import photos from iPhone to external hard drive on Mac, refer to the guide on how to transfer photos from iPhone to flash drive on Mac.
How to Transfer Photos from iPhone to External Hard Drive Without Computer
You can transfer photos from your iPhone to an external hard drive without a computer by using a USB-C cable that's often included with the external drive, allowing you to connect it directly to your iPhone.
You can connect an external hard drive to your iPhone or iPad using a specific cable, or alternatively, use Apple's Lightning-to-USB camera adapter to facilitate the connection. This allows for data exchange between the devices.
To import photos from iPhone to external hard drive without a computer:
Step 1. Connect the external hard drive to the iPhone.
To connect an external hard drive to an iPhone, use a USB-C cable or an adapter to connect the hard drive to the iPhone.
Step 2. Check the connection.
To check if the external hard drive is attached successfully on your iPhone, go to the "Files" app, then tap "Browse" to see if the drive is listed and accessible.
Step 3. Save iPhone photos to the external hard drive.
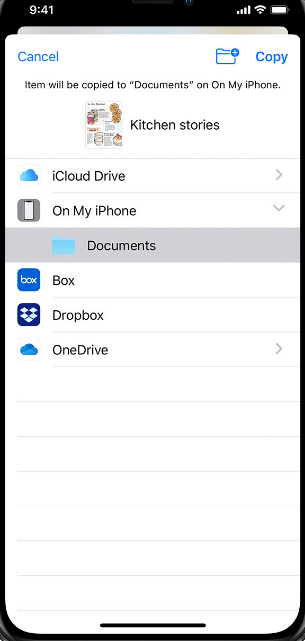
To move photos from your iPhone to an external hard drive, go to the Photos app, select the photos you want to move, tap the "Share" button, and choose "Save to Files." Then, tap "On My iPhone" and select the external hard drive.
You can transfer photos from your iPhone to an external hard drive using the Files app, and vice versa, allowing for direct transfer without needing a computer. This enables you to move photos and files between your iPhone and external drive, and also copy files from the external drive back to your iPhone if needed.
The Bottom Line
To transfer photos from your iPhone to an external hard drive, you can use the following methods. You can connect your iPhone to a computer and use the built-in Photos app to transfer photos, or use a third-party app like iMazing or PhoneCopy to transfer photos without a computer. Alternatively, you can use the Photos app on your iPhone to transfer photos to an external drive, or use a cloud service like iCloud or Google Photos to transfer photos and then download them to an external drive. All of these solutions can also be used to transfer photos from an iPhone to a computer. By following these tips, you can easily transfer your photos between an iPhone/iPad/iPod and a computer/external storage device.
FAQ
1. Can the iPhone connect directly to an external hard drive?
You can connect your iPhone or iPad to external storage devices like flash drives, USB hard drives, and SD cards using the appropriate adapter, which can be found on Amazon.
2. How do I organize my iPhone photos to an external hard drive?
You can organize an external hard drive by connecting it to a computer, backing up important files, and deleting unneeded or duplicated items.
3. How do I transfer files from my iPhone to an external hard drive without a computer?
Connect your iPhone or iPad to an external hard drive via an adapter, then go to the Photos app, select the photos to transfer, click the Share button, tap Save to Files, choose the external hard drive, select a folder, and tap Save.
Related Articles
- 3 Simple Ways to Open HEIC File on Mac
- How to Transfer Photos from iPhone to iPad in 4 Ways
- How to Download Vimeo Videos to iPhone
- How to Make iPhone Faster in Every Way