How to Transfer Photos from iPhone to iPad in 4 Ways
Also supports videos, music, ringtones, contacts, books, and more.
Transferring photos and videos from iPhone to iPad is a common need, driven by desires to create backups, free up space on the iPhone, or view cherished memories on a larger screen. Fortunately, there are four workable ways to achieve this goal, which will be covered in this guide.
- Qiling MobiMover - Transfer Photos Between iPhone and iPad Flexibly
- iCloud -Transfer Photos from iPhone to iPad Automatically
- AirDrop - Transfer Photos from iPhone to iPad Wirelessly
- Email - Send Photos from iPhone to iPad Remotely
Tip 1. Transfer Photos from iPhone to iPad with Qiling MobiMover
Applies to transfer all or specific photos and videos
Qiling MobiMover is our top pick for transferring photos from iPhone to iPad, thanks to its ease of use and fast transfer speed, making it a convenient solution for getting your photos across devices.
Qiling MobiMover is a versatile tool that allows you to easily and quickly transfer various types of data, including photos, videos, contacts, and more, from iPhone to iPad or vice versa. Additionally, it functions as a HEIC converter and WhatsApp data manager, providing further convenience and flexibility.
- Convert iPhone photos to JPG in bulk
- Transfer WhatsApp chats from one iPhone to another
- Back up WhatsApp from iPhone to PC
To move photos from iPhone to iPad, you can use a computer to download a program that will enable you to transfer the photos from your iPhone to your iPad.
Step 1. To connect both of your iOS devices to your computer, launch Qiling MobiMover and choose "Phone to Phone" on the screen. Next, set the source device and target device correctly and click "Next" to continue.
Step 2. To transfer data from your iPhone to iPad or vice versa, check the categories you want to transfer. In addition to photos, you can also copy videos, audios, contacts, messages, and more between devices.
Step 3. After checking the settings, click the "Transfer" button to start transferring photos from your iPhone to iPad or vice versa. Once completed, check the newly imported photos in the "Photos" app on your target device.
This program allows you to easily manage your iOS content on your PC, making it a convenient tool for users who want to access and organize their iOS files on their computer.
Tip 2. Transfer Photos from iPhone to iPad Automatically via iCloud
Applies to transfer all photos and videos
To transfer all photos from your iPhone to your iPad, use Apple's recommended solution, iCloud. Ensure both devices are connected to the same WiFi network, and sign in with the same Apple ID on both devices. Then, follow the necessary steps to complete the transfer.
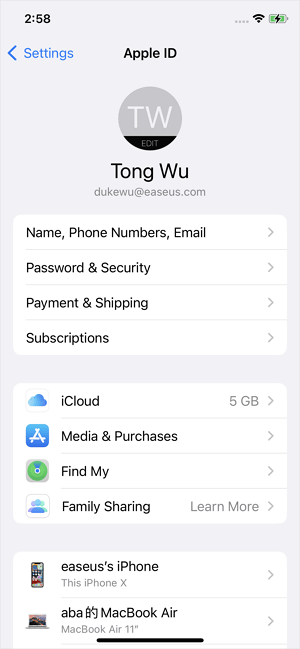
Step 1. To access the iCloud settings, go to the "Settings" app, tap on your name at the top, and then choose "iCloud."
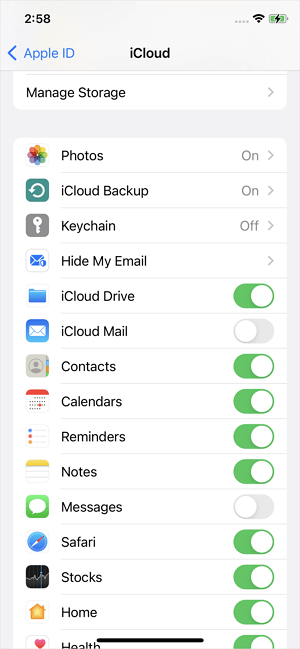
Step 2. Click "Photos" among the iCloud photos.
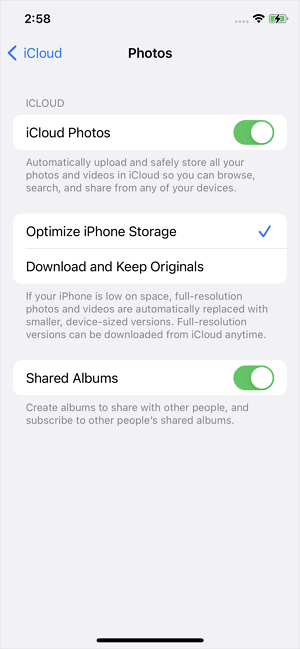
Step 3. To free up space on your iPhone, go to Settings, then select "Photos" and toggle on "iCloud Photos." From there, you can choose to either "Optimize iPhone Storage" to save space by storing lower-resolution copies of your photos on your device, or "Download and Keep Originals" to store the full-resolution versions of your photos on your iPhone.
Step 4. To sync photos from your iPhone to your iPad, follow these steps: on your iPhone, open the Photos app, tap the "Shared" tab, and select your iPad from the list of devices. Then, on your iPad, open the Photos app, tap the "Shared" tab, and select the album you want to sync.
Tip 3. Send Photos from iPhone to iPad Wirelessly with AirDrop
To transfer one or multiple photos from your iPhone to your iPad, you can use the Share Sheet feature on your iPhone, which allows you to share photos directly to your iPad. Alternatively, you can use the Photos app on your iPad to import photos from your iPhone via Wi-Fi or a USB connection.
AirDrop is a built-in feature that allows you to quickly and easily share files between Apple devices, including photos, videos, contacts, map locations, and more. To use AirDrop, enable both Bluetooth and WiFi on both devices, then follow the steps to share data over Wi-Fi. This feature uses Bluetooth to locate nearby compatible iOS devices.
Step 1. To enable AirDrop on both your iPhone and iPad, navigate to the Control Center on each device and toggle the Bluetooth switch to the "On" position. This will allow you to share files between the two devices using AirDrop.

Step 2. To transfer photos from an iPhone to a Mac, open the "Photos" app on your iPhone and select the photos you want to transfer. Tap the "Share" icon and choose "AirDrop" to send the selected photos to your Mac.
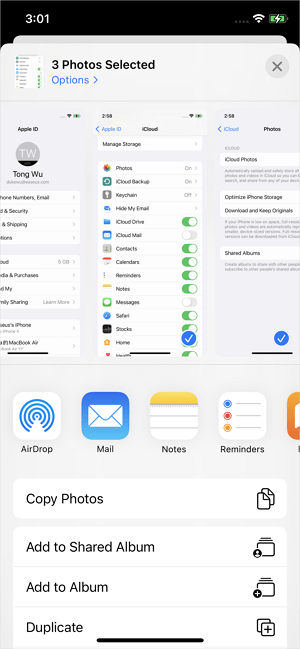
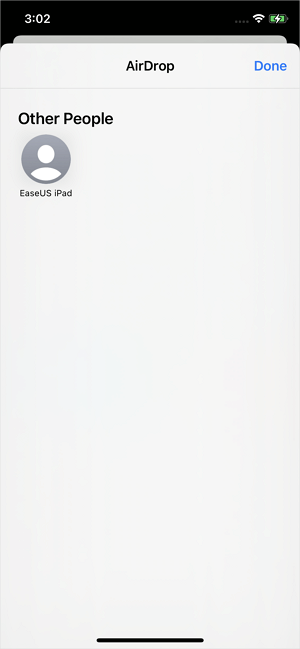
Step 3. To send photos from your iPhone to an iPad, tap the target iPad in the Photos app, then click "Accept" on the iPad to start receiving the photos.
AirDrop not working on iPhone/iPad? Try these troubleshooting steps: restart your device, enable AirDrop, check the sharing settings, and ensure both devices are on the same network. If the issue persists, reset network settings or visit an Apple Store for further assistance.
Tip 4. Transfer Photos from iPhone to iPad with Email
To transfer one or two photos and videos from your iPhone to your iPad, you can use the "Share" feature in the Photos app on your iPhone. Open the Photos app, select the photos and videos you want to transfer, and tap the "Share" icon.
Transferring photos from an iPhone to an iPad via email is a convenient option, but it's not the most ideal solution, especially for large files or attachments. However, if you still want to use email, here are the steps to follow.
Step 1. Go to the "Photos" app on your iPhone.
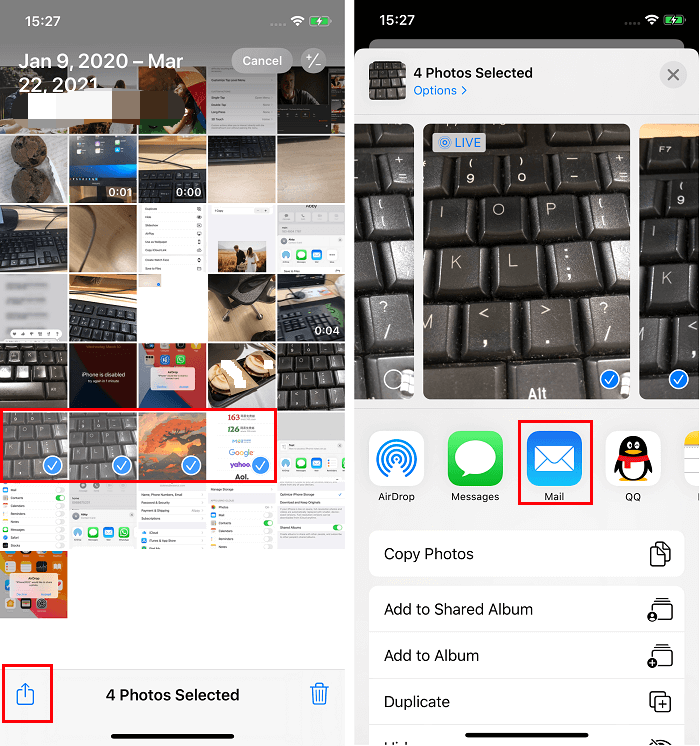
Step 2. Select the photos you want to move to the iPad.
Step 3. Tap the "Share" button and choose "Mail".
Step 4. Type in the information needed, then click "Send" to send the email to your own account.
Step 5. To save photos from an email on your iPad, open the "Mail" app, select the email that contains the photos, and tap on the images to view them in full size. Then, tap the "Save" icon (it looks like a box with an arrow coming out of it) to download the photos to your iPad. You can also tap the "Share" icon (it looks like a box with an arrow pointing out of it) and select "Save Image" to save the photos.
The Bottom Line
Our guide aims to help you sync photos from your iPhone to your iPad. Among the solutions we recommend, Qiling MobiMover stands out as the most practical and user-friendly option. Not only can it transfer photos, but also videos, contacts, messages, and other iPhone data. If you prefer not to install a third-party tool, there are alternative solutions available.
Related Articles
- How to Print Text Messages from iPhone for Free
- Best Vlive Video Downloaders You Can't Miss
- How to Transfer Music from iPhone to iPhone in 6 Ways
- 2 Ways to Complete Recycle Bin Recovery in Windows PC
Permanently deleted files from recycle bin or emptying recycle bin can be recovered using recycle bin recovery software, which can completely retrieve deleted files.