How to Transfer Photos/Pictures from iPhone 7 to Mac
Using iPhone 7 to capture moments of happiness, excitement, and memorable is quite convenient and fulfilled. As time goes on, too many photos storage can not only take a great amount of space, also will make iPhone run slowly. Meanwhile, you can't just get rid of these pictures by deletion as they are valuable to you. Then, you can transfer photos from iPhone 7 to Mac for backup and free up space on iPhone 7.
Transfer photos from iPhone 7 to Mac with Qiling MobiMover
Qiling MobiMover is an iOS data transfer software tool that allows users to transfer photos, music, playlists, videos, contacts, messages, notes, books and Safari bookmarks from iPhone 7 to Mac with ease. What's more, if you need to import photos from Mac to iPhone 7 in the vice versa or transfer other files from Mac to iPhone 7, Qiling MobiMover can fulfill your needs in a simple one-click.
Download and install Qiling MobiMover on your Mac by clicking the download button below, then follow the steps to import photos from your iPhone to Mac within minutes.
Step 1. Connect your iPhone to Mac with a USB cable. Run Qiling MobiMover, choose "Phone to Mac" and click the "Next" button to continue.
Step 2. Check the category/categories you want to copy from your iPhone to Mac. As you can see, you can copy other supported files together with photos from your iPhone to Mac all at once. After that, don't forget to customize the storage path for the exported photos unless you want to save them on your desktop.
Step 3. Now, click the "Transfer" button to start transferring photos or other files from your iPhone to Mac without iTunes. Exporting files from iPhone to Mac with MobiMover is the right way for backup to avoid unexpected data loss.
Transfer photos from iPhone 7 to Mac with AirDrop
Actually, there are two top ways to transfer iPhone 7 to Mac: using AirDrop and iTunes. In this part, we mainly talk about how to transfer pictures from iPhone 7 to Mac wirelessly with AirDrop. Check detail guides in following texts.
What must be prepared for using AirDrop
1. Turn on AirDrop and Bluetooth on iPhone and Mac.
2. Connect to Wi-Fi and Wi-Fi network on both iPhone and Mac.
3. iPhone and Mac should be nearby within 30 feet.
4. If you have checked out the AirDrop is not working, fix it to ensure a smooth transfer.
Transfer photos from iPhone 7 to Mac
1. Open the Photos app on your iPhone 7.
2. Select photos and tap Share button in the lower left corner of the screen, and then tap your Mac device in the AirDrop list right below the selected pictures.
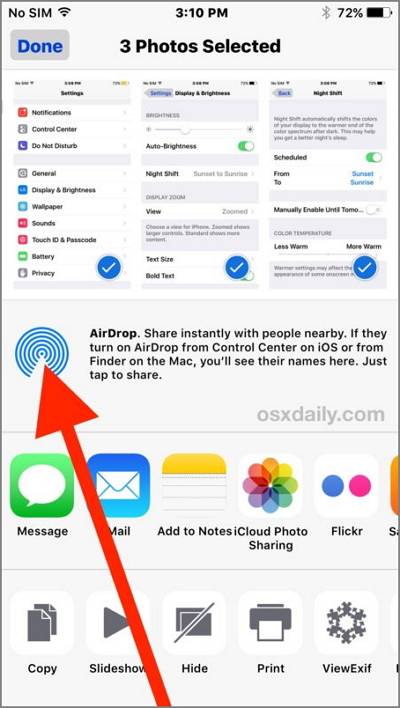
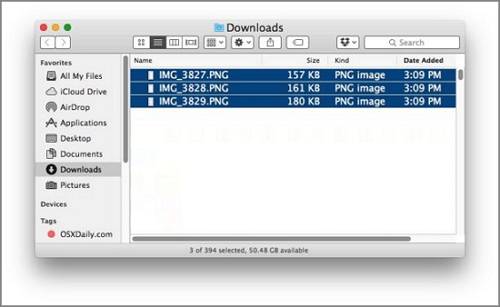
3. Switch to Mac, choose to Accept of asking receiving photos from AirDrop on iPhone 7. At last, go to User Download Folder on Mac to check the transferred pictures.
Transfer photos from iPhone 7 to Mac with iTunes
The most frequently used way to transfer iPhone 7 photos to Mac for backup or space clear is iTunes. Not limited to the best music manage tool, iTunes is also good at iPhone files backup and transfer, such as photos here, music, contacts, calendar, books, audios, and videos.
1. To avoid some iTunes errors coming from the earlier version, you are highly recommended to install the latest iTunes version on your Mac.
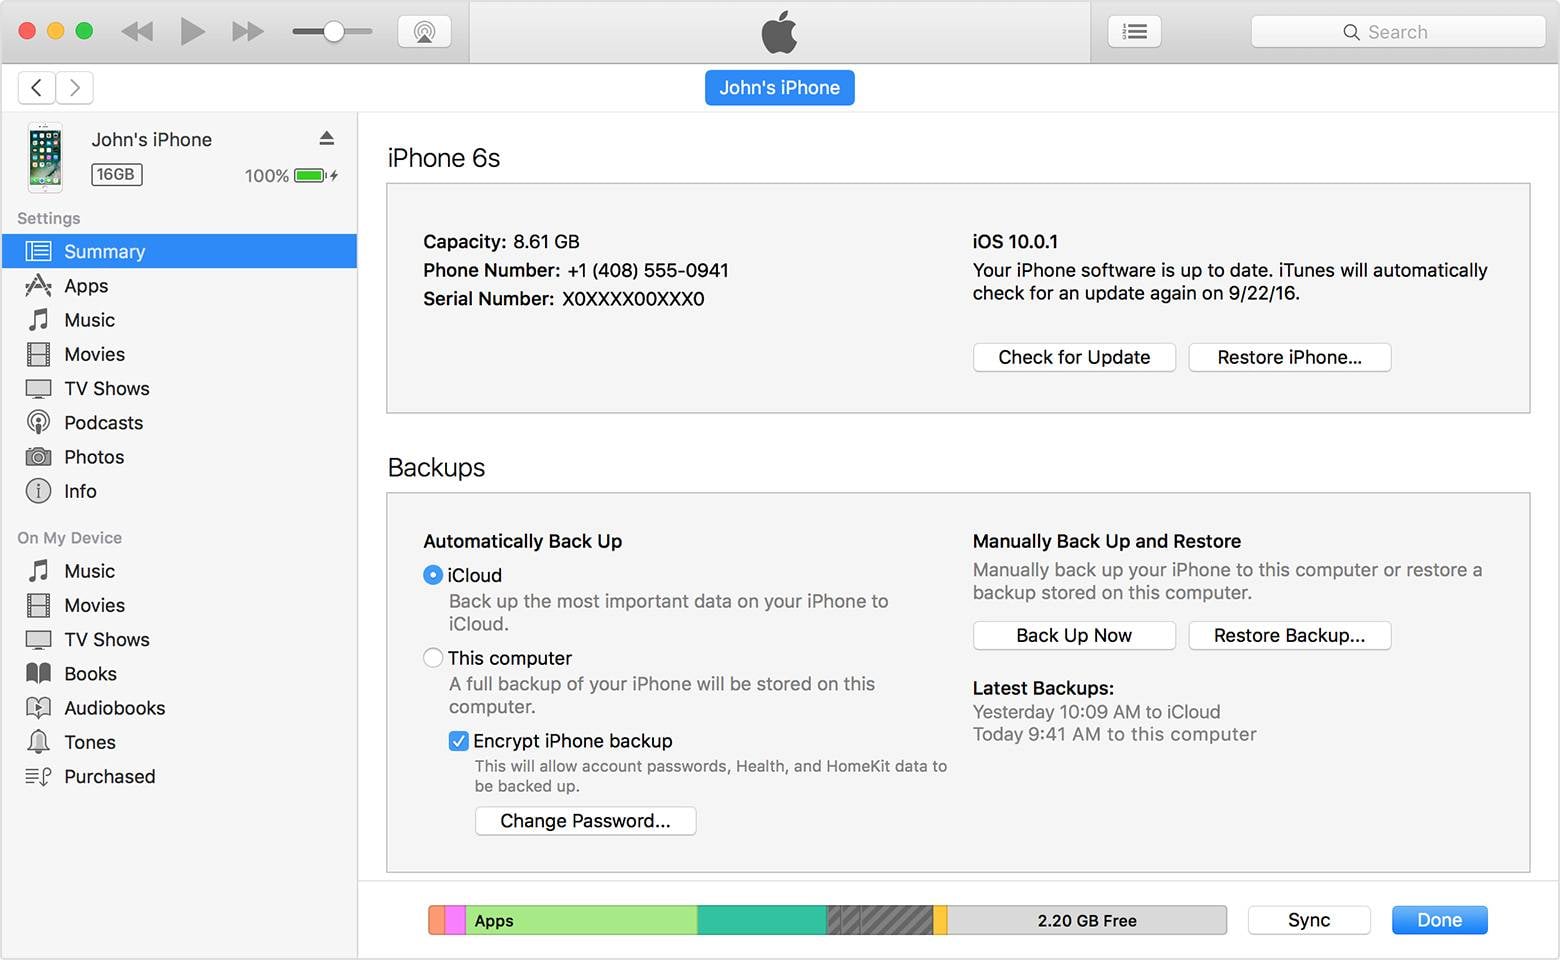
2. Connect your iPhone 7 to Mac and run iTunes at the same time.
3. Click the iPhone 7 device button. Then, click Summary under the device button, and choose Back Up Now to transfer all your iPhone data to Mac, including photos.
If you want to transfer music from computer to iPhone 7 with iTunes vice versa, click to see more info.
Related Articles
- How to Transfer Music from iTunes to iPad
- Free Video to MP3 Converter to Extract Audio from Video
- How to Transfer Music from Computer to iPhone 13/12/11 With/Without iTunes
- How to Back Up iPhone 6 in Every Way