What Is System Data on Mac | All You Should Know
What Is System Data on Mac
If your Mac's storage is running low, you may notice a large portion labeled "System Data" taking up space. System Data, previously known as "Other" in older macOS versions, encompasses various files that do not fall into standard categories like Photos, videos, or documents.
Mac system data contains various file types that cannot be classified as images, videos, or documents, and it typically occupies around 10 GB on a Mac. However, in some cases, system storage can reach up to 80 GB or more.
You can view the system storage through system settings:
Step 1. Go to the Apple menu, click on System Settings, then General, followed by Storage, where you will see a colored bar indicating the usage of different categories.
Step 2. Hover over a color, and you can see the category and the amount of space it uses.
Step 3. Hovering over each category reveals its type and size, with dark gray spaces typically indicating System Data.
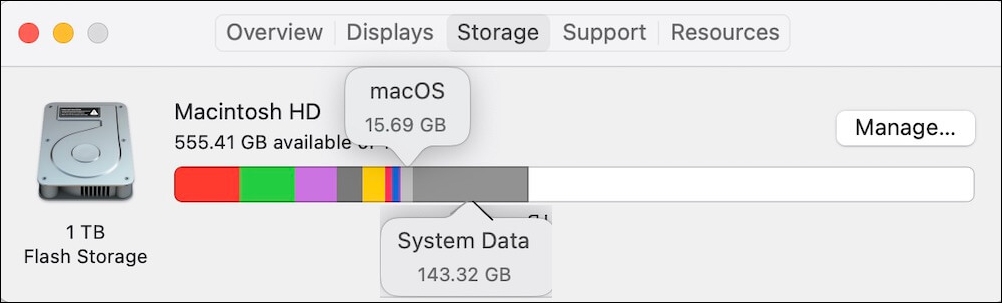
In the example above, the system data occupies 143.32 GB, which is significantly larger than the typical 10 GB.
Which Files Types Are Included in Mac System Data
macOS offers a feature to track storage space consumption and identify which documents are taking up the most space, helping to manage storage better. However, System Data often appears as a large, mysterious category in Mac storage.
The "System Data" storage label on Mac encompasses various file types that do not fit into specific categories like Photos, videos, Mail, or Messages.
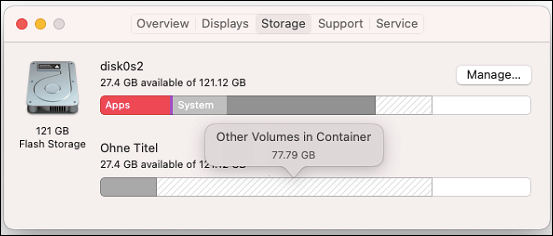
In macOS Big Sur or earlier, "System" is listed above "Other" in storage. In later versions, including Monterey, "System" has been renamed to "macOS" and "Other" to "System Data".
The Mac System Data consists of several files as follows:
- Old backups.
- macOS system.
- Temporary files.
- App extensions/plugins.
- Disk images and archives, including .DMG, .ZIP, etc.
- Cache files like system cache, browser cache, and user cache.
System Data can vary in size based on the Mac's performance. Erasing it can free up storage space by removing unnecessary files, without compromising the system's functionality.
How to Access System Data on Mac
Apple's default preference is to conceal folders that could be vulnerable to viruses and cyber threats. However, in some cases, users may need to access system data to gain full control, modify settings, or clear out cache files.
To view Mac system data, you can use the Terminal to access the system settings and view the storage space. You can do this by following these steps:
Step 1. Find Applications/Utilities, Open Terminal.
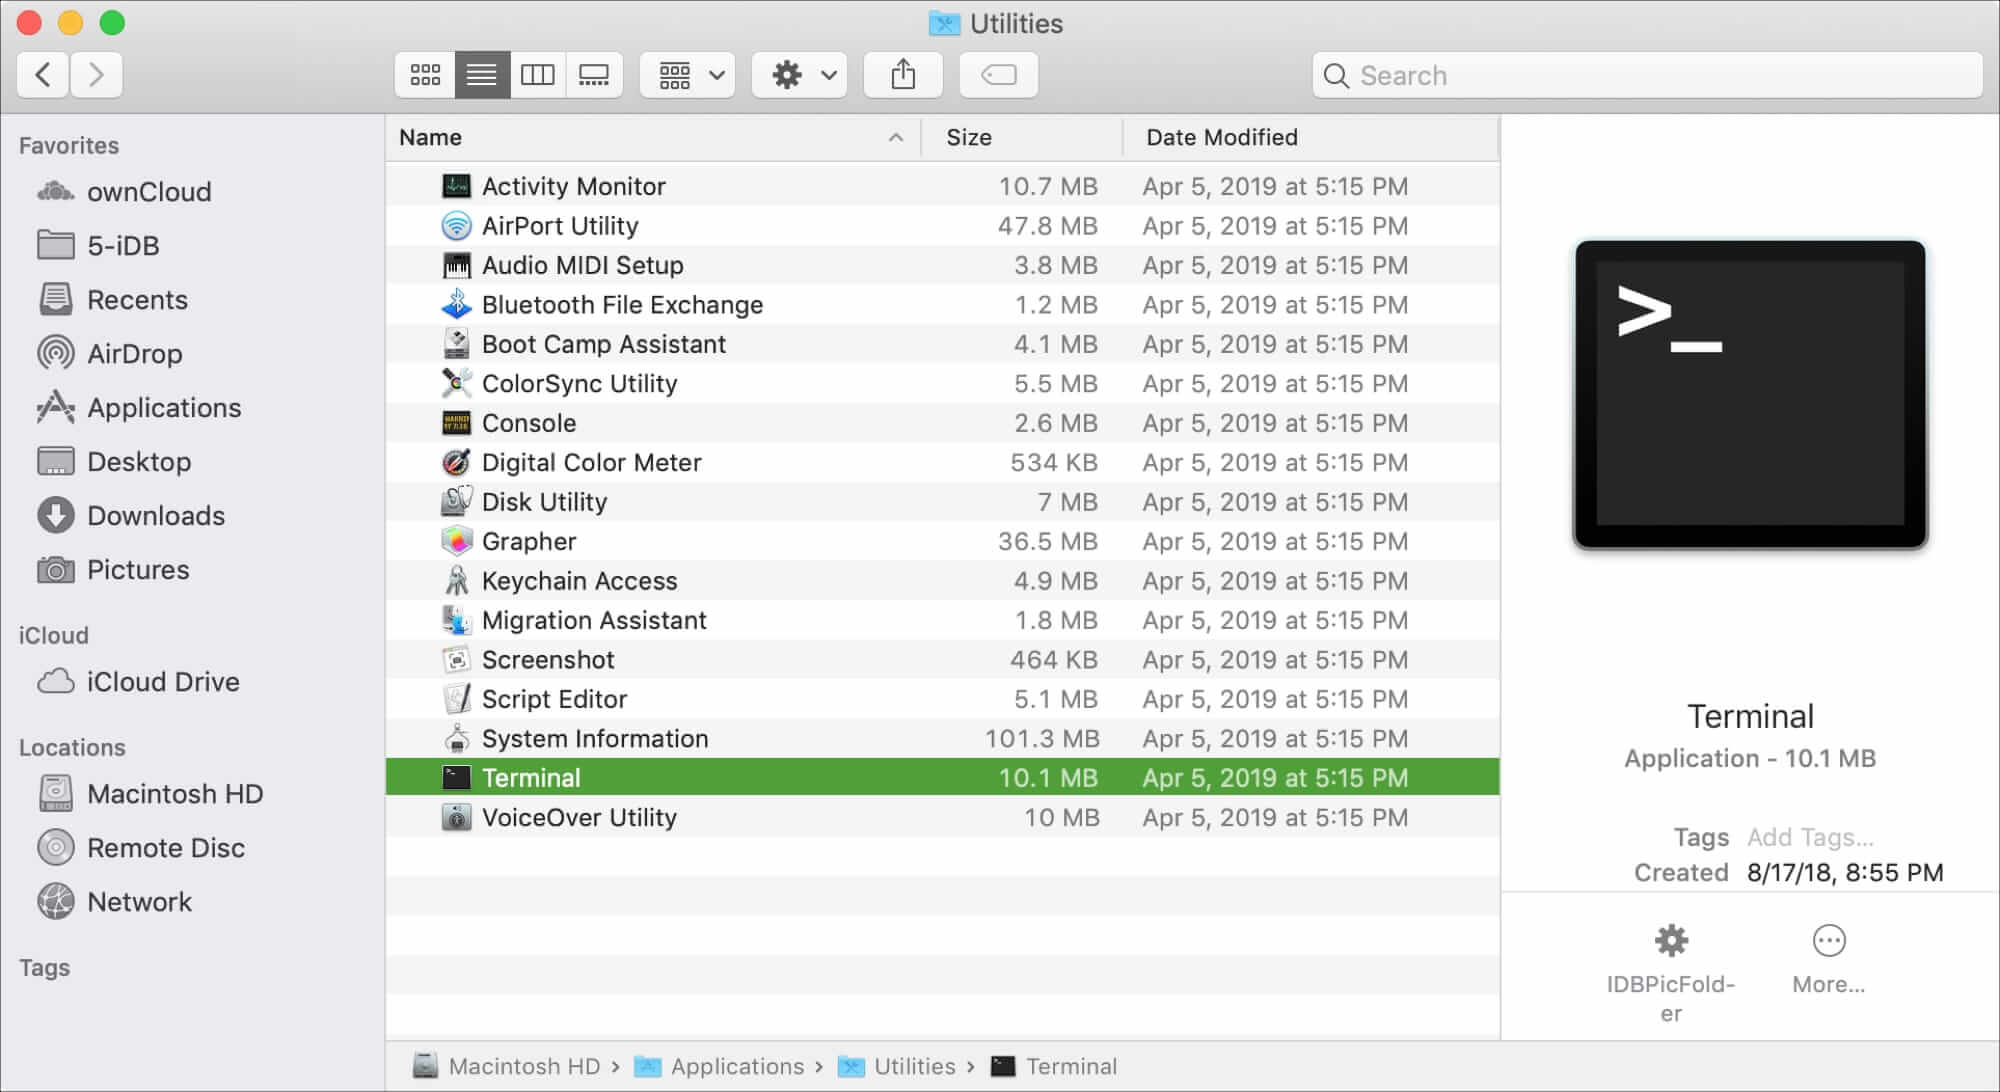
Step 2. Enter this command in Terminal: chflags nohidden ~/System.
Step 3. Press Return. Make sure the command is executed.
Step 4. To make the System folder visible in the Finder, quit Terminal, and the System folder will then be visible in the Finder's Go menu.
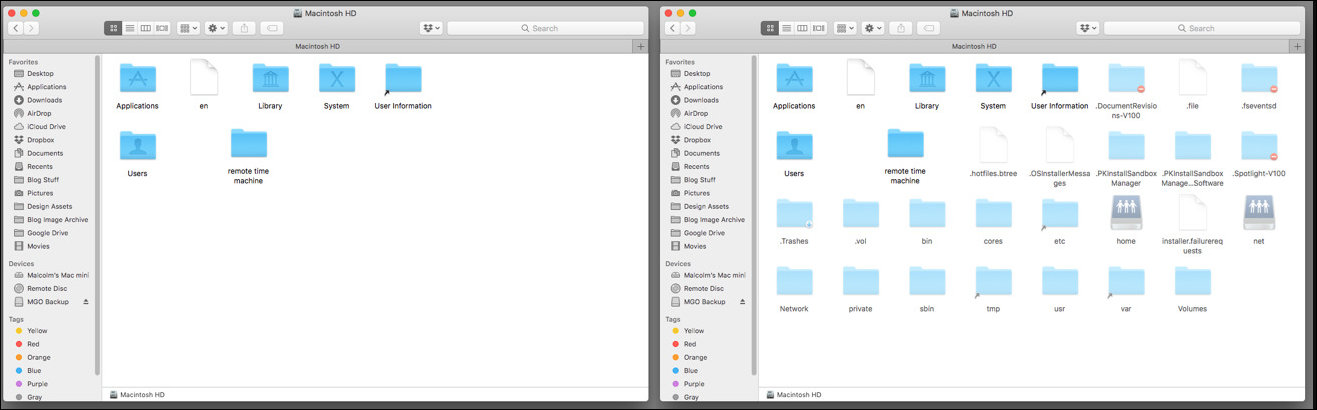
To hide the system data from view, enter the command chflags hidden ~/System in Terminal.
Then press Return, and it should be back to the original settings.
Share this article on social media to read it anytime.
How to Clear System Data on Mac
If your Mac is running low on space, it is suggested that you clear system data to free up some room. You can find a video that outlines the methods to clear system data on your Mac.
- 00:01 What's System Data
- 01:13 Optimize Storage
- 02:03 Manually Clean Application Cache Files
- 03:33 System Clean-up Software
- 05:15 Additional Tips
While having complete control over System Data is ideal, there are ways to minimize its size.
Optimize Mac Storage
Optimizing system data storage on your Mac can be achieved by implementing the recommendations provided under the Storage bar.
Note: The recommendations apply only to the partition that contains the home directory of your Mac.
Clear Cache on Mac
To delete unnecessary cache files on your Mac, navigate to the "Library Folder" by holding the Option key while selecting "Go" in the Finder menu. Then, click on "Library" to access the folder.
From there, you can browse through the various folders and delete any unnecessary cache files you find. Be cautious when deleting files, as some may be necessary for certain applications or system processes.
Step 1. To access a specific folder in Finder on a Mac, select the Go menu and choose "Go to Folder" from the dropdown options. This will open a dialog box where you can enter the path to the folder you want to access.
Step 2. Paste the file paths below into the search box:
~/Library/Caches/
/Library/Caches/
/System/Library/Caches/
Step 3. Click the Return key.
Step 4. Move the files you want to delete to the Trash, specifically in the cache folders.
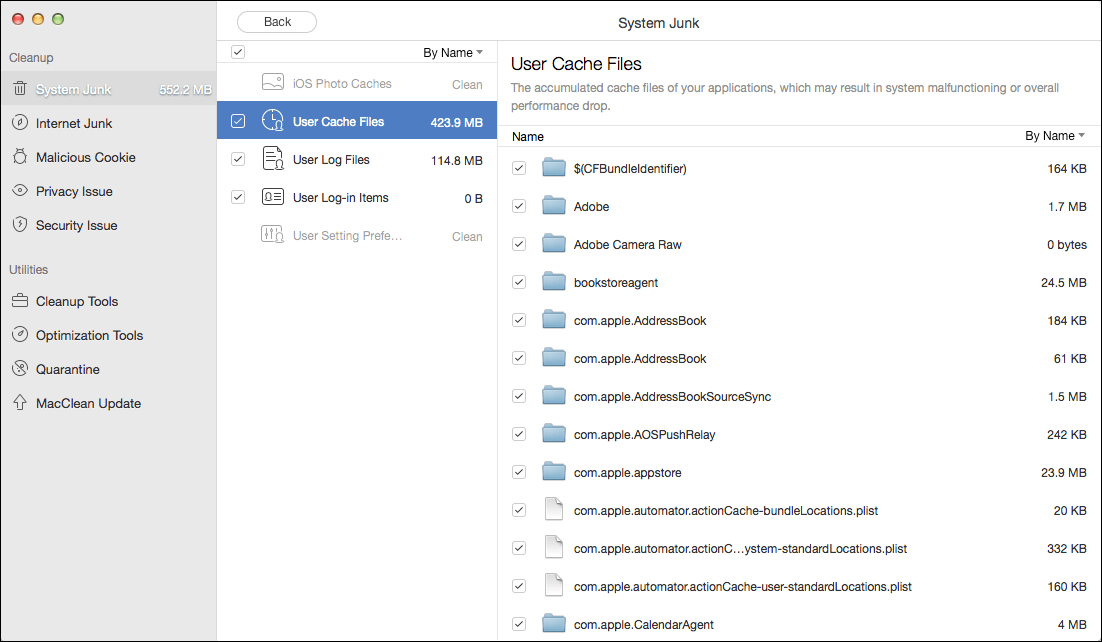
Step 5. Empty your Trash.
Be careful not to delete essential data to avoid causing system failure. If you accidentally delete important data at Mac Trash, you can restore Mac Trash data through third-party software.
Delete Log Files on Mac
To delete log files from the System Data, follow these steps:
Step 1. To access the Go menu in Finder, select it, then choose Go to Folder from the dropdown options.
Step 2. Paste ~/Library/Logs/ into the blank box, then press "Return".
Step 3. Select the log files you want to delete, and press the Command + Backspace keys.
Step 4. Remove the log files in /Library/Logs/.
Delete Time Machine Local Snapshots
Your Mac will automatically preserve local snapshots of your Time Machine backups in case your external drives become inoperable. To clean up these local snapshots, you can follow a series of steps.
Step 1. Launch Terminal using Launchpad or Spotlight.
Step 2. To get a list of backup snapshots sorted by date, type tmutil listlocalsnapshotdates into the Terminal and hit Return.
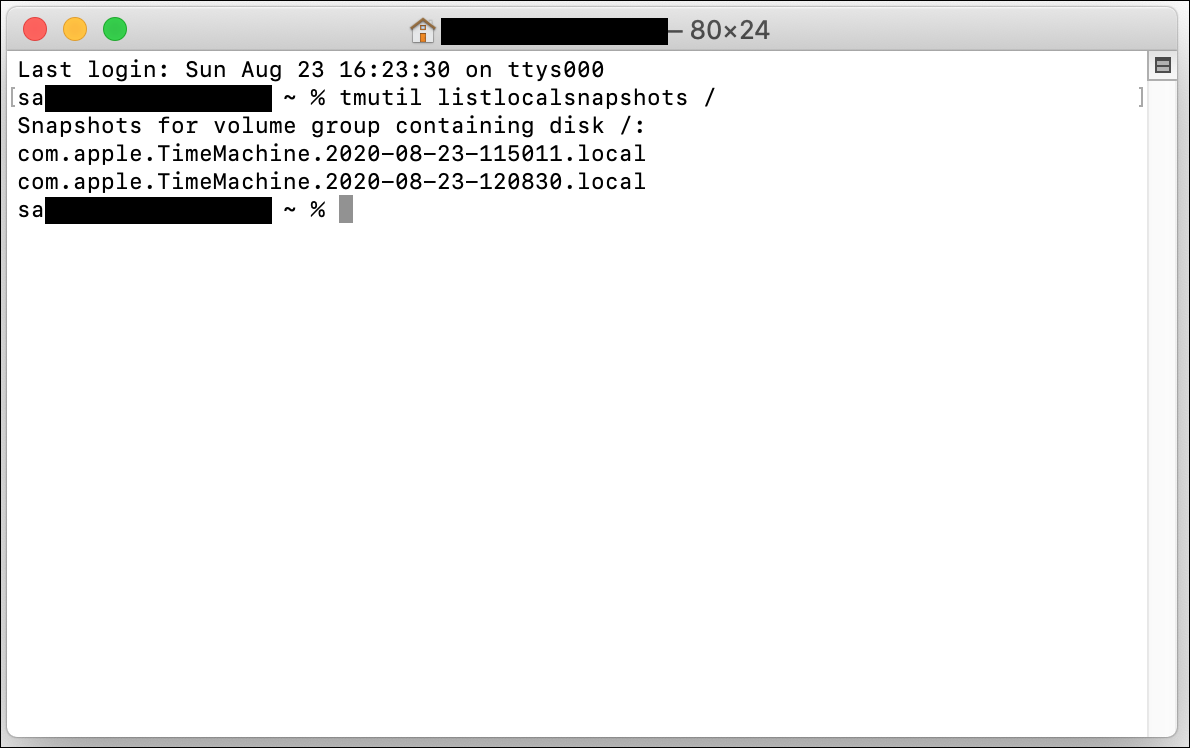
Step 3. To delete a Time Machine backup, enter a command such as tmutil deletelocalsnapshots "2024-01-01-120000" in Terminal. Replace the sample timestamp with the backup date you want to delete, and enter your user account password if prompted.
Remove Old iOS Backups
The "System Data" folder on a Mac contains iOS backups that can take up a significant amount of storage space, and it is recommended to delete outdated backups to free up space.
If connecting your iPhone to your computer is a hassle, you can manually search and delete iOS backups by following these steps:
Step 1. To quickly access the Go to Folder window on the desktop, press the keyboard shortcut Shift + Command + G.
Step 2. In the search box, paste /Library/Application Support/MobileSync/Backup/ and then hit Return.
Step 3. Find the files you want to delete in your backup folder, then drag them to the Trash. This will remove them from your backup folder, but keep in mind that they may still be stored elsewhere, such as on an external drive or in the cloud.
Clear Your Downloads Folder
The Downloads folder on your Mac, where files are automatically saved, can quickly become cluttered and take up a lot of space over time. Regularly cleaning out this folder is a good habit to get into to keep your Mac running smoothly.
- Click Download in the sidebar after launching Finder.
- Sort your files by size, then delete any unnecessary ones to free up space.
Restart Your Mac
If it has been a while since you last restarted your Mac, try restarting it by clicking the Apple menu and choosing Restart. This may resolve some issues.
Recover Deleted System Data on Mac
If you have accidentally deleted system data on your Mac or are experiencing errors with certain programs, consider using Deep Data Recovery for Mac to recover your system data.
This software is a professional data recovery tool for Mac that can recover data from the emptied Trash Bin, allowing users to save unlimited data in just three simple steps.
Step 1. Choose a hard drive or partition.
Step 2. Scan to find deleted files.
Step 3. Preview all recoverable files, and select files to recover.
Qiling data recovery software for Mac can recover deleted files on Mac, including from SD cards, even without a Time Machine backup.
Conclusion
Mac system data includes various file categories that cannot be classified as specific file types, such as Photos, videos, Mail, or Messages, and takes up around 10 GB of storage, but can sometimes swell to over 80 GB.
To clear system data on a Mac, you can access storage space through system settings or the Terminal. Alternatively, you can optimize storage, clear cache, delete Log files, Time Machine local snapshots, old iOS backups, and the downloads folder, or simply restart your Mac.
Related Articles
- What is the Thinking Behind 32GB Windows Format Limit on FAT32?
- Rollback from Windows 11 to Windows 10 - 2 Methods
- What Is Difference between .BAT and .EXE files? [Full Information]
- What Is Pagefile.sys? Is It OK to Delete It?
Products
Articles & Tutorials
- Data Recovery
- Data Backup
- File Recovery
- File Backup
- System Backup and Restore
- Disk and Partition Clone
- Technical articles
- Mobile articles
- Disk Master Help
- Windows Data Recovery Tutorials
- Windows Secure Delete Tutorials
- Windows Partition Management Tutorials
- Windows File Backup and Restore Tutorials
- Windows System Backup and Restore Tutorials
- Windows Disk Backup and Restore Tutorials
- Windows Clone Tutorials