How to Migrate Windows 10 to an SSD without Data Loss
Quick Navigation:
- Step 1. Performing a Disk Clean up to ensure only Windows 10 system is transferred to SSD
- Step 2. Using QILING Disk Master to migrate Windows 10 to an SSD
- How to Transfer Windows 10 to SSD using QILING Disk Master
Migrating Windows 10 to a new SSD or larger SSD will boost your computer performance. However, if you do not know how to move your Windows 10 to an SSD, you should learn the steps first. Otherwise, you may face the possibility of data loss. This article tells you how to clean up useless data first, and then migrate Windows 10 to a new SSD with Qiling hard drive duplicator.
Migrating Windows 10 to an SSD involves transferring your OS and the partition related to the system completely from your hard disk drive (HDD), your smaller, or your Solid State Drive (SSD) to a newer one. This may be as a result of the fact your computer boots very slowly due to shortage in space of your present SSD or due to the use of an HDD, or you are thinking of changing your SSD of smaller size for another SSD or rather changing from HDD to SSD for the benefits of SSD over HDD as mentioned below:
- Faster access speed: SSD has a faster access speed as compared to HDD so people like programmers who deal a lot with huge amounts of data will find it easier to manage from an SSD rather than from an HDD.
- Durability and Reliability: SSD deals with flash memory for data storage whereas an HDD uses magnetism for writing information on a platter. This results in the fact that SSDs have a longer lifespan as they have no moveable parts hence less heat is produced by SSDs while HDDs produce a lot of heat which damages electronic parts over time. This can lead to future data problems with the HDDs hence SSDs are more reliable.
- Effect of magnetism: Magnetism does not affect SSDs as they do not rely on magnetism for data storage but in the case of the HDDs, the use of large magnets can cause data to be erased from them as their mechanism of writing data involves the use of magnets.
- Convenience: SSDs produce use less power and produce less noise which is convenient for working and lowers electric bill while HDDs produce much noise (usually the highest than other components) as they function with moveable parts and uses more power which can cause discomfort when working and increases electric bill which is not cost-effective.
Generally, the SSD is a better choice than an HDD in terms of reliable data storage. But as a result of the price per MB of data, the HDD is widely used as compared to the SSD because the HDD is relatively cheaper per MB of data than the SSD. Consequently, it is advised to use an SSD for running the Windows 10 and system-related information and using an HDD for other information storage so as to preserve Windows 10 and system-related settings in any case of a malfunction. For this reason, people who have their OS installed on their HDD tend to migrate Windows 10 to a new SSD or to a larger SSD for faster access speeds.
If you have been thinking of how to migrate Windows 10 to a new, larger, or another SSD due to any of the reasons above, this is a one-stop tutorial for you. This tutorial shows you how to migrate Windows 10 to another SDD without any data loss.
Step 1. Performing a Disk Clean up to ensure only Windows 10 system is transferred to SSD
Before migrating Windows 10 to another SSD, it is necessary to do a disk cleanup. A disk clean up involves the removal of temporary, cache, history, and backup files on your present local drives to keep Windows 10 free from junk files, fast and secure. This will prevent the risk of migrating useless information to a new SSD. In case you want to transfer Windows 10 to SSD with all your system settings, cache, the history you may skip this step as this step permits you to erase all. Here are the steps for how to perform a disk cleanup on Windows 10.
- 1. Type disk cleanup in the search box and select Disk Cleanup from the results.
- 2. Choose Clean up system files (In this case, the drive containing Windows 10).
- 3. Choose the file types you want to delete. To have a description of the file type, select it. And the choose OK to start migrate Win 10 to SSD.
After performing a cleanup, you are set to go to migrate Windows 10 to a larger, new, or another SSD. Migrating Windows 10 is more effective and easily done with the use of the software. Even when done manually; consuming energy and time, it still cannot work so using software is the only recommended method to go along with this. In this tutorial, we will use the professional software, QILING Disk Master to migrate Windows 10 to an SSD.
Step 2. Using QILING Disk Master to migrate Windows 10 to an SSD
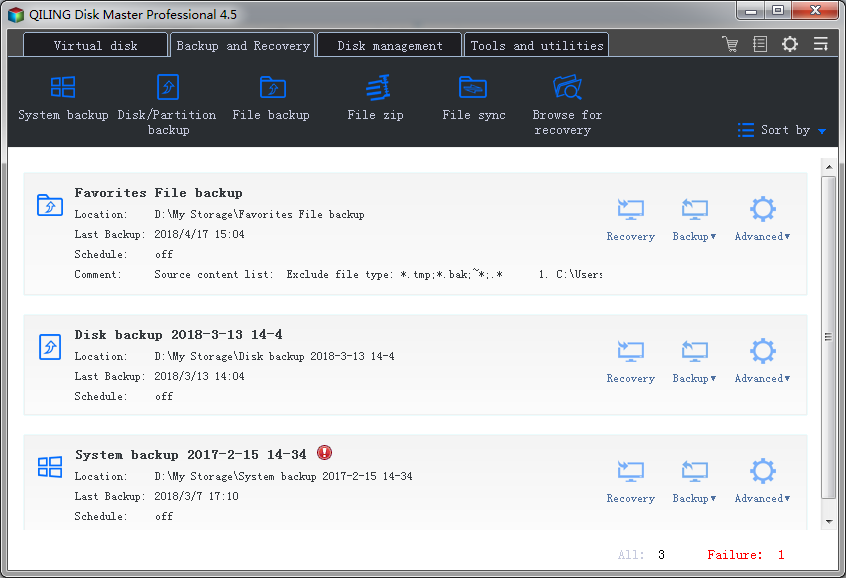
QILING Disk Master is the ideal software to use in order to migrate Windows 10 to an SSD because it saves time and energy as well as keeping your information safe, hence there is no possible way of losing information when using this software. It is a professional software designed for backups, data cloning, and migrating of files, folders, drives, and even more.
Best Software for Migrate windows 10 to SSD Without Data Loss
- Deduces the space occupancy for you.
- Can help for cloning and backing up files, folders, and drives.
- Permits users to customize data transferring, backing up, and cloning; up to scheduling of task.
- It supports a wide range of hard drives making backing up and cloning of data easier.
Note: It is advisable to clone Windows 10 before carrying out any migration of data or file transfer because incidents may happen during your file transfer and you won't want to lose any of your data. Also, some files will not be copied when transferring files so it is better to clone Windows 10 before carrying out a transfer of any nature.
QILING Disk Master can transfer all of Windows 10 including cache files, settings, history, etc but a disk clean-up is performed in order to avoid this.
How to Transfer Windows 10 to SSD using QILING Disk Master
1. In order to transfer Windows 10 to your SSD with the software, Please connect the SSD to your computer. If installed, it will show up in the file explorer as a drive;
2. Download then install QILING Disk Master on your computer. It is a very easy process and doesn't take time.
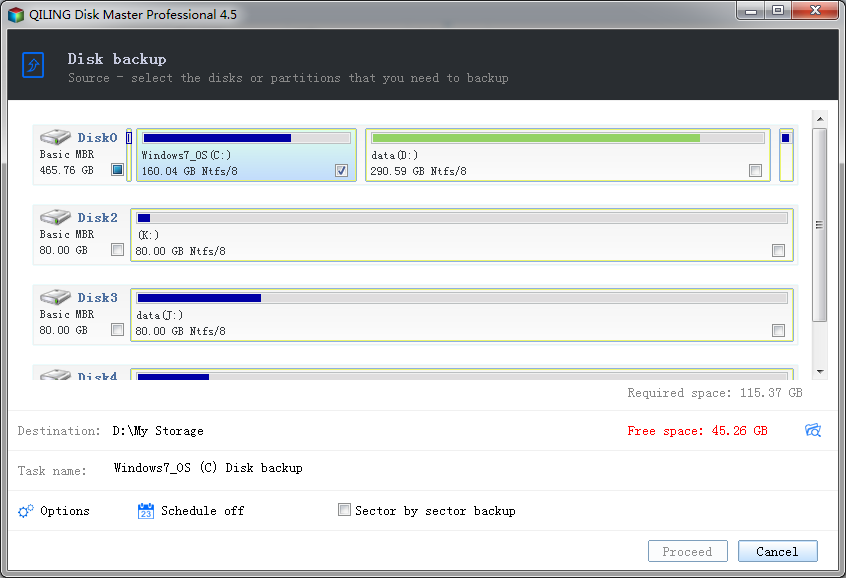
3. Launch the free disk cloning software for Windows 10 then in the window that appears, choose between Drive backup (if you want to include all the files in the drive) and system backup if you want to transfer the system only.
4. As the next window shows up, the path of the SDD should be the chosen location. Then name the backup file and click on "Proceed" in order to create a duplicate hard drive in Windows 10 or to transfer Windows 10 system to SSD (depending on whether you chose Drive backup or System backup respectively)
SWhen transferring files from Windows 10 to SSD, it is necessary to backup drives to SSD with the same software.
When you follow the steps above, transferring Windows 10 to SSD is nothing more than a piece of cake to any newbie, the reason why the use of this professional software is advised.
Transferring data is important to create backups or to facilitate computer/drive updates but using the right software is equally important because, with this, you are guaranteed an efficient and error-free data migration process.
Related Articles
- Two Ways to Backup Windows 10 to Network Drive
- How to Clone HDD to SSD in Windows 10
- 2 Ways for How to Backup Windows 10 to External Hard Drive
- 2 Ways for How to Recover Deleted Files from Avast Antivirus
The article help you how it is possible to bring vital data files back on the system without any virus. - How to Recover Deleted/Lost Files in Windows 10/8/7/XP
If you accidentally deleted or lost files in Windows, you can try the following way for how to recover deleted/lost files in Windows 10/8/7/XP. - How to Recover Deleted Photos from Camera 360 on iPhone/Computer/Android Phone
This article is a detailed guide for how to recover deleted photos from Camera 360 on iPhone, how to recover deleted photos from Camera 360 on Android phone and how to recover Camera 360 photos in computer. Check it out.