How to Transfer Photos from iPhone to Laptop in 5 Proven Ways
To download pictures from your iPhone to your laptop, connect your iPhone to your laptop using a USB cable. Open the Photos app on your iPhone, select the photos you want to transfer, and tap the "Share" icon. Select "Import Photos" and choose your laptop as the destination.
Transferring photos from iPhone to computer is a common task, whether it's to back up your iPhone photos or share them across devices. Fortunately, there are several ways to get it done, making it easy to transfer your photos from your iPhone to your laptop.
To help you download pictures from iPhone to laptop successfully, I will show you how to transfer photos from iPhone to laptop in FIVE different ways. Keep reading and carry out the way best suited to your needs.
Method 1. How to Transfer Photos from iPhone to Laptop with Reliable iPhone Transfer Software
Qiling MobiMover supports a wide range of file types, including photos, videos, music, ringtones, voice memos, contacts, messages, books, and more. This allows users to store and access various types of digital content on their device.
To transfer photos from iPhone to laptop in Windows 10, Windows 8, or Windows 7, use the iPhone transfer software, Qiling MobiMover, which allows you to transfer photos all at once or selectively and also enables you to transfer pictures back to your iOS device when necessary.
With this tool installed on your laptop, you will be able to download videos from various websites, making it a versatile and convenient solution for your online video needs.
- Access and view iDevice content from a computer
- Transfer files between an iPhone/iPad/iPod and a computer
- Transfer data from one iPhone/iPad/iPod to another
- Download videos from YouTube, Facebook, Twitter, and many other sites directly to your computer or iPhone/iPad/iPod with a simple video downloader.
Whether you want to transfer photos from your iPhone to your laptop or add music to your iPhone from your computer, this tool will help you achieve your goal.
To get pictures from iPhone to laptop:
Step 1. Connect your iPhone to your laptop via a USB cable and run Qiling MobiMover. On the main screen, select "Phone to PC" and click "Next" to proceed. Alternatively, go to "Content Management" > "Pictures" > "Photos" to transfer photos from iPhone to laptop individually.
Step 2. Select the "Pictures" category and transfer various files, including photos, videos, music, ringtones, contacts, messages, and more from your iPhone to your laptop, with the option to change the storage path for exported files or save them on the desktop by default.
Step 3. To transfer photos from your iPhone to your laptop, click the "Transfer" button, which will initiate the process at a fast speed. The time it takes to complete the transfer will depend on the size of the files, ranging from just a few seconds to a longer duration.
Method 2. How to Download Pictures from iPhone to Laptop (PC) via File Explorer
Supports: Photos and videos
While importing photos from iPhone to a computer via File Explorer in Windows 10 is convenient, it has its limitations.
Via File Explorer, you can only access photos and videos from your iPhone's internal storage, and only transfer photos from iPhone to laptop, not other types of content or add data from computer to mobile device.
If you only want to transfer iPhone photos to your computer, the most straightforward solution is to use File Explorer.
To get pictures off iPhone to laptop via File Explorer:
Step 1. Connect your iPhone to your laptop or PC with a USB cable.
Step 2. Unlock your device and trust the computer.
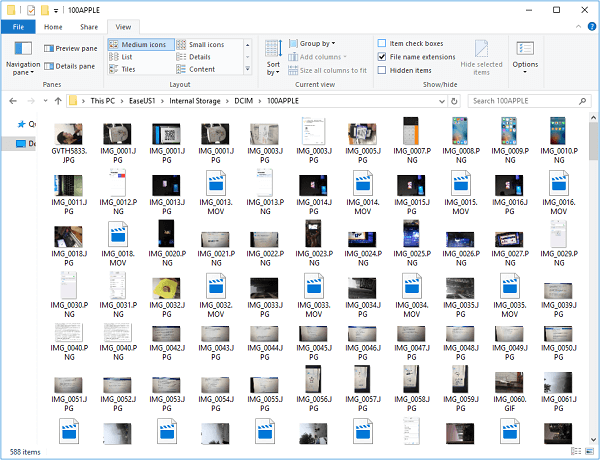
Step 3. To access your iPhone's camera roll on your computer, go to "This PC" and select your iPhone's name, then navigate to "Internal Storage" > "DCIM" > "100APPLE".
Step 4. Now you can see all the photos and videos from your iOS device. Manually copy and paste these items to your computer.
Method 3. How to Get Pictures Off iPhone to Laptop Using Photos
Supports: Photos and videos
To transfer photos from your iPhone to a laptop in Windows 10 or Windows 8, you can also use the built-in Photos app, which allows you to import photos from an external device, such as your iPhone, and manage them on your PC.
Similar to using File Explorer, Photos helps to download your iPhone photos and videos to your computer. If that's exactly what you want, follow the steps below to easily get your iPhone pictures to your laptop.
To copy photos from iPhone to laptop using Photos:
Step 1. Connect your iPhone or iPad to your PC with a USB cable.
Step 2.To unlock the iPhone, enter the passcode or press the home button to recognize the device on the computer. Then, click "Trust" on the iPhone to confirm the connection.
Step 3.Click the "Start" menu and launch "Photos".
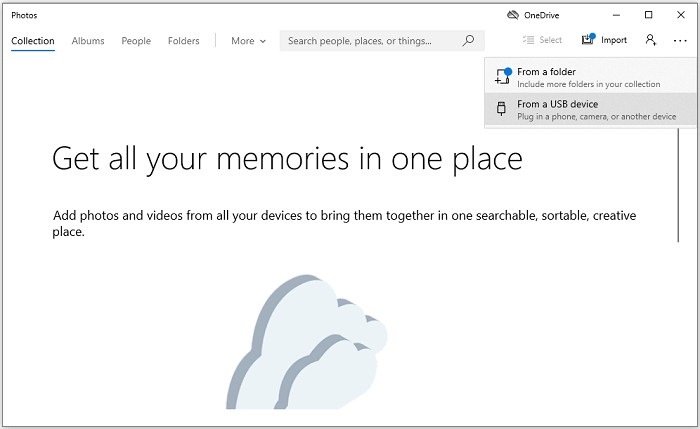
Step 5.To import photos from a USB device in the Photos app, click on "Import" in the top-right corner of the window and select "From a USB device".
Step 5.After you select the device, Photos will scan it and display the new photos and videos it found. You can then view, edit, or delete them as needed.
Step 6.To avoid transferring unwanted photos, uncheck the ones you don't want to import to your PC.
Step 7.To transfer photos from your iPhone to your Windows 10 PC, click the "Continue" button to start the process. This will initiate the transfer of your photos to your PC, allowing you to access and view them on your Windows 10 device.
Method 4. How to Transfer Photos from iPhone to Computer via iCloud
Supports: Photos, videos, contacts, and more
To download photos from iPhone to laptop, you can use iCloud as a wireless solution, allowing you to share photos, videos, contacts, and more across devices with the same Apple ID, including a PC.
If you have installed the iCloud control panel, iCloud could help you by automatically syncing your iPhone's contacts, calendar, reminders, and more with your computer. This means that if you add a new contact or calendar event on your iPhone, it will also be added on your computer, and vice versa.
Option 1. How to Upload Photos from iPhone to Laptop via iCloud.com
Step 1. To enable iCloud Photos on your iPhone, go to Settings, then tap on your name, followed by "iCloud", and finally "Photos", where you can toggle on "iCloud Photos" or "iCloud Photo Library".
Step 2. To access your iCloud account, open a web browser on your laptop or PC, then navigate to the iCloud website at iCloud.com.
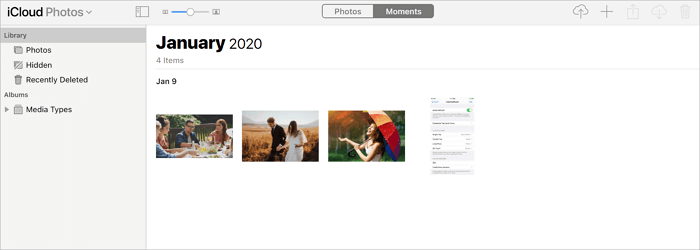
Step 3. Sign in with the Apple ID you use on your iOS device and select the "Photos" option.
Step 4. To save photos and videos from your computer to your Google account, select the items you want to copy, click the "Download" button, and then save them to your computer.
Option 2. How to Download Pictures from iPhone to Laptop via iCloud for Windows
Step 1. Enable "iCloud Photos" or "iCloud Photo Library" on your iPhone.
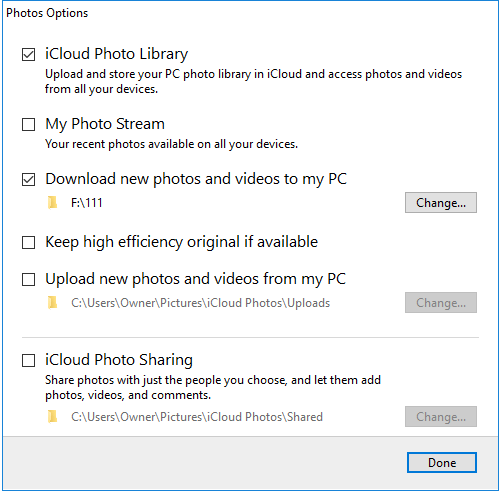
Step 2. To enable iCloud Photo Library on your laptop or PC, go to iCloud settings and click the "Options" button next to "Photos", then select "iCloud Photo Library".
Step 3. Go to Settings > [your name] > iCloud > iCloud Photo Library and toggle it on. Then, go to Settings > [your name] > iCloud > Photos and toggle on "Download new photos and videos to my PC".
Step 4. After syncing your iPhone with your computer, your iPhone photos will be displayed in the folder you designated to store the downloaded items.
Method 5. How to Download Pictures from iPhone to Laptop with Cloud Services
The supported file types vary depending on the service you use.
You can share photos between your iPhone and laptop using cloud-based services like iCloud, Dropbox, OneDrive, and Google Photo, in addition to iCloud.
To transfer photos from iPhone to laptop using Google Photos, you need to ensure you have enough cloud storage to save the files you are going to copy and use the same account on the devices. This service allows you to upload your iPhone photos to the cloud, and then access them on your laptop by logging in with the same Google account. This way, you can easily transfer your photos from your iPhone to your laptop using Google Photos.
To get pictures from iPhone to computer:
Step 1. Download the Google Photos app for iOS on your iPhone and sign in with your Google account to get started.
Step 2. Upload photos from your iPhone to the cloud storage.
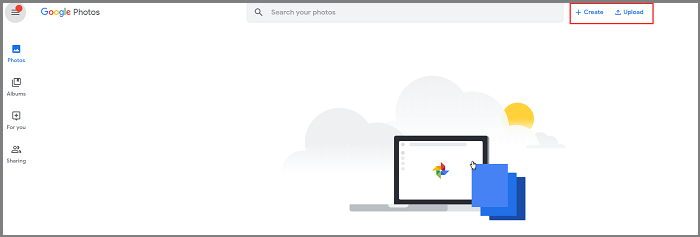
Step 3. Sign in to Google Photos on your computer with the same account used on your iPhone, and you will see the photos synced from your device.
Step 4. Select the photos you'd like to save, tap the "More" option in the top-right corner, and then choose "Download" to download iPhone photos to your laptop.
The Bottom Line
Some of the tips mentioned above, such as Qiling MobiMover, iCloud, and Google Photos, can also be used to transfer photos from iPhone to Mac or vice versa, or to transfer photos from a laptop to an iPhone. When using a USB connection, ensure the cable is functional, and when opting for a wireless solution, ensure a stable and reliable network is available.
Related Articles
- How to Transfer Data from One iPad to Another with/Without iCloud
- How to Transfer Photos from iPhone to SD Card With/Without Computer
- How to Download Music on iPhone With or Without iTunes
- How to Recover Hogwarts Legacy Lost Progress on PC/Steam/Xbox
If you've lost progress in Hogwarts Legacy on your PC, Steam, or Xbox, don't worry - there are practical solutions to recover it. Follow the steps provided and run Hogwarts Legacy progress recovery software to restore the missing game save in Windows 11/10/8/7. This will help you get back to where you left off and continue your magical journey.