Add A Second Drive to Windows Server [Full Guide 2022]
Adding a second hard drive to a PC can be beneficial for heavy users, increasing storage space and potentially reducing the need for additional PCs. Multiple drives can also enhance data security by making backups faster and easier, and can even improve PC performance by optimizing Windows Server performance. However, installing a second hard drive can be a bit challenging for some users, which is why this article aims to provide a comprehensive guide on how to easily add a second drive to Windows Server 2019/2016/2012 (r2)/2008 and other versions.
4 Parts to Add A Second Drive to Windows Server:
When purchasing a second hard drive or SSD, consider factors such as storage capacity, interface type (SATA, PCIe, or M.2), and compatibility with your computer's motherboard. Look for drives with high storage capacity, fast read and write speeds, and low power consumption.
2. How to Add Second Drive to Windows Server Computers
3. Initialize New Hard Drive in Windows Server
To optimize Windows Server performance, consider utilizing the second hard drive or solid-state drive (SSD) available on the system. This can be done by assigning a drive letter to the second drive and configuring it as a separate volume, which can then be used to store data, log files, or even the operating system itself. This approach can help distribute the workload and reduce the load on the primary drive, leading to improved overall system responsiveness and efficiency.
1. Tips to Purchase or Select a Second New Hard Drive/SSD
If you're adding a second hard drive to your Windows Server, consider whether you need a solid-state drive (SSD) or not. For a server, an SSD is ideal for storing the operating system, programs, and frequently accessed data, while a traditional hard drive is better suited for storing less frequently accessed data, such as video files or backups. Consider the size and speed of the drive, as well as any specific requirements for your server, such as RAID configurations or specific disk formats. Additionally, think about the power consumption and noise level of the drive, as these can impact the overall performance and efficiency of your server.
Purposes - Usage Purposes
To determine if you need a second hard drive, consider your PC usage: if you're a gamer, content editor, or have resource-intensive work, a second hard drive can be beneficial for storing non-essential files, freeing up space on your primary drive. If you're a normal PC user, you may not necessarily need one. Your specific needs should guide your decision.
Storage Capacity
Before buying a second hard drive, consider your storage needs, taking into account the size of your files and videos, and choosing a capacity that suits your requirements.
Price
When considering a hard drive, the cost is also a crucial factor. Hard drives come in various price ranges, making it difficult to decide which one is the best. To simplify the decision-making process, one can calculate the price-per-gigabyte by dividing the drive's price by its storage capacity, allowing for a more informed purchasing decision.
Disk size/weight
When adding a second hard drive to your PC, consider the size and weight of the hard drive to ensure it doesn't make your PC too heavy or cumbersome.
Read/write speed
Making your PC faster than a faster external hard drive is a better option, as it will also make read/write speed faster to copy files and paste them easily, with many faster models available in the market, often with higher RPMs than the standard 5,400 rpm.
2. How to Add Second Drive to Windows Server Computers
To add a second hard disk to your Windows PC, you need to physically install the drive inside your PC and then set it up from Windows so that the operating system can recognize and utilize it. This process involves two main steps, with the first being the physical installation of the drive and the second being the setup within Windows. To prepare for this, you will need to gather the necessary items, such as the second hard drive, a screwdriver, and any other required cables or adapters.
To add a second hard drive or SSD, you'll need an open drive bay, a second drive itself, a SATA data cable, a screwdriver, and an available SATA data connection on your motherboard, as well as a SATA power connector.
To add a second hard disk to your PC, start by shutting down your computer and unplugging the power cord. Next, locate the data and power cables for the existing hard drive and identify the corresponding ports on the motherboard.
Step 1.First, close your PC and unplug it to avoid getting any discharging static. Next, open up the case using a screwdriver.
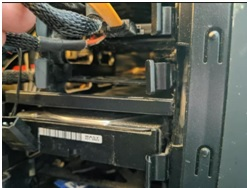
Step 2.Look for an open drive bay.
Step 3.To upgrade your storage, first, remove the drive caddy from the laptop. Next, insert your second hard drive into the drive caddy.
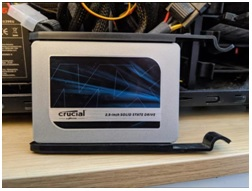
Step 4.You need to put the caddy again into the drive bay.
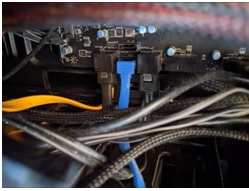
Step 5.To connect a SATA hard drive to your computer, you'll need to locate a free SATA data cable port on the motherboard and plug in a SATA data cable. This will allow you to connect the hard drive to your computer's motherboard, enabling data transfer and operation.
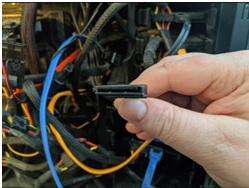
Step 6.Then get the free SATA power connector and plug it into your new SSD.
Step 7.Check if all the plugs are placed correctly or not, then close up the PC case and turn on your PC.
To add a second hard drive to your PC, you'll need to set it up in Windows for the operating system to recognize it. This involves connecting the new drive to your computer and configuring it within the Windows settings. Once done, the OS will be able to identify and utilize the additional storage space, allowing you to expand your PC's storage capacity.
3. Initialize New Hard Drive in Windows Server
After installing a second hard drive to your PC, it may not show up in your system immediately. To access it, you need to add a drive letter or initialize it, which can erase all data on the disk.
Here are all the steps of Initializing a new disk using Disk Management.
- To access Disk Management in Windows, click on the Windows button, then type "Disk Management" in the search box, and select the result from the search list. (Note: This is a shortened version of the original text)
- When the window opens up, choose Run as administrator and click on YES.
- Locate the disk you wish to initialize, then right-click on it and select "Initialize Disk".
- To initialize the disk, go to the Disk Management utility, right-click on the disk you want to initialize, and select 'Initialize Disk'. A dialog box will appear; click 'OK' to confirm. This will prepare the disk for use.
- After that, right-To create a new partition, click on the unallocated space in the drive and then choose New Simple Volume from the context menu.
- To resize the volume, click on the "Extend" button and then select the size of the volume you want to resize to. You can choose from a variety of sizes, such as 128GB, 256GB, 512GB, or 1TB.
- You can name the drive and again click on next.
- Then simply follow the window's instructions and finish it.
4. Make Use of the Second Hard Drive or SSD on Windows Server
There are many options to choose from when adding a second hard drive to your PC, but Qiling Partition Master Server Edition is a great and all-in-one solution to manage the second hard drive with ease, allowing you to make more storage and make your PC faster.
Qiling Partition Master Enterprise
Your trustworthy Windows Server disk manager.
- Extend System drive, combine/split partitions.
- Clone disk, migrate OS to HDD/SSD.
- Convert MBR to GPT, GPT to MBR, no data loss.
- 1-click adjust disk layout, create volumes at one time.
Option 1.Partitioning a new hard drive allows you to relocate free space and extend the system drive, helping to avoid low disk space issues.
Option 2.You can migrate your Windows Server system to a new drive without reinstalling the OS using Qiling Partition Master. This tool allows you to easily expand system partitions, making your Windows Server system's performance faster without the need for a full OS reinstallation.
Note:When migrating an OS to a new SSD or HDD, be aware that the process will erase all existing partitions and data on the target disk if there's not enough unallocated space available. This means any important data on the target disk will be lost. To avoid losing valuable information, it's essential to back up any important files to an external hard drive before proceeding with the migration.
Step 1. Select "System Clone" from the tool page.
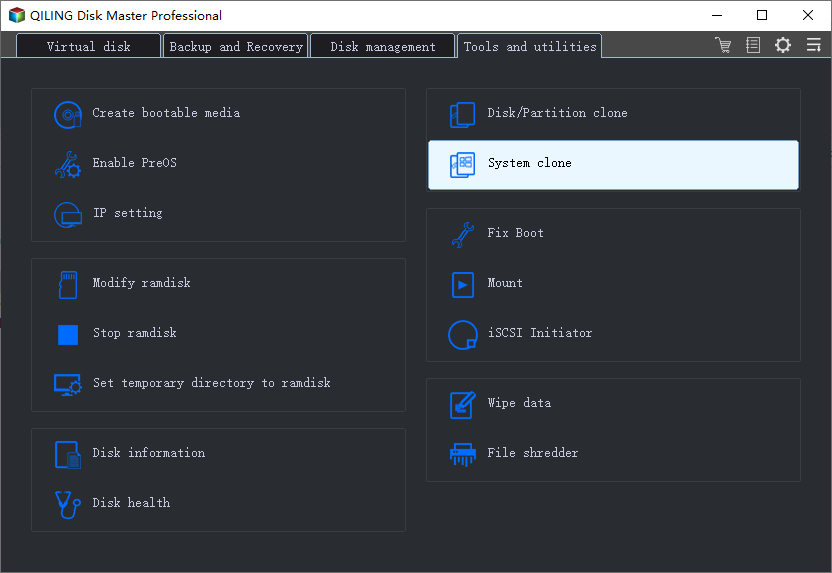
The system partition will be selected automatically, and then click "Next".
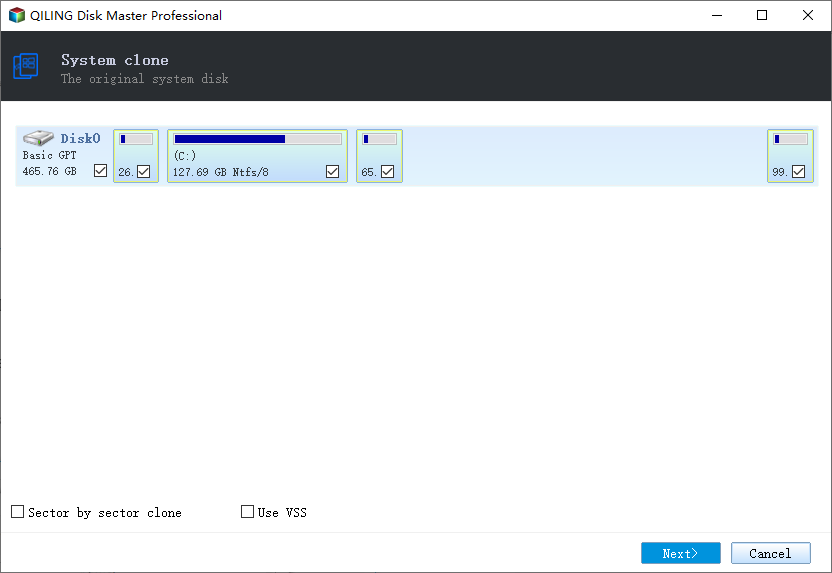
Step 2.Select the SSD or HDD as the destination disk and click "Next" to proceed.

Step 3. Click "Continue" after check warning message. The data and partitions on the target disk will be deleted. Make sure that you've backed up important data in advance. If not, do it now.

Step 4. Preview the target disk layout, customize it if needed, and then click "Proceed" to start migrating the OS to the new disk.
Conclusion
Windows Server users can easily add a second or third hard drive to their PC using this full guide, and Qiling Partition Master makes it even simpler. This software not only partitions hard drives but also migrates Server systems, allowing users to extend the system drive, merge partitions, and convert a disk to MBR or GPT without losing any data, making it a versatile tool for disk management tasks.
Related Articles
- How to Fix Virtual Disk Manager the System Cannot Find the File Specified in Windows 10/8/7
- Windows 10 File Transfer Stuck at 99%? Fixes Are Here!
- Windows 11/10 Media Creation Tool: How to Download and How to Use (a Complete Guide)
- How to Wipe a Hard Drive in Windows XP Without CD
- Freeware: Reformat Hard Drive to FAT32 from NTFS or exFAT
If you need to reformat a hard drive from NTFS to FAT32 or exFAT, you can use various tools such as Disk Management, Diskpart, or a free partition manager to complete the task. - 5 Free Ways to Remove Write Protection from USB/Pen Drive
This tutorial will guide you through the process of removing write protection from a USB/Pen drive in Windows 11, 10, 8, 7, providing a step-by-step solution to restore write functionality to your device.