Free HDD-to-SSD Cloning Software: Choose and Migrate Safely
An HDD-to-SSD upgrade can keep Windows and applications, but 'free download' does not always mean the system-clone operation is free. Check current license terms, the SSD's capacity, and whether you need a system-only or full-disk copy before starting.
Select the Right Clone Scope
A system clone moves Windows plus its boot partitions and is suitable when the old disk has separate data partitions you will handle another way. A whole-disk clone copies the selected disk layout, including data partitions. File Explorer copy-and-paste cannot reproduce a bootable Windows installation.
Compare free and trial editions against your exact task. Clonezilla is an open-source offline option but requires careful device selection. Some SSD makers offer a tool limited to eligible destination models. Qiling's available clone functions depend on the installed edition and license; verify the current product page before promising a no-cost system migration. Avoid modified installers or license keys from unrelated download sites.
Prepare the HDD and SSD
Back up important files independently of the clone. Save the BitLocker or Device Encryption recovery key, if enabled. Check the HDD for read errors; an unstable source should have priority files copied before a long clone. In Disk Management identify both disks by model and capacity, not just drive letter.
Make sure the SSD fits the computer's SATA or M.2 interface and has enough real capacity for the selected partitions. A smaller target can work only when the data and layout fit and the tool supports resizing. The destination will be overwritten, so move anything you need off it first.
Clone Windows with Qiling System Clone
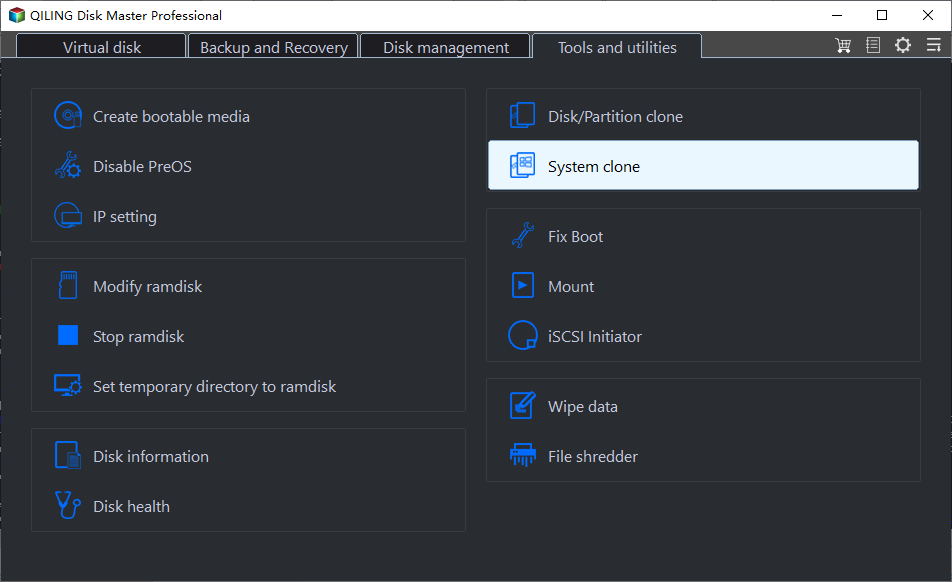
Step 1. Connect the SSD through a compatible internal slot or enclosure. Open Qiling Disk Master and select Tools and utilities > System clone.
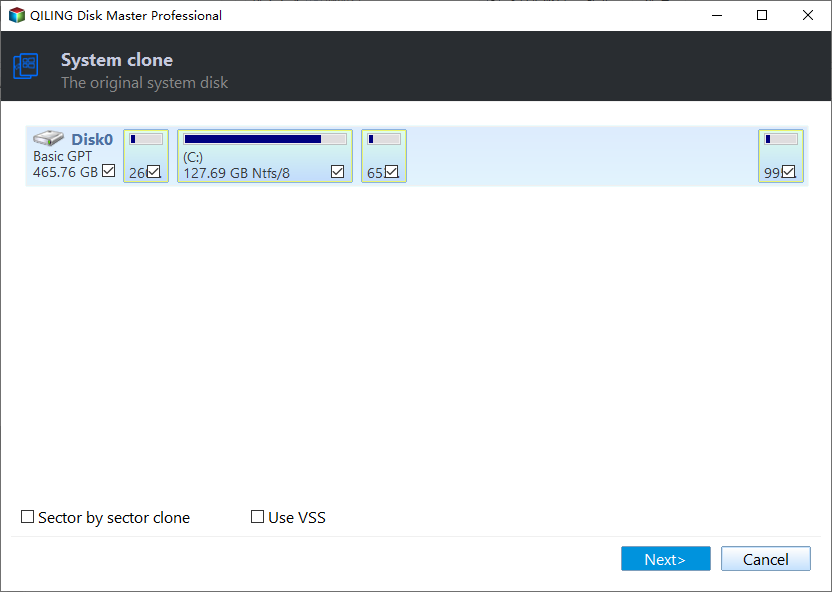
Step 2. Review the Windows source disk and boot partitions that Qiling selected. Confirm that it is the installation you intend to migrate, then click Next.
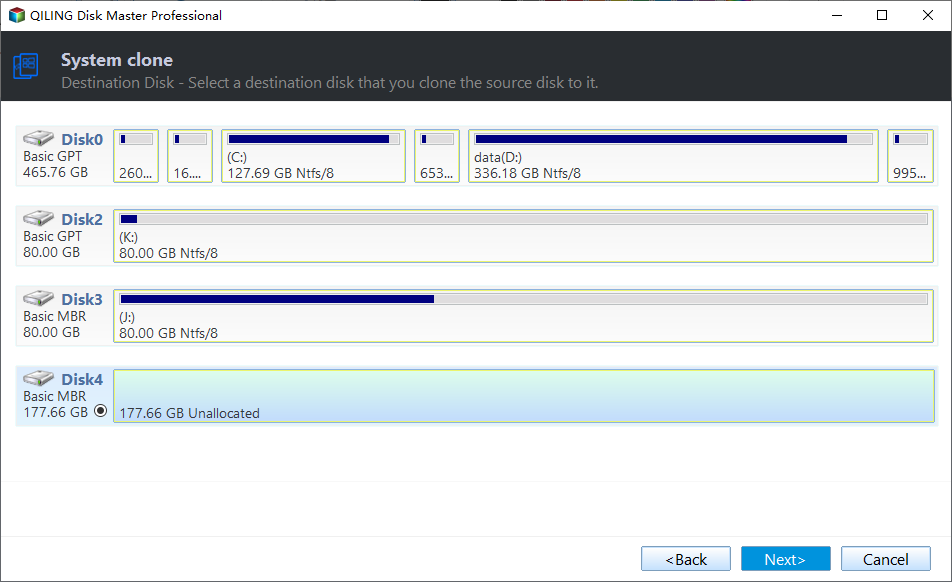
Step 3. Choose the SSD as destination by model and capacity. Recheck that it contains no files you need, then click Next.
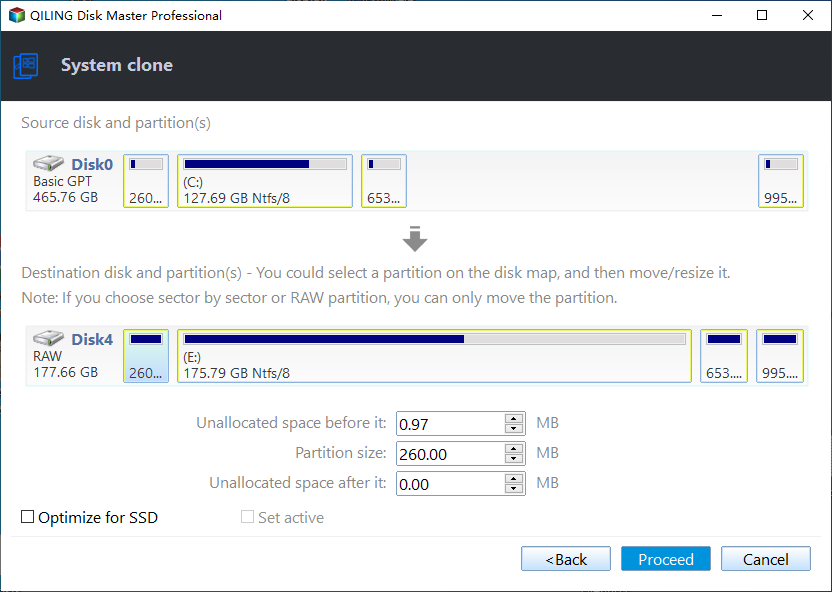
Step 4. Review the layout, use Optimize for SSD when appropriate, click Proceed, confirm the overwrite warning, and wait for a successful result. Do not disconnect either disk during the task.
Boot and Check the New SSD
Shut down and install the SSD internally. Disconnect the old HDD for the first test where practical, or explicitly select the new SSD's Windows Boot Manager. Restart more than once, open several files and applications, and check activation and encryption status. If the SSD is larger, inspect its unallocated space in Disk Management before extending C:.
Only after the new drive works and a separate backup exists should you repurpose the old HDD. A clone is a migration copy, not a versioned backup that protects against later deletion or corruption.
Conclusion
Choose a tool by its actual license and clone scope, protect data before overwriting the SSD, and treat an independent first boot as part of the migration.
Related Articles
- Free SSD Clone Software for Windows
Compare edition limits and system-clone requirements. - Transfer Preinstalled Windows to SSD
Check boot partitions and first-boot results.
Products
Articles & Tutorials
- Data Recovery
- Data Backup
- File Recovery
- File Backup
- System Backup and Restore
- Disk and Partition Clone
- Technical articles
- Mobile articles
- Disk Master Help
- Windows Data Recovery Tutorials
- Windows Secure Delete Tutorials
- Windows Partition Management Tutorials
- Windows File Backup and Restore Tutorials
- Windows System Backup and Restore Tutorials
- Windows Disk Backup and Restore Tutorials
- Windows Clone Tutorials