How to Fix High Memory Usage in Windows 11
Upgrading to Windows 11 can bring some surprises, but some users may encounter the issue of high memory usage. To keep your computer healthy, we've identified 8 methods to fix high memory usage in Windows 11, which can help you resolve this problem and enjoy a smoother computing experience.
Quick Navigation:
1. End Unnecessary Apps or Programs
2. Disable Startup Apps
3. Defragment Hard Drive
4. Disable SysMain Service
5. Adjust for Best Performance
6. Increase Virtual Memory
7. Set Your Registry
8. Scan Virus
Reasons for High Memory Usage In Windows 11
Memory, like RAM, is used to temporarily store data and instructions. In fact, all computer programs are run from Memory, making it a crucial component of a computer's functioning.
- Unnecessary Apps or Programs
- Enabled a lot of programs running at the Startup.
- Virtual memory is not enough.
- Virus infection.
- More......
Windows 11 users may encounter memory usage issues, which can be resolved by trying various approaches. To fix this problem, you may need to try each of the 8 fixes available in Windows 11, which can help alleviate memory usage issues.
1. End Unnecessary Apps or Programs
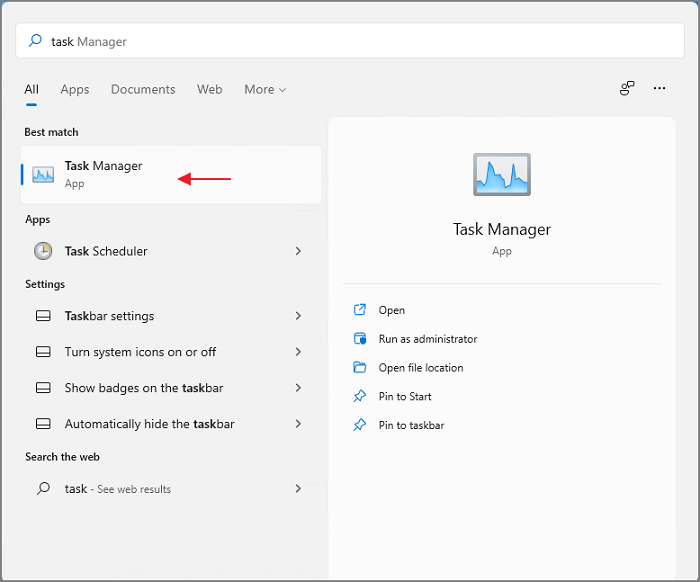
Step 1.To open Task Manager, press the Search icon in the middle of the taskbar, type "Task Manager", and click the best match to start.
Step 2.In the Task Manager, click the Processestab.
You can view the apps and programs running below, and in the Memory column, see the memory consumption.
Step 3.To stop a program running in the background, right-click on it and select End Task from the menu that appears.
You can delete an app that you don't need at that moment or the one that takes up too much memory on your device.

2. Disable Startup Apps
Some programs automatically start when you turn on your computer, which can be convenient but also consume a lot of memory. If you find that your startup is too high, you can manage the programs running at startup by going to the Startup tab and disabling the apps that are not necessary.
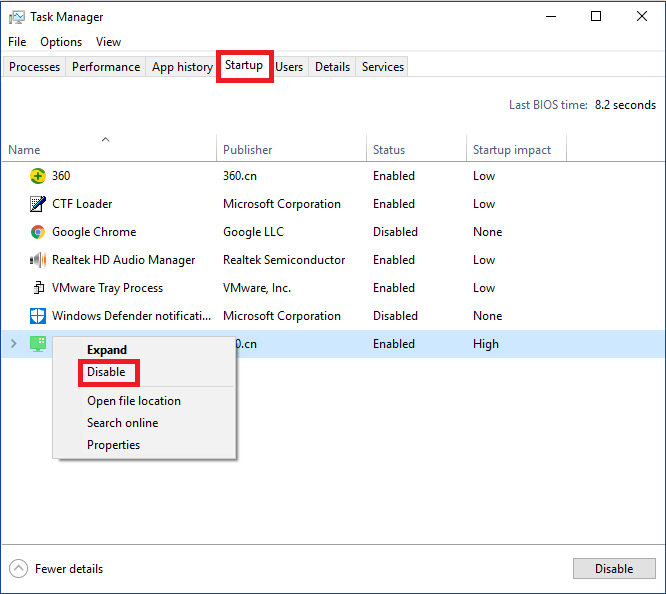
Step 1.To open the Task Manager, click the Search icon and type in "Task Manager".
Step 2.Go to the Startuptab.
You can see a bunch of apps that running at the startup.
Step 3.Right-click the app and click Disable.
3. Defragment Hard Drive
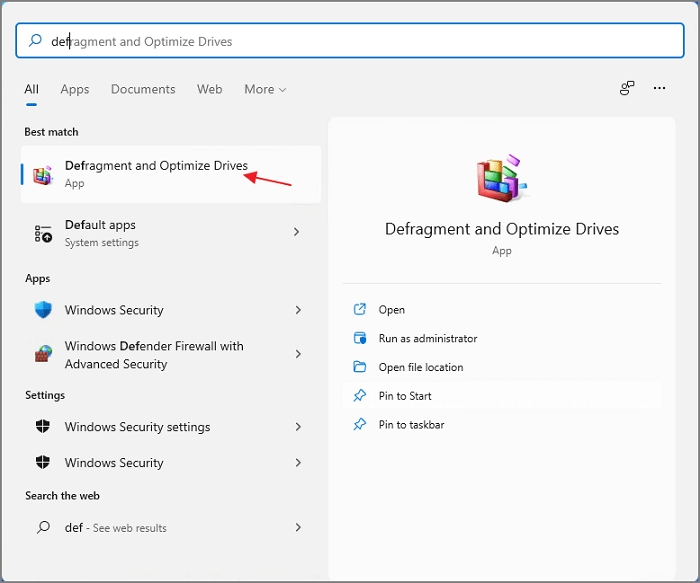
Step 1.To start the disk defragmentation process, open the Start menu by clicking the search icon and searching for "Defragment and Optimize Drives". Click on the best match result to initiate the process.
Step 2.You can see the drive here. Click on the drive you want to defragment, then click the Optimize option.
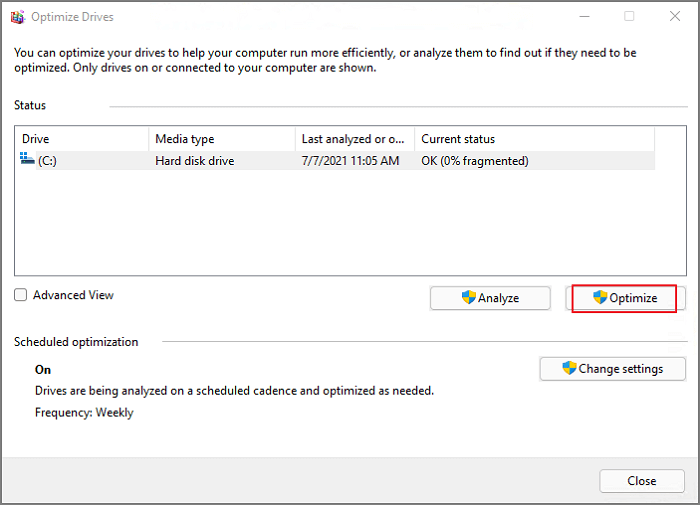
Step 3.Wait for the defragment is finish.
Step 4.If your computer's memory usage is high, try restarting it. This simple step can provide a relief from the memory usage issue.
4. Disable SysMain Service
If you're experiencing performance issues, it's okay to disable the SysMain service, which helps launch frequently used apps more quickly, but may be causing the problems you're experiencing.
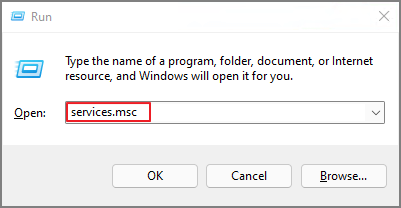
Step 1.Press Windows + R to open the Run window, input services.msc in the box, and click OK to open the Services window.
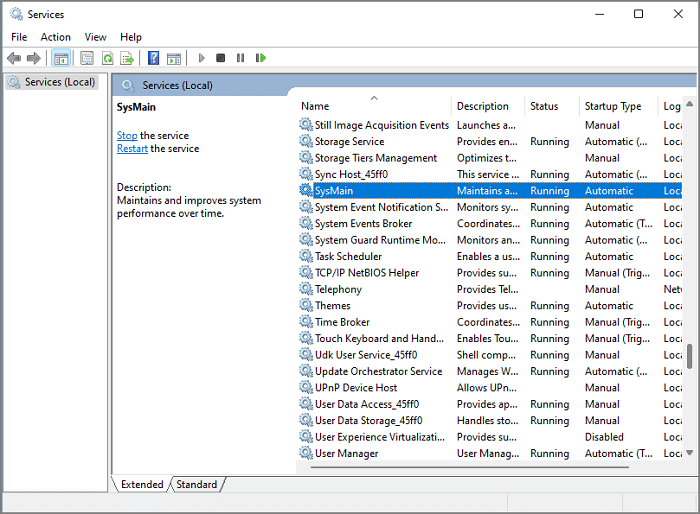
Step 2.Scroll down to find the SysMain service.
Step 3.Right-click SysMain Service and select Propertiesfrom the context menu.
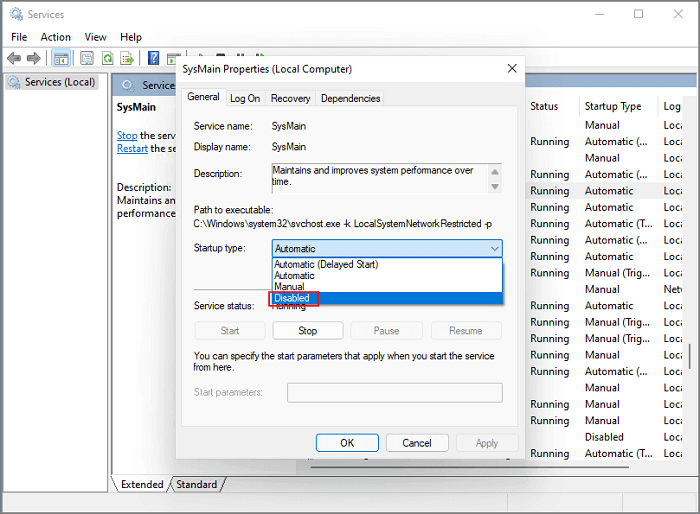
Step 4.To disable the SysMain service, navigate to the SysMain Properties page, select Startup Type, and choose Disabled from the drop-down menu.
Step 5.Move to Service status and click the Stop button.
Wait for the disable process to complete and click OK.
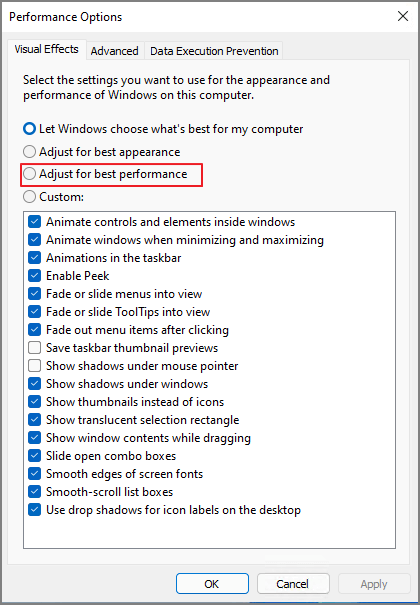
5. Adjust for Best Performance
Changing the system performance setting can also help resolve high memory usage issues by optimizing how the system uses its resources.
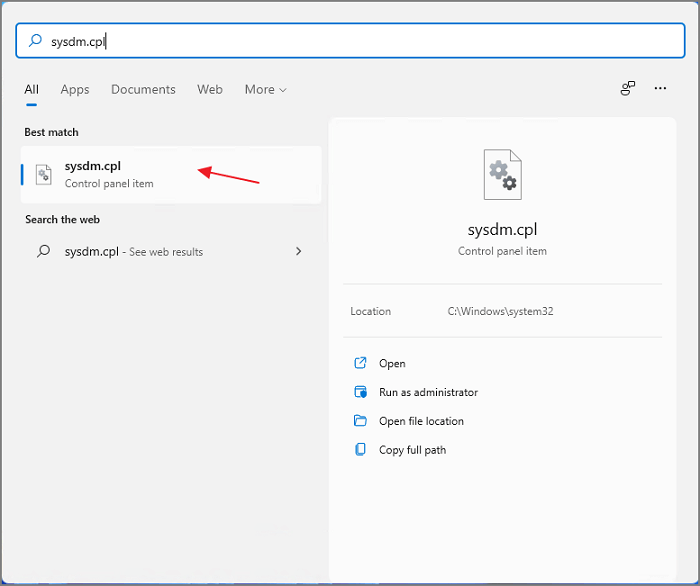
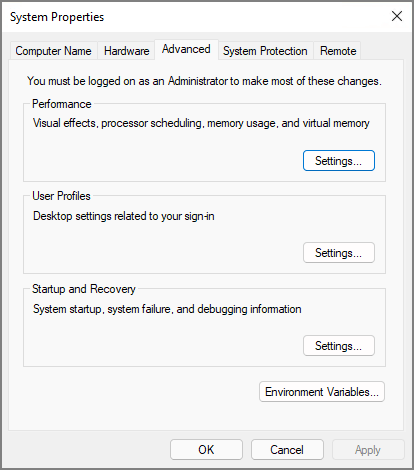
Step 1.You can open the System Properties window by searching for "sysdm.cpl" in the Start menu. Just click on the best match result that appears. This will open the System Properties window, where you can access various system settings and configure your computer's properties.
Step 2.You can see the System Properties window here.
Step 3. Click on the Advanced tab and click the Settings button under the Performance.
Step 4.To optimize the performance of your computer, go to the Performance Options windows and select the "Adjust for best performance" option.
6. Increase Virtual Memory
Step 1.To access the System Properties window, start by launching the Start Menu and typing sysdm.cpl. Once you've entered this command, click on the result to proceed.
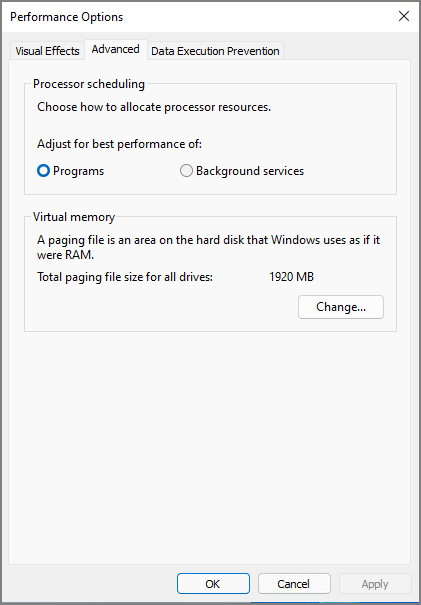
Step 2.When System Properties appear, go to the Advanced tab and click Settings under Performance.
Step 3.In the Performance Options window, click the Advanced tab, navigate to Virtual memory, and click the Change button.
Step 4.To adjust the paging file size, go to the Performance Options, select the "Automatically manage paging file size for all drives" checkbox, choose the C drive (system partition), uncheck the "No paging file" box, and then click the "Set" button.
Step 5.Click Yes to confirm.
Step 6.Select another volume from the drive list, tick the Custom size, enter a value for Initial size and Maximum size, click on Set, and then click on OK.
Step 7.Restart your computer.
7. Set Your Registry
Step 1.To open the Registry Editor, press Windows + R to open the Run window, then type Regedit and press Enter.
Step 2.Navigate to: Computer\HKEY_LOCAL_MACHINE\SYSTEM\CurrentControlSet\Control\Session Manager\Memory Management
Step 3.Locate and double-click the ClearPageFileAtShutDown.
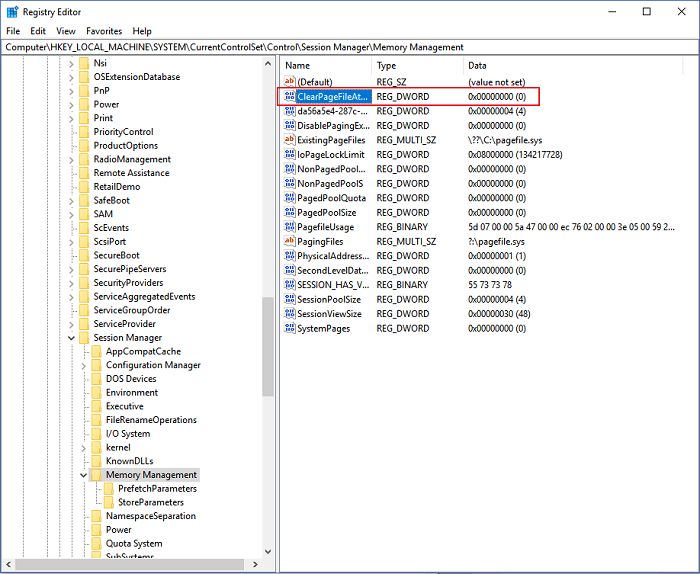
Step 4.Enter 1 on the Value data and click OK.
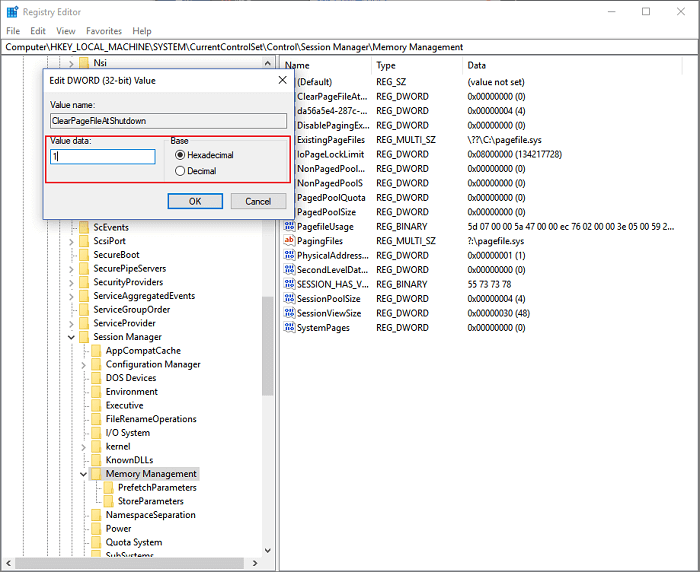
Step 5.Restart your computer.
8. Scan Virus
The high memory usage may be caused by a virus issue.
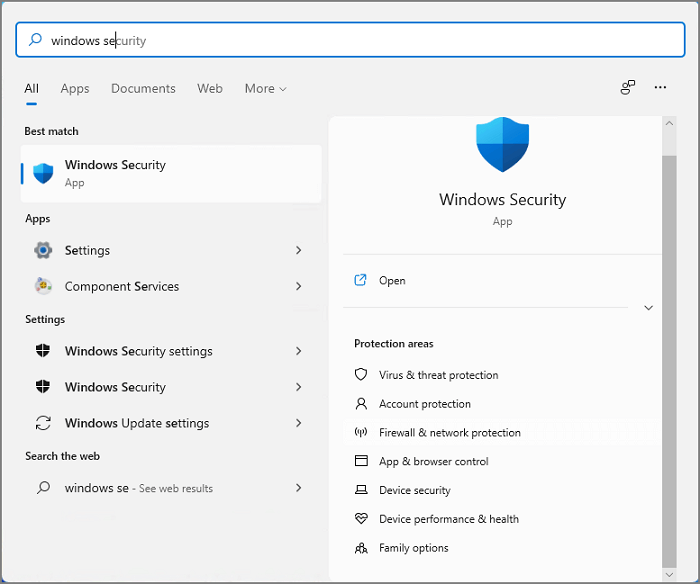
Step 1.To access Windows Security, go to the Start Menu, click on the best match to open the program.
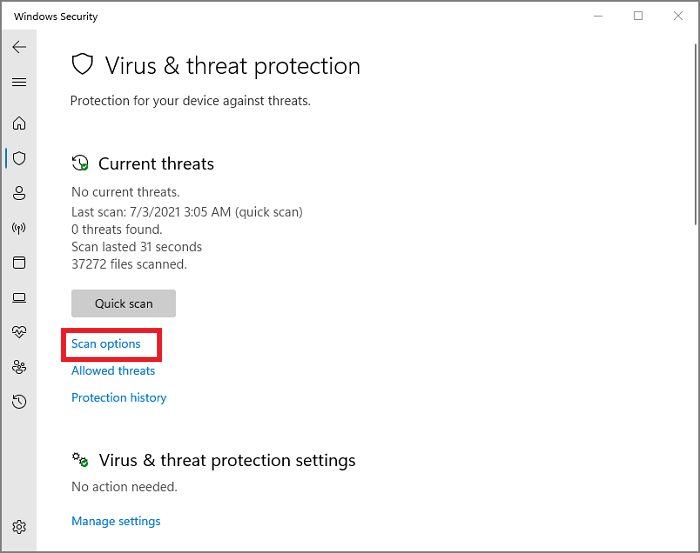
Step 2.Click Virus & threat protection.
You can click the Quick Scan here.
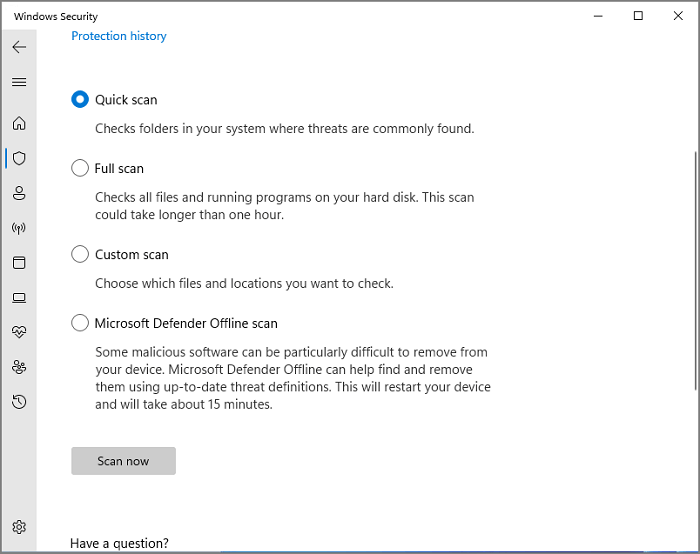
If the issue persists, we recommend performing a full system scan to identify and remove any potential viruses. This will help determine if the problem is caused by malware.
Step 1.Click Scan options.
Step 2.Tick the Full scan and click Scan now button.
Related Articles
- Reset This PC Not Working on Windows 11 (4 Fixes)
- One PC Plays as Two: How to Dual Boot Windows 11 with Windows 10 Together
- Windows 11 Is Not Activated: How to Activate Windows 11 OS for Free
- Windows 11 Must Read | All You Should Know about Windows 11
- My Laptop is Showing Only C Drive Not Other Drives
Why is my laptop showing only C drive not other drives? How do I get the missing partitions back? If you are facing such problems on your Windows laptop, read this post, and we will show you the solution to this troublesome issue. - M.2 SSD Shows Empty on the New PC, but Definitely Not
Have you ever encountered this 'M.2 SSD shows empty on the new PC, but definitely not' problem? Let me explain why this issue will happen and how to resolve it easily.