Here's What to Do With Unallocated Space on SSD After Cloning
How to Use Unallocated Space After Cloning to A Larger HDD/SSD
If you have unallocated space right behind the cloned partition, then use Disk Management.
- 1. Right-click the nearest partition that next to the unallocated space.
- 2. To extend the volume, select the "Extend Volume" option and drag the arrow to the end of the box in the pop-up window.
About the Unallocated Space After Cloning
The unallocated space on the target disk after cloning is likely due to the Qiling software not properly resizing the partition to fit the larger destination disk. This can happen if the source disk has a smaller partition size than the target disk, and the software doesn't automatically resize the partition to fill the remaining space. To resolve this, you may need to manually resize the partition using the Qiling software's built-in tools or a separate partition manager. Alternatively, you can try re-cloning the disk using a different cloning software that supports automatic partition resizing.
Cloning issues, such as unallocated space, can occur when using disk cloning software. This unwanted empty space can be frustrating, and users may be unsure where it came from or how to remove it. The unallocated space can seem useless, but it can potentially cause problems with disk performance and storage capacity. To resolve the issue, users may need to reclone the disk, check for errors, or use disk management tools to reclaim the space.
The unallocated space on a hard disk is not useless, but rather a part of the disk that can be utilized. It often arises from cloning a hard disk or partition using a sector-by-sector clone function, such as Qiling Backup's disk clone feature, which replicates system files, partition tables, and even bad sectors. This results in an exact copy of the original drive, but also includes unallocated space.
How to Make Use of the Unallocated Space on SSD After Cloning
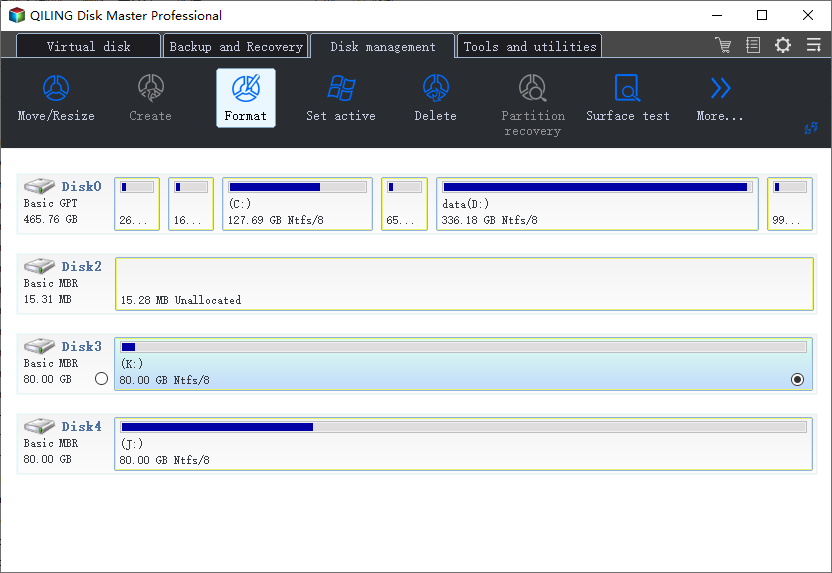
Converting unallocated space to a storage drive partition can save you trouble and utilize every byte on your cloned hard disk. This can be easily achieved using software like Qiling Partition Master, which is ideal for cloning systems to HDD/SSD, upgrading from small to large hard drives, or from old to new. The software also allows you to edit the unallocated space by merging it with the neighboring partition directly.
Nevertheless, no matter how you cloned the drive in the previous step, as long as you are currently confronted with the unallocated space issue, you can still ask help from Qiling Partition Master. First, download the free partition manager on your PC, and go through the following two options to deal with the current issue.
Option 1. Create a Partition on Unallocated Space
Step 1. Launch Qiling Partition Master, click on the unallocated space on your hard drive or external storage device, and select "Create" from the main window.
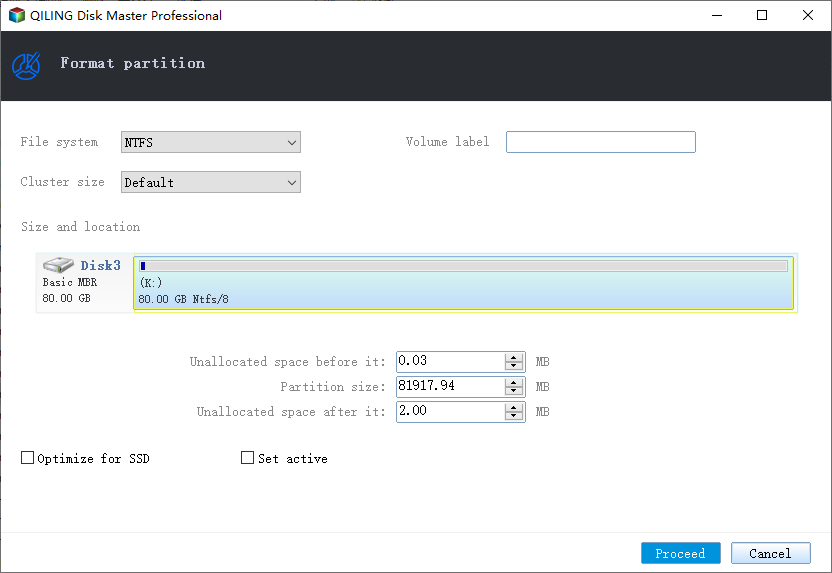
Step 2. To create a new partition, adjust the partition size, file system (selecting a suitable file system based on your needs), and label as desired, then click "OK" to finalize the new partition.
Watch the video tutorial to learn how to create a partition in various file systems, including NTFS, FAT, and EXT.
Option 2. Add Unallocated Space to An Existing Partition
To extend the existing partition next to the unallocated space, right-click on the unallocated space in the Disk Management window and select "Extend Volume". In the "Extend Volume" window, select the partition you want to extend and choose the amount of space you want to add. Confirm the changes and click "Finish" to complete the process.
Step 1. Click the partition that is next to the unallocated space, select "Resize/Move".
Step 2. To move the unallocated space, place the mouse cursor on the partition and drag it to the left or right. This will adjust the size of the unallocated space accordingly.
To move the unallocated space to the desired location, repeat Step 1 and 2 to move the unallocated space to the desired location.
Step 3. Click "Proceed", and it will execute the operations to add the unallocated space into the target partition eventually. This will add the unallocated space to the target partition, making it larger.
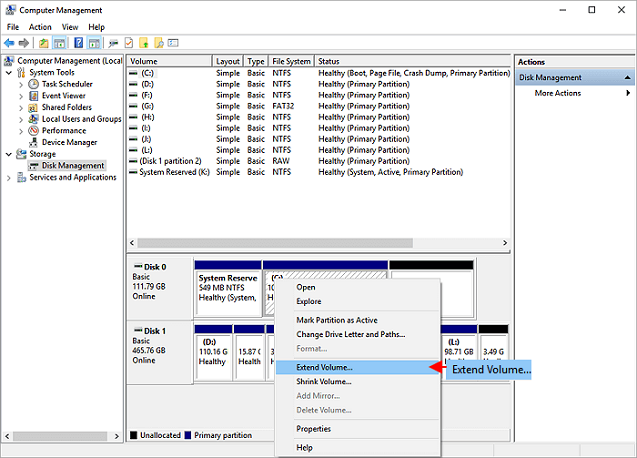
Option 3. Add Unallocated Space to An Existing Partition with Disk Management
Step 1. To access Disk Management, right-click on "This PC" or "My Computer" and select "Manage". Then, click on "Device Manager" and select "Disk Management" from the options.
Step 2. Right-click on the target partition and select "Extend Volume".
Step 3. To extend the target partition, click "Next" to add the unallocated space, then click "Next" and "Finish" to complete the process.
To create a new simple volume with the unused space, right-click the unallocated space and select "New Simple Volume". Follow the wizard to complete the process.
Related Articles
- How to Format Laptop or PC Windows 7 Without CD (Full Guides)
- What is Dynamic Foreign Disk, How to Import Foreign Disk Without Data Loss
- Fix 'System C Drive Full' Error in Windows Server 2019/2016/2012
- Windows 11/10 Media Creation Tool: How to Download and How to Use (a Complete Guide)
- How to Remove OEM Partition in Windows 10, 8, 7?
You can remove OEM partition on Dell or Lenovo with the help of diskpart or Qiling Disk Master if you don't need it any more. - 5 Free Ways to Remove Write Protection from USB/Pen Drive
This tutorial will guide you through the process of removing write protection from a USB/Pen drive in Windows 11, 10, 8, 7, providing a step-by-step solution to restore write functionality to your device.