How to Use the D: Drive in Windows 10
D: is only a drive letter. On one PC it may be a separate internal SSD, on another a partition of the same disk, an optical drive, or a manufacturer recovery volume. Identify it before saving files or changing partitions.
Identify What D: Actually Is
Open File Explorer > This PC to see D:'s label, total size, and free space. Then open Disk Management from the Start menu and note which physical disk contains D:. Do not write to a small recovery or OEM partition just because it has a drive letter. If D: is an optical drive or a removable USB device, it may not be suitable for regular storage.
A separate D: partition on the same physical disk does not protect files if that disk fails. Keep an external or cloud backup of irreplaceable data. If D: is a second physical SSD or HDD, it can help separate workloads, but it still needs its own backup.
Save New Files and Apps to D:
Step 1. Create a folder such as D:\Documents or D:\Games if D: is a normal writable data volume. Copy a small test file there and reopen it.
Step 2. In Settings > System > Storage > Advanced storage settings > Where new content is saved, choose D: for supported new documents, pictures, or apps. Existing files do not move automatically.
Step 3. For a personal Windows folder such as Documents, right-click the folder under your user profile, open Properties > Location, and use Move to select a new folder on D:. Let Windows transfer contents. Do not redirect the entire C:\Users tree by dragging it.
Step 4. In a game launcher, create a D: library and use its supported move function. Check that the game starts before deleting the old copy. Conventional desktop apps may require reinstalling to a new location; moving only their folders can break them.
Create D: Only from Safe Unallocated Space
If no D: data volume exists, first check whether the disk already has unallocated space. Back up important data and keep recovery partitions untouched. If there is no unallocated space, do not delete an unknown partition; you would first need a separately planned resize of a suitable data partition.
Step 1. In Qiling Disk Master's Disk management view, select the intended unallocated area and choose Create. Verify the disk number and capacity.
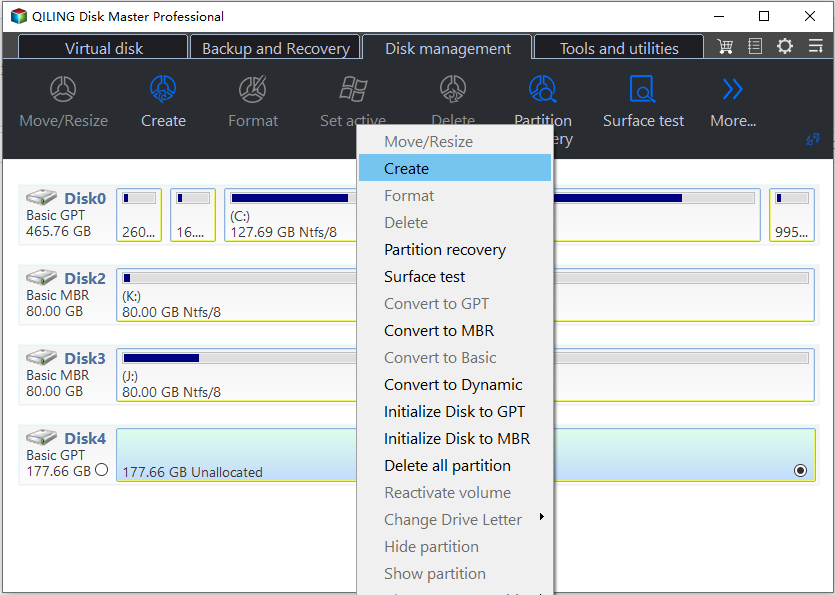
Step 2. Set a useful size, NTFS file system, and a descriptive label. Choose the desired drive letter if the interface offers it; if D: is unavailable, Windows can assign another letter.
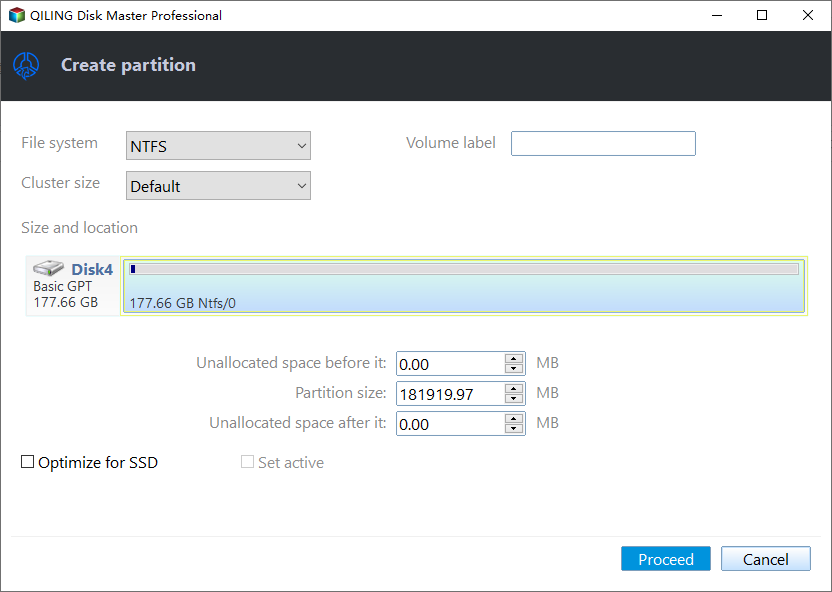
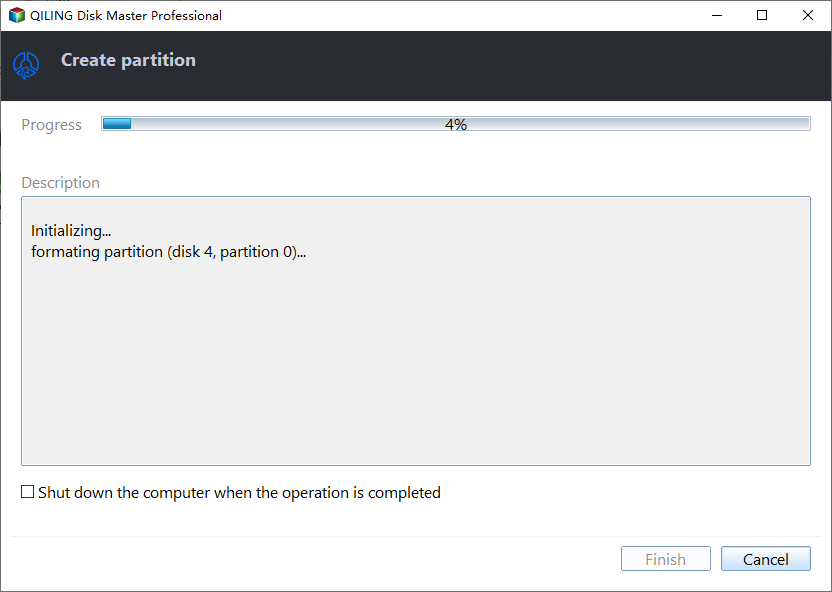
Step 3. Click Proceed and wait for completion. In Disk Management or File Explorer, confirm the new volume is accessible and still belongs to the intended physical disk.
Common D: Problems
If D: is missing, it may have lost its letter, be offline, or be a failing device. Identify its disk and existing data before assigning a letter or formatting. If D: is full, clean or move files first; a larger C: partition cannot donate capacity without a deliberate resize on the same disk. Do not assume a drive-letter change moves data.
Conclusion
Use D: only after identifying its physical disk and purpose. Move files through supported Windows or app controls, and create a partition only from verified unallocated space.
Related Articles
- D: Drive Not Showing Up
Diagnose a missing drive letter or disk. - Move Games from HDD to SSD
Use supported game-library migration.
Products
Articles & Tutorials
- Data Recovery
- Data Backup
- File Recovery
- File Backup
- System Backup and Restore
- Disk and Partition Clone
- Technical articles
- Mobile articles
- Disk Master Help
- Windows Data Recovery Tutorials
- Windows Secure Delete Tutorials
- Windows Partition Management Tutorials
- Windows File Backup and Restore Tutorials
- Windows System Backup and Restore Tutorials
- Windows Disk Backup and Restore Tutorials
- Windows Clone Tutorials