Photo Recovery Software for Windows and External Drives
Quick Navigation:
- Where Did the Photos Go?
- Before You Scan
- Scan Photos on the Correct Device
- Organize Restored Photos
- Frequently Asked Questions
A folder of missing images on a PC is different from a camera card that has been formatted. Identify where the photos last existed and what changed before choosing a scan.
Where Did the Photos Go?
On a Windows PC, check whether the folder was moved, hidden, synced to OneDrive, or included in File History. A missing folder is not proof that its files were deleted. If Recycle Bin still contains the images, restore them there first.
On an external disk, a changed drive letter or damaged file system can make pictures appear missing. Do not format the disk when Windows offers to do so. Confirm the device is recognized and note its capacity before scanning.
Before You Scan
Stop adding files to the affected PC drive or external disk. Connect a separate destination for recovered images and make sure it has enough space for full-resolution copies.
If the drive is unstable or makes abnormal sounds, stop and consider professional imaging. Software cannot compensate for an unreadable device and repeated power cycles can worsen a physical fault.
Scan Photos on the Correct Device
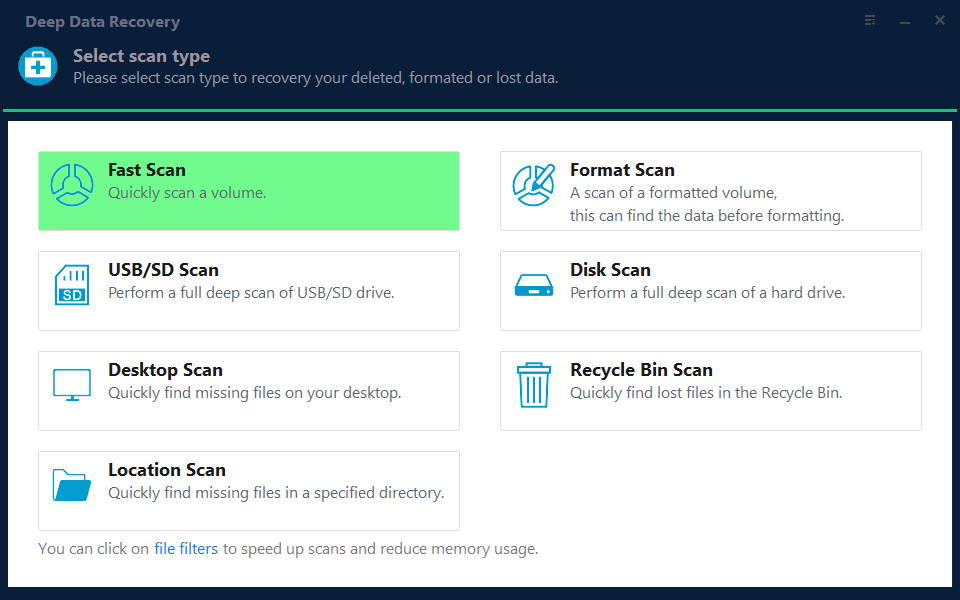
Qiling Deep Data Recovery provides the scan modes shown below. The mode in Step 2 is chosen for this specific loss scenario; it does not change the need for a separate recovery destination.
Step 1. Prepare the Recovery Workspace
Connect a healthy output drive. Install Deep Data Recovery somewhere other than the photo source and start the software.
Step 2. Pick a Mode by Location
Use Fast Scan for recently deleted PC photos, Location Scan if the former folder is known, Format Scan after formatting, or USB/SD Scan for removable photo media.
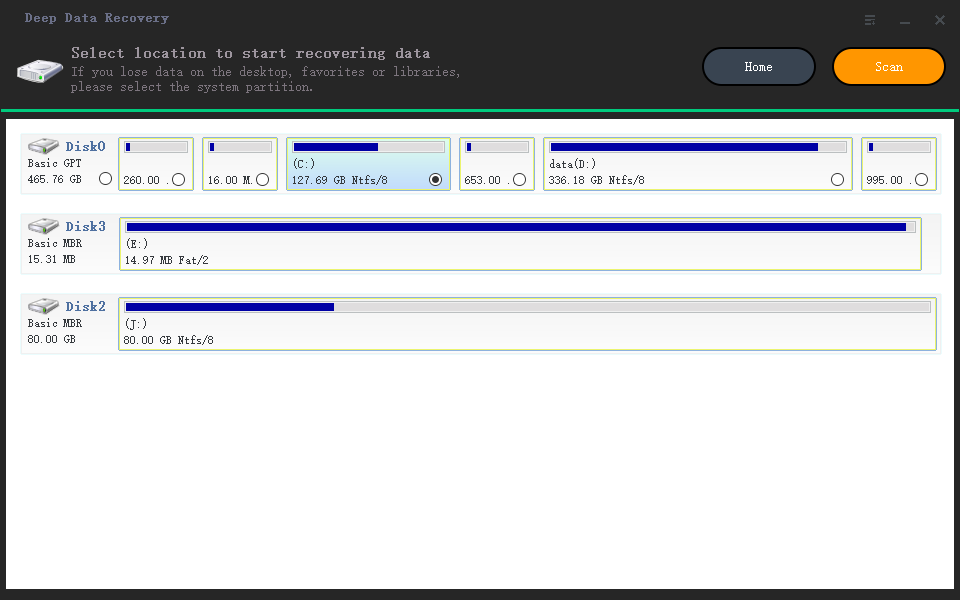
Step 3. Scan the Original Volume
Select the PC partition or external drive that held the pictures, confirming its size and drive letter. Start Scan; do not scan only the output drive.
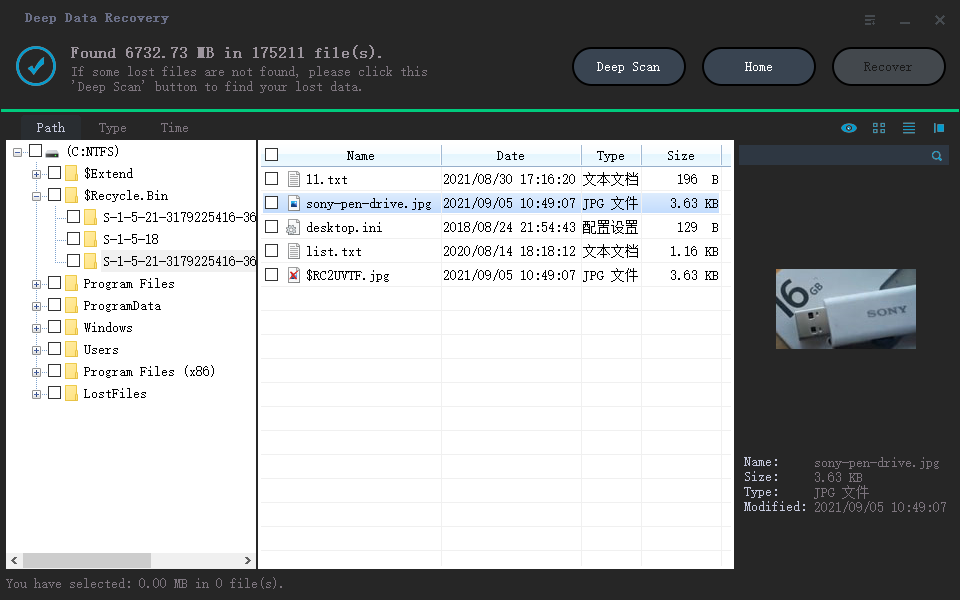
Step 4. Inspect Picture Previews
Filter by Pictures and extension, then preview several images from different dates. If expected albums are absent, run Deep Scan from the results view.
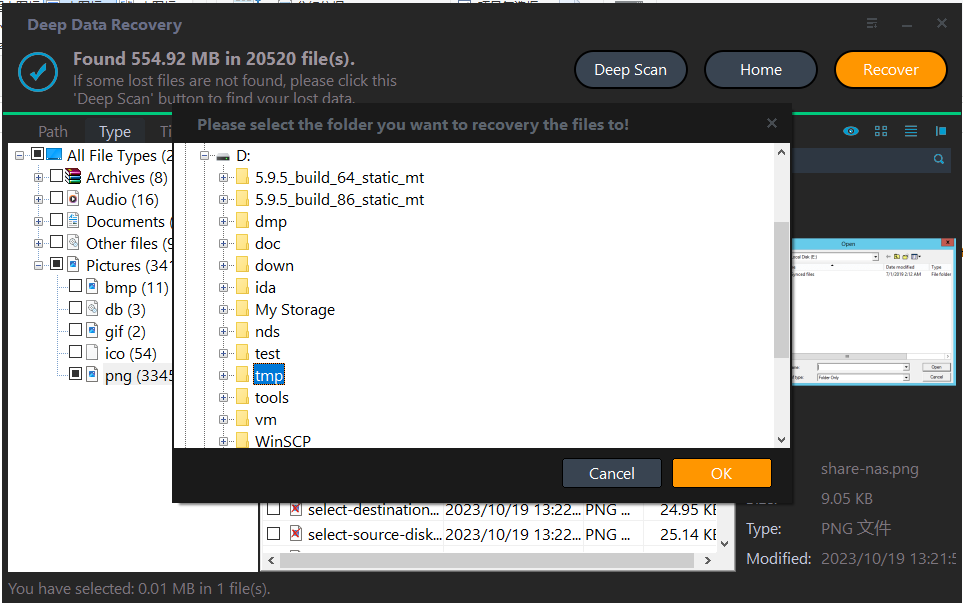
Step 5. Save and Verify
Choose the photos, click Recover, and save to the separate drive. Check that full images open and that folders contain the expected files before reusing the source.
Organize Restored Photos
Recovered images may have duplicate names or lose their original folder hierarchy, particularly after a deep scan. Sort by date and file type, then compare previews rather than deleting duplicates immediately.
Once the photos are safe, make at least one independent backup. A recovery result is a one-time rescue, not ongoing protection against deletion or drive failure.
Frequently Asked Questions
Why do previews work but saved images fail?
Some file fragments may be damaged or the output drive may be full. Check several samples and try a different healthy destination.
Is photo recovery the same as photo repair?
No. Recovery retrieves lost file data; repair attempts to fix the contents of a damaged image file.
Related Articles
- Recover Photos on Windows 10
- Windows SD Card Photo Recovery
- Recover Deleted Files
Start with the original storage location and keep recovered copies on another drive.
Products
Articles & Tutorials
- Data Recovery
- Data Backup
- File Recovery
- File Backup
- System Backup and Restore
- Disk and Partition Clone
- Technical articles
- Mobile articles
- Disk Master Help
- Windows Data Recovery Tutorials
- Windows Secure Delete Tutorials
- Windows Partition Management Tutorials
- Windows File Backup and Restore Tutorials
- Windows System Backup and Restore Tutorials
- Windows Disk Backup and Restore Tutorials
- Windows Clone Tutorials