Audacity Recovery: Recover Deleted and Unsaved Audacity Recordings
We provide four effective ways to recover deleted or unsaved Audacity recordings. The solutions include recovering deleted files from the Recycle Bin, restoring from exported files, finding unsaved tracks in the temporary folder, and using Audacity's AutoSave feature, which can be read in detail for full steps.
| Workable Solutions | Step-by-step Troubleshooting |
|---|---|
| Fix 1. Recover deleted files |
|
| Fix 2. Recover unsaved files |
|
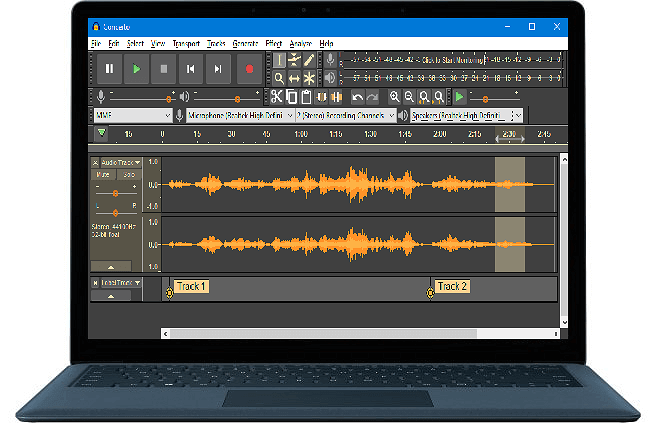
Audacity is a free and powerful multi-track audio editor and recorder available for Windows and Mac users. It allows you to record live audio, capture computer playback, and even digitize tapes and records into digital recordings. Additionally, you can use Audacity to edit various sound files.
If you accidentally delete audio files on Audacity, you can try using the "Undo" feature or reopening the project to see if the deleted files are still there. If Audacity crashes, you can try to recover your unsaved recordings by checking the "Recent Projects" folder, which is usually located in the Audacity installation directory. You can also try to use a third-party recovery software or contact Audacity support for further assistance.
Part 1. Restore Deleted or Lost Audacity Audio Files
Applies to: Recovering deleted or lost Audacity audio files on a Windows PC or external storage devices.
If you've accidentally deleted an Audacity audio file on your PC, you can try looking for it in the Recycle Bin. If you don't find it there, don't worry, as there are still other options to recover the deleted file.
Here are the two methods to regain your recordings:
Method 1. Restore Audacity Recordings with Audio File Recovery Software
Deep Data Recovery is a powerful audio recovery software that can restore deleted or lost audios or recordings on your computer or external storage devices in just three steps.
Qiling File Recovery supports all Audacity video file formats, including WAV, AIFF, PCM, Ogg Vorbis, FLAC, MP2, and MP3, as well as FFmpeg for other importable audio formats like AC3, AMR, M4A, and WMA. If you're a Mac user who's lost Audacity audios on your computer, the Mac version of Qiling can help.
Step 1. Select file types
To recover data, download and install Deep Data Recovery on your Windows 11/10 64-bit computer, select the file types you want to recover and click "Next" to begin the process.

Step 2. Select the location
To recover lost music, voice recordings, and other audio files, start by selecting the location where the files were lost. This is usually a folder or drive where the files were stored.

Step 3. Preview the audio files
The scanning process for a disk takes time depending on its size, allowing for file recovery during this process. To preview found audio files, click the "Preview" button in the left panel.

Step 4. Restore lost audio files
Select all found audio files, click "Recover", choose a safe location to save them, and click "OK" to confirm.
Method 2. Restore Lost Tracks or Audacity Recordings from Exported Files
Note: This only works when you have exported those tracks or recordings by using File > Export commands.
If you've lost Audacity tracks or recordings, you can recover them by looking for the exported files, which contain the original recordings. To do this, follow these steps:
Step 1. To locate the folder or storage devices where you saved your Audacity recordings, you can follow these steps: Check the file path in the Audacity project window or the export settings if you've exported the file. This should show you the exact location where the recording is saved.
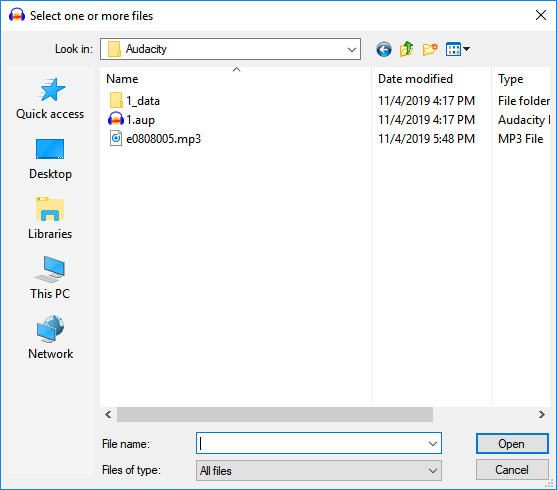
Step 2. On Audacity, click "File" > "Open".
Select the lost or track or Audacity recordings from the drive where you've exported, and click "Open" to bring it into your Audacity.
If you've successfully recovered your recordings using the steps provided, you can now resume editing the recording in Audacity. Simply open the recording in Audacity and you'll be able to continue making any necessary edits. The recording should now be fully accessible and usable within the Audacity software.
If you haven't exported the lost Audacity recordings in advance, go back to let Qiling file recovery software help in Method 1.
Part 2. Find and Restore Unsaved Audacity Tracks
To find and restore unsaved tracks in Audacity, follow these steps: First, check if Audacity has automatically saved the project in the default location. If not, go to "File" > "Revert to Saved" to load the last saved version of the project.
If Audacity suddenly crashes, you may want to know how to find or restore unsaved recordings. Fortunately, there are two ways to recover your unsaved Audacity tracks.
If you've lost your unsaved files, don't panic! There are ways to recover them.
Solution 1. Find Unsaved Tracks in Audacity Temporary Folder
If you've lost Audacity recordings without saving, you can try to recover them by finding the temporary folder where Audacity saves editing tracks. This folder is usually created on the same drive where you installed Audacity, and contains the unsaved recordings. By locating and accessing this folder, you may be able to restore the lost tracks.
Step 1. Find unsaved tracks from the Audacity temporary folder
1. Open Audacity, and press Ctrl + P
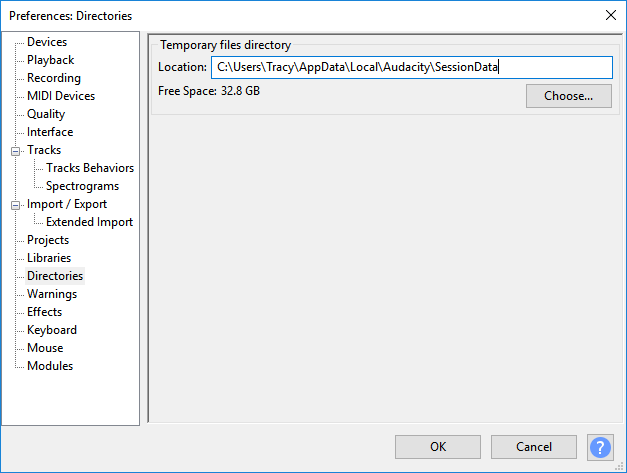
2. To access the temporary file directory in Audacity, open the Audacity Preference window, navigate to the Directories section, and copy the path of the temporary file directory. This will allow you to locate and manage temporary files created by Audacity.
- Windows 10/8: C:\Users\UserName\AppData\Local\Audacity\SessionData
- Windows 7: C:\Users\UserName\AppData\Local\Temp\audacity_1_2_temp
- Windows XP: C:\Documents and Settings\Local Settings\Temp\audacity_1_2_temp
Step 2. Restore unsaved Audacity file
- 1. Open the Temporary folder and check for files with the .au extension, which are typically left behind after an application update.
- 2. To import an AU file into Audacity, simply drag the file into the Audacity program or click on "Open" under the File menu, and select the AU file to bring it into the program.
Step 3. Save the unsaved files into a safe location
You can open the unsaved AU file in Audacity to verify its contents, and if it's the desired file, export and save it to a secure location.
If you've set Audacity to remove temp data, the chance to restore your unsaved Audacity files may minimize.
Solution 2. Automatic Crash Recovery: Recover Unsaved Recordings from AutoSave
If you lose an unsaved record in Audacity, the AutoSave feature can help you recover it. If Audacity suddenly closes or crashes, you can restore the lost recording by following these steps:
Step 1. If the project is missing in Audacity, try closing and reopening the program. If the project still doesn't appear, check if it's saved in the correct location.
Step 2. Re-open Audacity, an automatic crash recovery dialog will show up.
- Warning
- Don't discard the unsaved data for all projects on Audacity.
- If you confirm to discard the unsaved data for all projects after restarting this program, all the files won't be recoverable again.
Step 3. To recover the unsaved data for all projects and load the recovered waveforms, select the option to recover unsaved data for all projects. This will retrieve the waveforms that were not saved and load them into the system, allowing you to continue working with the data.
If there are multiple unsaved projects, each will be recovered into its own project window, requiring you to save each project individually. Note that the project history and text contents are unrecoverable.
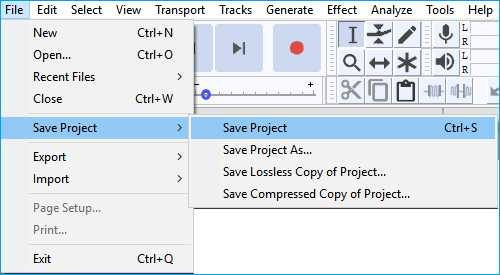
Step 4. The instruction is to save the project, which can be done by going to the "File" menu, then selecting "Save Project" from the dropdown options, and finally confirming the action by selecting "Save Project" again. This will save all files associated with the project.
- Tip
- If the recovered projects appear to be incorrect, try the tips provided by Audacity, which may help resolve the issue.
- 1. Open Help > Diagnostics > Show Log... and copy the errors shown, such as "missing data block files" to provide the necessary information.
- 2. To prevent data loss, force quit Audacity through the Task Manager, ensuring the autosave file and audio data are preserved. Then, search your computer or utilize a data recovery software, such as Deep Data Recovery, to locate any files previously marked as missing.
- 3. To recover your recordings in Audacity, restore the files to their original location as shown in the log, and then re-open Audacity to access the recordings correctly.
Part 3. Tips to Protect Audacity Recordings
To save and protect Audacity recordings and tracks on a Windows PC, consider using an external hard drive or cloud storage service to back up your files. This will prevent further Audacity file loss in case of a system crash, power outage, or other issues.
Here are three practical tips to help protect your Audacity recordings in one paragraph:
# 1. Manually Locate and Copy Saved Audacity Recordings
If you want to manually copy saved Audacity recordings as a backup without relying on automatic methods, follow these steps. You can do this by navigating to the location where your Audacity project files are saved, usually the default location in the "Documents" folder on your computer.
Step 1. To prepare a secure location, connect to a PC or an empty external storage device.
Step 2. Locate saved Audacity files on PC:
For Windows Users:
C:\Users\your username\AppData\Local\Audacity\SessionData
For Mac Users:
/Users/your username/Library/Application Support/audacity/SessionData
Sometimes, Audacity also may save created projects under this path: C:\Users\UserName\Documents\Audacity.
Step 3. Select AUP files with the .aup extension, copy them, and save them as a backup in the target storage location.
# 2. Use Automated Backup Software for Help
Applies to: automatically back up Audacity files as scheduled.
If you prefer to use an automated method, professional file backup software like Qiling Backup can help. It simplifies the process by allowing you to back up your files in just 3 easy steps.
Step 1. To initiate a backup, click the "File backup" button on the Backup and recovery page.

Step 2. Local and network files will be displayed on the left side, allowing users to navigate and select specific files and directories to include in the backup.

Step 3. Select the location where you want to store the backup by following the on-screen instructions.

Step 4. To encrypt the backup with a password, click on "Options" in the "Backup Options" section. This allows for various other customizations to be made for the backup process.

To set up a backup schedule, navigate to "Backup Scheme" and select the option to initiate a backup at a specific event. This will allow you to choose when backups should occur, such as daily, weekly, or monthly, and at what time of day.

Step 5. The backup can be saved to a local disk, Qiling's online service, or a NAS.

Step 6. To start a backup, click "Proceed" after selecting the desired files or folders. Once the backup process is complete, the backup job will be displayed as a card on the left panel. To manage the backup job further, right-click it.

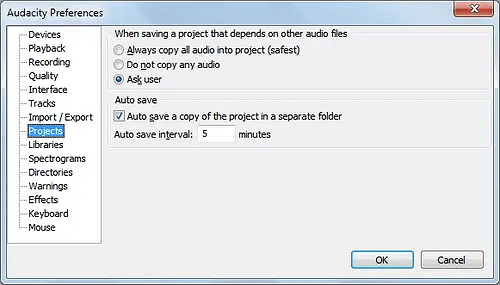
# 3. Enable AutoSave Feature in Audacity
To automatically save editing files, enable the AutoSave feature. This will save your work periodically, so you can recover your changes even if you accidentally close the file or experience a system crash.
Note: This feature is no longer available in the latest version of Audacity on Windows 10/8.
If you are using Windows 7, XP, etc. on your computer, you may try this tip to enable the AutoSave feature and protect your Audacity recordings:
Step 1. Click "Edit" on Audacity > and select "Preferences".
Step 2. To save your project as a copy in a separate folder, scroll to the "Project" section, tick the box for Autosave as a copy of the project in a separate folder, and set the desired frequency for Autosave internal.
Step 3. Click "OK" to confirm and keep the changes.
Related Articles
- Ctrl+Z Deleted Files Recovery: How To Recover Files Lost by Ctrl+Z
- How to Recover and Repair Corrupted Excel Files in Windows 10/11
- [Solved] Recover Corrupted or Invalid ZIP Files
- Recover Deleted or Missing Outlook Folder
- 2 Ways to Recover Unsaved iWork Document on Mac
Mac crashes often happen without warning, leaving users' unsaved iWork documents at risk of being lost. A common scenario is when a Mac shuts down while a user is working on an iWork document, resulting in important data being left unsaved. - How to Tell if Your Computer Is 32 or 64 Bit Windows 10 [Full Ways]
To determine if your Windows 10 computer is 32-bit or 64-bit, you can follow various methods. You can check the version of Windows 10 you're running, which will indicate whether it's 32-bit or 64-bit. These methods also apply to Windows 11, 8, and 7.