MiniTool Power Data Recovery vs Qiling Deep Data Recovery
MiniTool Power Data Recovery is a separate product from MiniTool Partition Wizard. This comparison is about finding lost files in Windows, not moving or resizing partitions. Both products let you scan a storage device and inspect results; the deciding factors are the loss scenario, the condition of the drive, and whether the needed files preview correctly.
Which loss cases are relevant?
| Case | MiniTool Power Data Recovery | Qiling Deep Data Recovery |
|---|---|---|
| Deleted documents on a Windows volume | Scan the logical drive and filter results. | Use Fast Scan or the matching location-based mode. |
| Files lost from a USB or SD card | Select the removable device and inspect found files. | Use USB/SD Scan and select the original device. |
| Partition missing from File Explorer | Check whether the physical disk is visible and scan the relevant device. | Use a suitable disk scan only if the drive is detected and stable. |
A missing drive letter is not the same as a deleted partition. Before scanning, check Windows Disk Management to see whether the disk is detected, its capacity looks correct, and the partition still exists. Do not initialize or format an unknown disk just to make it appear in File Explorer.
Check edition limits and hardware condition
Both vendors offer editions with different recovery allowances and capabilities. Confirm the current terms before you depend on a free version. If the drive has read errors, disappearing capacity, or a hardware warning, the scan itself can stress it; stop and consider imaging or professional assistance.
Never restore files onto the same physical device you are scanning. Saving results to an external drive reduces the chance of overwriting still-recoverable data.
Qiling walkthrough for a USB or SD card
Step 1. Connect the card or USB drive and open Qiling. Choose USB/SD Scan. If Windows asks to format the device, cancel that prompt until your files are recovered.
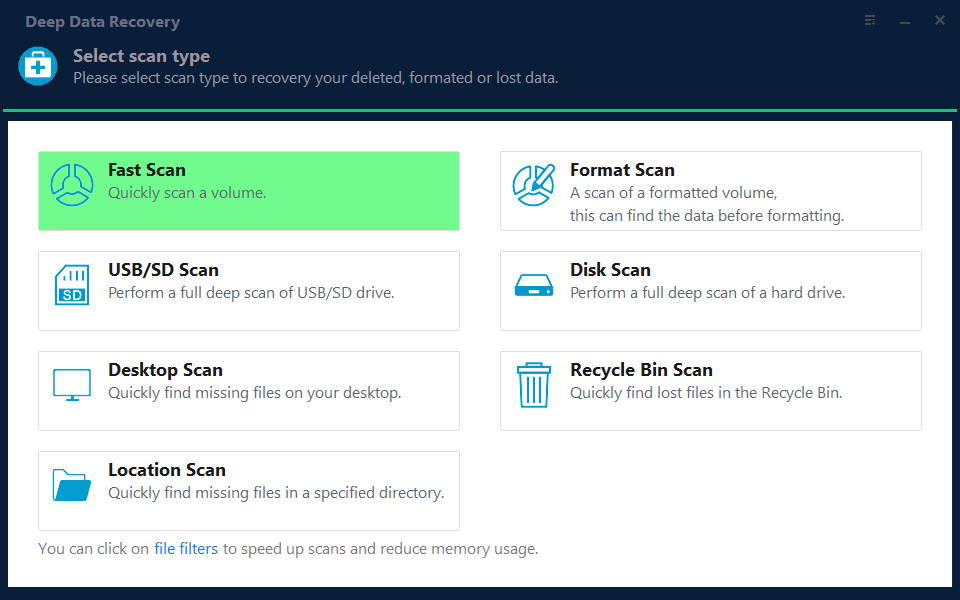
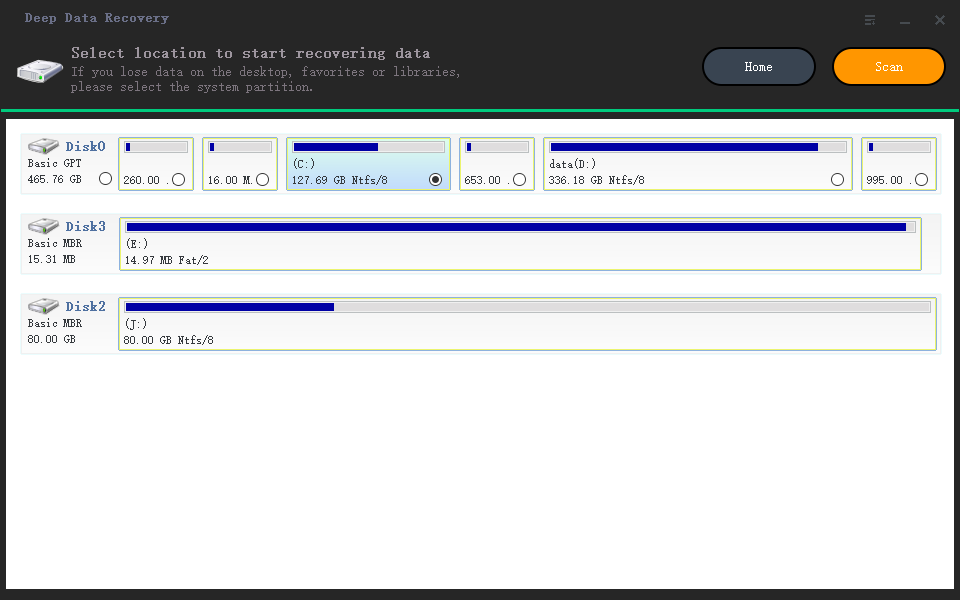
Step 2. Select the original removable device by capacity and drive letter, then click Scan. Be careful not to choose another connected USB drive that holds your destination.
Step 3. Filter the results by file type and preview the important photos or documents. If required files are not found, examine the available deeper scan option.
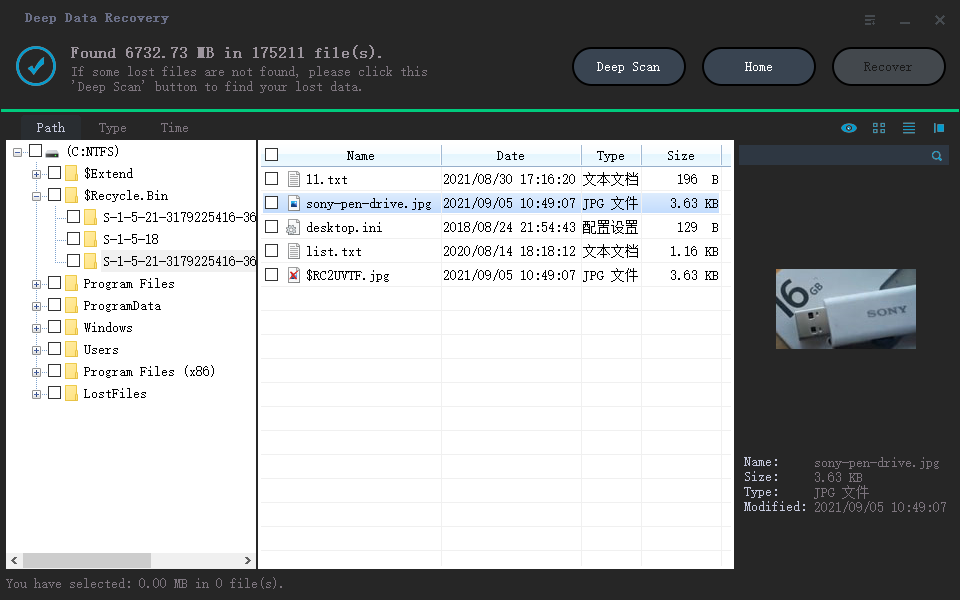
Step 4. Select the wanted files and click Recover. Save them to a different disk, then verify that several files open correctly before repairing or reformatting the original device.
Decision checklist
Use the tool that finds readable copies of the files you need. Try both only if the first scan does not give usable results and the device is healthy. If neither sees the disk, troubleshoot the connection and hardware before assuming a different recovery program can solve it.
Related Articles
- SD Card Recovery Guide
Check common SD card file-loss causes and recovery choices. - Cannot Open a USB Drive
Learn what to check before formatting an inaccessible USB drive.
Products
Articles & Tutorials
- Data Recovery
- Data Backup
- File Recovery
- File Backup
- System Backup and Restore
- Disk and Partition Clone
- Technical articles
- Mobile articles
- Disk Master Help
- Windows Data Recovery Tutorials
- Windows Secure Delete Tutorials
- Windows Partition Management Tutorials
- Windows File Backup and Restore Tutorials
- Windows System Backup and Restore Tutorials
- Windows Disk Backup and Restore Tutorials
- Windows Clone Tutorials